Showing posts with label crafts. Show all posts

16 August 2013

Pen Pal Box

Life is so surreal right now-- my baby sister was born this Monday, and I just moved into my dorm room! I am officially a college student now!!!

My little sister and I are really close, and she was very worried about me being gone. She doesn't know how she'll be living in our room by herself! :)

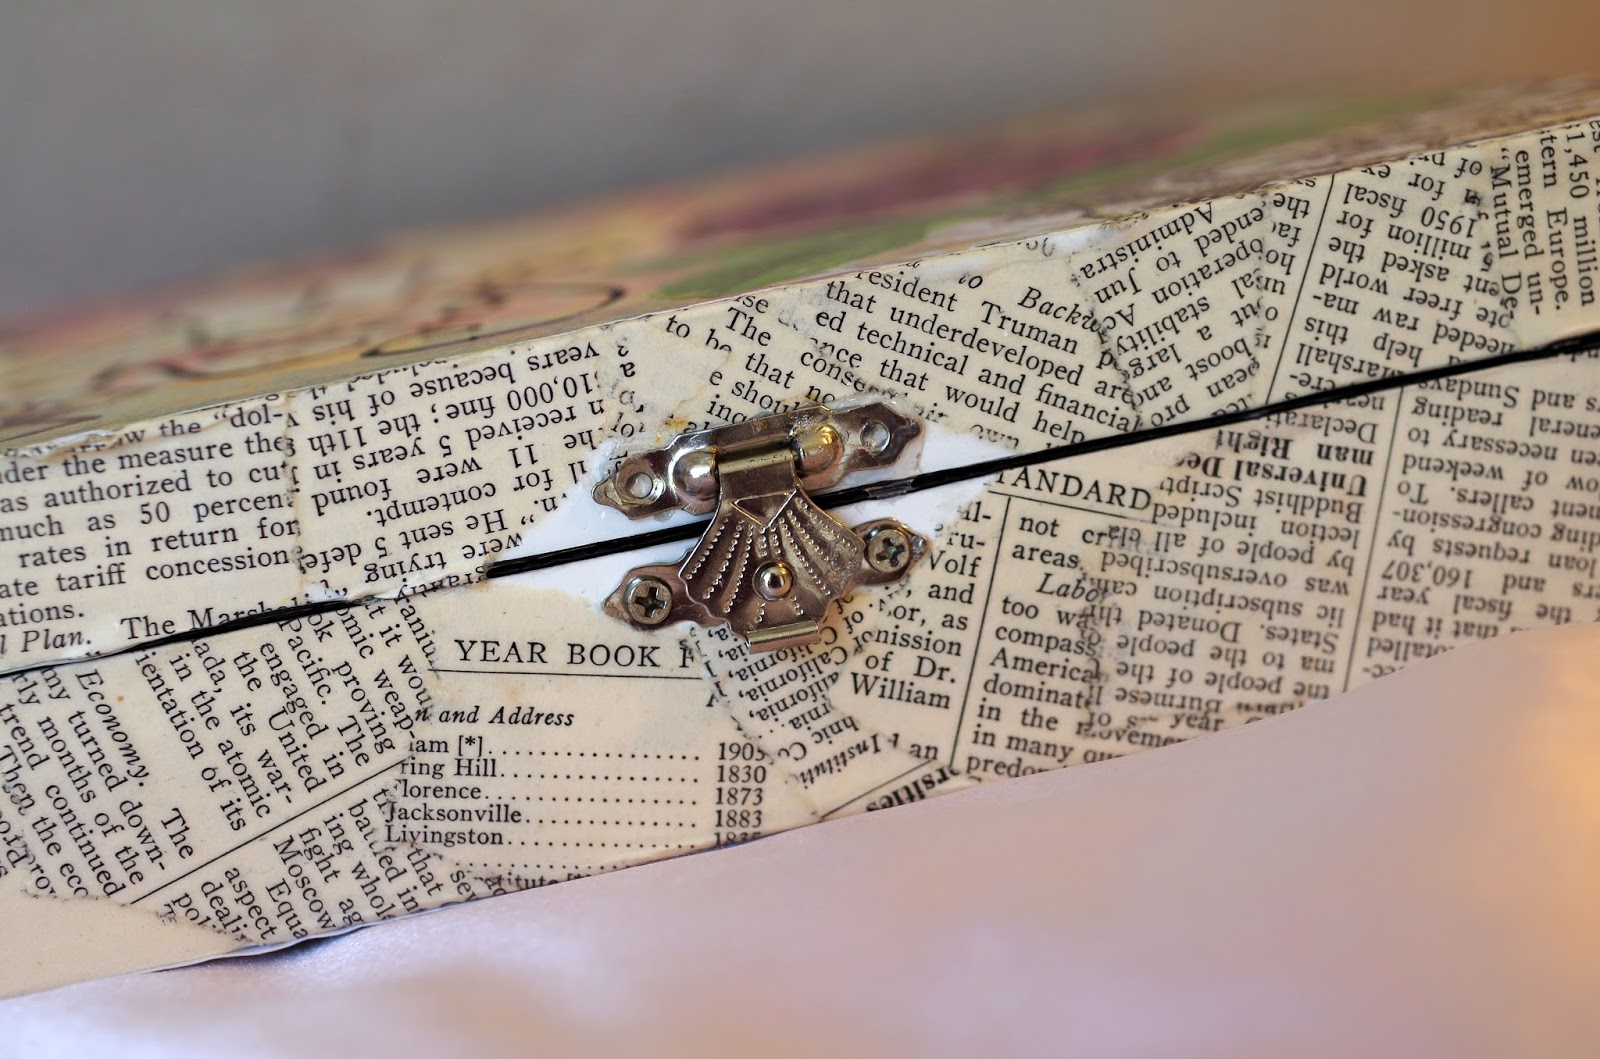
I decided to ask her to be my penpal, and I made her a pen-pal box as a goodbye gift. It's a cheap wooden box from the clearance aisle at Michaels, and I simply decoupaged it with scrapbook paper, pages from destroyable books, and a really pretty Washi tape from JoAnn's. 


I meant to get her stamps and address labels, but forgot to do it in time. Oh, well! My mom can do that, right? :) I can't wait to start writing to her, and hopefully writing me letters will help her to become a more confident writer. She's getting a lot better at spelling and I'm trying to convince her to write letters on her own without any help.

Life is just so surreal... Are any of you lovely readers off to college this year? Are you as excited as I am? It's going to be an epic year!

24 July 2013

Sketchbook Cover with Fabric + Mod Podge


Lately I've taken to shoving this little Strathmore sketchbook into every purse, backpack, or lunch bag that I happen to be carrying. I used to bring around a big 9x12 affair, but I've learned the importance of tiny sketchbooks. They are so easy to carry around, and now I find myself doing quick no-pressure sketches when I am out and about.

You can tell I don't create any little masterpieces in here, though, because I don't exactly treat it nicely. The paper cover is bent and wrinkled. It is also SUPER boring.

I decided to cover the front and back covers with fabric to make it prettier and sturdier. :) I found this darling, blue, swirly, brocade-y fabric at JoAnns on super sale and just had to pick some up. Since our sewing machine is broken, what is better than a quick no-sew project when you have delicious fabric just sitting around?


How to Make a No-Sew Fabric Sketchbook Cover

It's really super simple. :) You'll need:

A sketchbook or notebook to cover
Mod Podge
A paintbrush
Fabric
(optional) cardstock

Progress photos courtesy of my little sister!


To begin, cut a piece of fabric close to the size of the cover. Make the length and width of the fabric around 1/2 inch longer than the length and width of the sketchbook.


Next, coat the cover with Mod Podge. They do sell special fabric mod podge, but I found that my regular stuff works just fine.


Like so!


Set the fabric ontop of the Mod Podge glue and press it firmly-- you don't want any air bubbles!


Open the sketchbook cover, fold the excess fabric over, and glue (or tape) the fabric onto the backside of the cover.


Next, cut out a piece of fabric (or cardstock, as I chose) to the exact dimensions of the sketchbook cover and glue it onto the inside of the cover.


Ta-da! It's a quick and simple project, but it jazzed up my sketchbook quite nicely. :)


The backside of the fabric is lovely, too, so I used that side on the back cover. You can see that some of the wet glue bled through the fabric-- unfortunately that spot shows even when the glue dried. Beware of bleed-through glue!

I've decorated sketchbooks with doodles, collages, and stickers in the past, and I even made a pretty stamped-paper cover for my 30 Day Drawing Challenge book, but this is the first that I've used fabric on!


Also, check out my epic new Noodler's flex fountain pen. I love it. :) I'm starting to become addicted to writing tools, and at $20 this is my single most expensive pen. It's worth it for me, though, because it writes so beautifully and lets me do some unique calligraphy styles. (Ignore the poor calligraphy in this drawing! It's just what I did late at night after decorating my sketchbook with fabric).

What's the most unique thing you've ever done to decorate a notebook or sketchbook?
P.S. I'm starting to pack for college already! I'm overwhelmed in a wonderful way, and I'm so excited for my classes. :) My little sister is going to be born in just a couple of weeks, too, and I'm just bouncing up and down with excitement! Here's to life being crazy but good. :)

04 July 2013

The Tale of a Frabjous Present


O frabjous day! Callooh! Callay!
He chortled in his joy.


I made this sculpture, designed by George Hart, for my brother's birthday. He wants to study mechanical engineering when he goes to college, but he's always said that his favorite hobbies will be theoretical physics and building fun contraptions in the garage.

In my family we kids don't usually spend money on birthday or Christmas presents for one another. I'm the only one of us with a source of income, and when there are six-soon-to-be-seven kids, none of us have the money! Gifts are always something cheap and handmade.

This particular brother is hard to make gifts for. He makes or already has most of the little things he wants, like 3D tic-tac-toe boards, levitating tops, or science-y desk toys. He even stole my M.C. Escher poster (I had only taken it down for the afternoon to move it to a new part of my wall!!!) so I couldn't give him that. He doesn't use crocheted hats or keychains or cute little painted cards. What to make?

We're all huge fans of Vi Hart, a youtuber who makes ridiculously geeky, mathematical, funny, and epic videos. One day I was re-watching her videos and stumbled upon her father George Hart's channel, and from there his website of sculptures. He's got a template for making the Frabjous sculpture, a geometric art piece which is totally up my brother's alley, so I set to work getting all my other siblings to help me out.


We traced the templates onto the stiff, thin cardboard that comes on the backs of sketchpads and legal pads. (I now have a lot of loose drawings in a folder instead of all attached in their pad, but whatever!)


While the rest of us slaved away, my five year old brother tried to make Sierpinski triangles! Isn't it sweet? Those fractal triangles turned into another distraction, and you can see my second-youngest brother's Sierpinski triangles on his Instagram here.    

And THAT lead to making hexaflexagons. Hexaflexagons are quickly taking over the house.

That cardboard was incredibly difficult to cut, but we finally managed it with box cutters. We spray painted everything black and let it dry overnight.

George Hart's PDF didn't have much in the way of instructions, but I naively assumed that I would be able to assemble the sculpture with ease. I mean, I'm one of those people who leave instruction booklets at the bottom of the box and just figures out how to put things together. Easy peasey, right? Hah.

This thing was hard to put together. I took a solid two hours puzzling the S-curves into the cool star-vortex pattern.

My aha-moment was realizing that the final shape is basically a dodecahedron and that the S-curves go diagonally to different vertices of the dodecahedron.

He took his vorpal sword in hand:
Long time the manxome foe he sought --
So rested he by the Tumtum tree,
And stood awhile in thought.


And as in uffish thought I stood, the Frabjous, with lots of tape, came whiffling to it's final form, and looked awesome as it came.

It looked strange and alien as I put it together (doesn't that first photo look a lot like the Tripods of doom from the Tripods Attack book?).


Next I glued all the vertices to one another using a ton of glue and painted any leftover cardboard spots. Hot glue probably would have worked better.


It's far from perfect (the one on the website was made from laser-cut wood and all the pieces are actually identical), but still looks pretty fun. My brother was so excited and he's hung it on his ceiling.


It looks a bit floppy in this picture... argh!


And, has thou slain the Jabberwock?
Come to my arms, my beamish boy!
O frabjous day! Callooh! Callay!'
He chortled in his joy.


12 April 2013

Happy Easter

I recently started a job and have been very busy finishing my senior year of high school in addition to working on Shoppe orders, so blog posts are going to be sporadic until the end of May. Today I went to put together a post and discovered that this one-- which was supposed to go up EASTER MONDAY-- didn't actually publish and instead saved as a draft. I don't EVEN know how I overlooked that. Oh, well. Happy late Easter Monday. Here's some eggs to look at.


Happy Easter, everyone!


Do you remember the Sharpie Easter Eggs I made last year? I'd experimented with Sharpies to try to copy the traditional Ukrainian eggs but discovered that it was really hard to do. Sharpies are great for drawing on eggs, but the neat geometric patterns are difficult to copy without using the beeswax and dye technique.


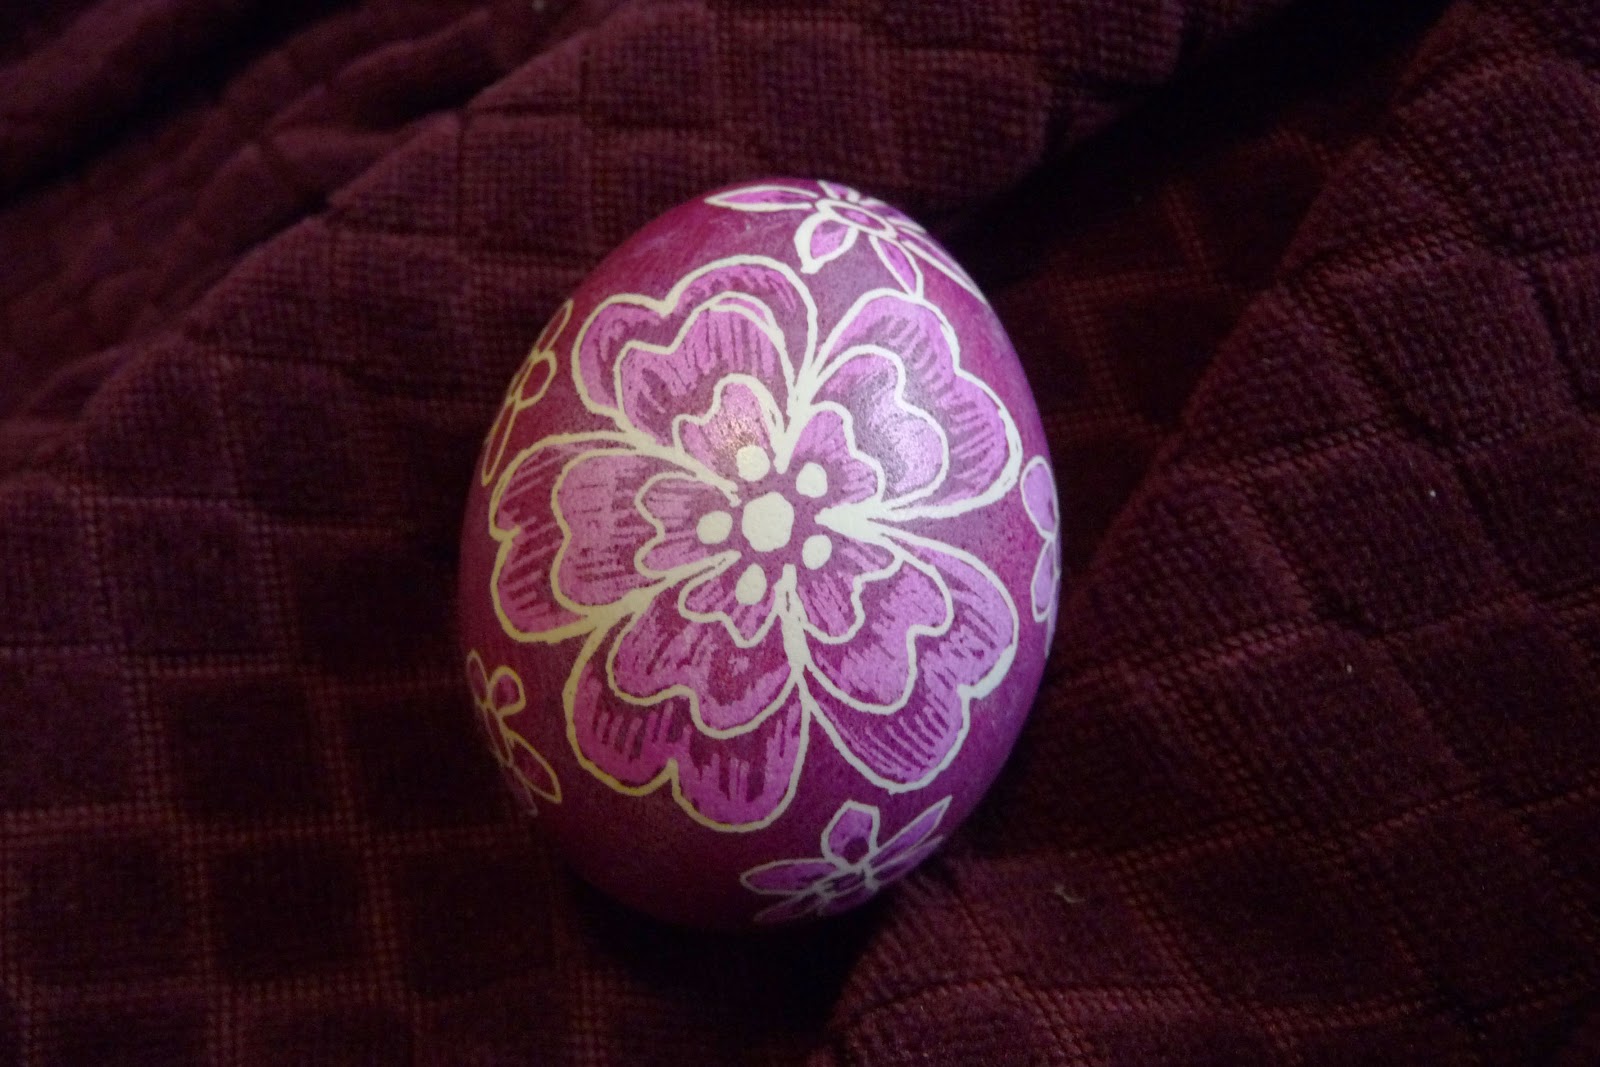
And guess what??? My parents bought us a pysanky set this year! Here's a collection of (most of) the eggs I've decorated in the past couple of weeks. The pictures are blurry because I didn't grab a tripod-- I was in a rush to take pictures before putting the eggs into little boxes to give to friends and family!


We got a neat egg-blowing tool which only makes one hole and does not require killing your cheeks and lungs in order to squirt the insides out. It's a nice little pump that creates a vaccum and will both empty and clean an egg in about two minutes.


Ukrainian eggs are a lot more complicated and time-instensive than I had anticipated! (Which of course just means that I am more obsessed with it than I would have been, because it's a nice challenge.) We boiled dyes and put them into mason jars. You take a cleaned egg, write on it with melted beeswax using a kitska wherever you want white, dye it in yellow, write with beeswax, dye it in the next darkest color, etc.


Our favorite part? When the egg is completely decorated and covered with blackened beeswax, you hold it over a flame until all the wax melts. You get to play with fire, guys. This is the coolest thing since the invention of fire. If you aren't careful, you can even heat the egg up so much that it hurts your fingers and you drop it!

click to enlarge
The kit arrived the same day that Pope Francis was elected! This was my second-ever egg made using this technique. The front has a slightly messy version of the papal seal, the back has a cross, and the sides say "Habemus Papam - Francis - Allelulia."

(My first egg was awful and not worth photographing).


This one was actually a lot cooler in real life. I soaked the egg in vinegar for a few minutes after making it a deep blue, and the top layer of dye (or of the egg itself, I'm not sure) rubbed right off with a paper towel. It made a messy, faded look. I've heard you can also dye eggs in bleach to go back to white-- this is how you get white backgrounds. It would be sooo much easier than trying to cover large swatches with wax.


Ta-da! Ukrainian eggs are so much fun, but as you can see I both have little time and little patience, so I gravitated towards making lots of simpler designs. I'm in complete awe of true pysanky eggs!

Oh, and I didn't spend all my egg decorating time using dyes. There aren't any cool religious icon eggs this year, but I did make this:

Frodo Baggins LOTR sharpie easter egg

19 March 2013

DIY Sealing Wax Stamp


Today I stepped out of my comfort zone and made a video tutorial! I just snapped a few pictures as I worked, so the video is probably more illuminating.


I've always loved writing letters and have dreamed of the days of yore when people sent letters calligraphied on parchment, sealed with wax... there's something so romantic about it. Then, after I made the blog post about glass nib pens and several of you oh-so-lovely readers teased me about having sealing wax kits while I didn't... I just had to get or make one! :) 


I bought some sealing wax but didn't want to spend $20 or more on a stamp that I would only use when sending those long, rare, handwritten letters, so I decided to make my own! I tried using buttons as a stamp but we didn't have any pretty ones that worked, and I wanted to make my own cool design. Several months ago I saw this pin and memorized the steps from the photos. I just spent a couple of minutes searching, and it looked like this idea originated from this post on a design blog called RageHaus. 

Anyway, here's my spin on the DIY wooden sealing wax stamps!

You will need:
A wooden dowel or block
A woodburner / pyrography wand
A dremel tool
Oil
Sealing wax
Approximately 45 minutes

Above you can see my first attempt at making a wax stamp (the red stamp with the monogram "S). I was really pleased with how it turned out, especially considering the complexity of the design! For this tutorial I made a very basic heart stamp. It's a lot easier than it looks!


To begin, you'll need a circular wood dowel. I used a block from one of those ubiquitos toy block sets.


Draw the design that you want on the dowel. Remember, your image will be reversed when stamping. For the heart it doesn't matter, but for the monogram I freehanded a mirror image. If you don't like mirroring or drawing things without a reference, you can print out a reverse image and transfer the picture onto the wood.


Next, use the pyrography tool to burn the wood! Begin by simply using the smallest tip to slowly, slowly trace the design. After the initial burn, press down the the tool (it's best if you do this using the side of the tool, not just the tip) to deepen the valleys. It needs to be deep enough for the wax design to stand out clearly. Do your best to not just push a bunch of dots into the wood, as this will make the final design very bumpy.

Protip: If your design starts getting really bumpy, use a small flathead screwdriver to push the bumpy wood down flat. You want everything to be level-- unless you want a design with varying heights, such as my monogram, where I carved the main letter deeply but made the swirlies much lighter.

Also, if your wooden block is covered with paint like mine, and it smells really foul while burning it, you can always put on a mask. I wound up doing that because the smell made me queasy, so just watch out.


You're not done yet! The design needs to be sanded to make it flat and even. If you sand it well enough, the wax will not stick to the wood. Use a fine nib dremel tool to do this!


Ta-da! The design is finished, and all that remains is to dip the tip in oil and wipe off the excess (to discourage the wax from sticking to your stamp). Then it's time to test out your new toy!


I just wanted to send a little shout-out to GreenCraftStore, where I bought the wax. Their pieces were reasonably priced and just lookit that beautiful packaging! 

I'm not really an expert on stamping with wax, as the first time I did it was when I made the monogram stamp, but here's a couple of tips:

1. Don't catch the paper on fire if you are using a wax stick with a wick. Do, however, get really excited that you are holding a flame and dripping really really really hot wax on paper. It's cool.
2. Let the wax dry for just a couple of seconds before imprinting it with the stamp.
3. Let the wax dry with the stamp ontop of it, then wiggle the stamp off.
4. If you are going to mail this, use modern plastic waxes that won't break in the mail. I used beeswax, which is great for historical accuracy. However, historically seals were used not only as a sort of signature but also to keep prying eyes off of letters. If a seal was fiddled with, it would crack. I think that beeswax probably won't survive modern mail machines. I've yet to test it out, though!


Ahhh! It WORKED. 

Ignore the cheesy "To: You"-- I needed something to quickly write on the sheet of paper and "To: You Lovely Blog Readers and YouTube Followers and The Random Person Who Just Stumbled Upon This Video and/or Blog Post" would have taken too long to write.


Here's a shot of my "S" stamp. And an envelope which I marbled. That will hopefully be another tutorial someday, just as soon as I perfect my marbling technique...

You can see that I didn't sand the heart down all the way; it's still a little bumpy.
Now I need to go write some long-overdue letters to some dear friends and stamp them all with handmade sealing wax stamps. :)

  • bgbgb