Showing posts with label diy. Show all posts

21 June 2014

DIY Simple Ear Cuff Tutorial {Video}

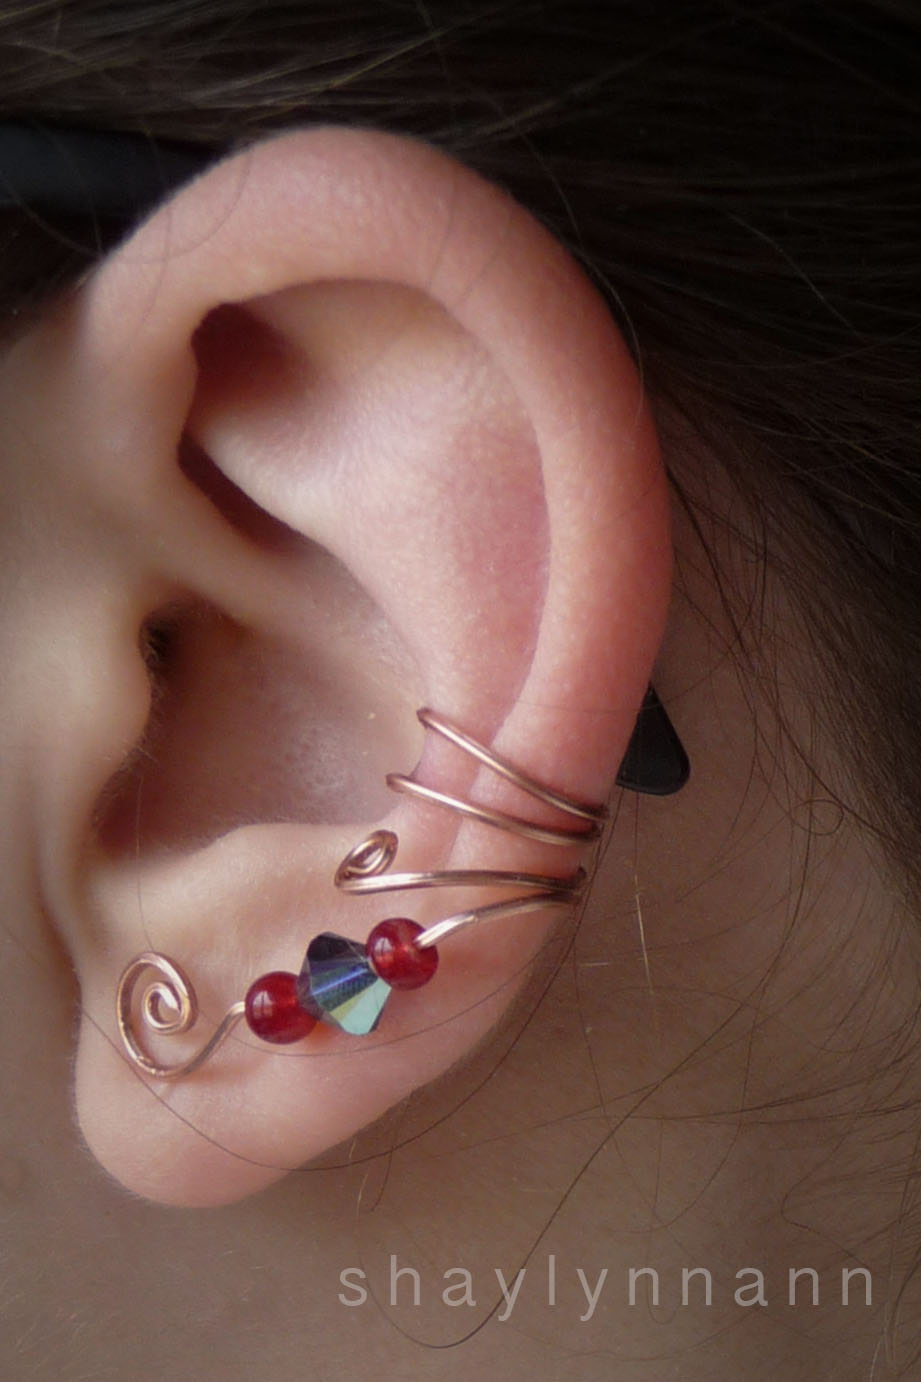
Awhile back, I made a picture tutorial on how to make ear cuffs. Amazingly, it has been my most popular blog post to date!

I've had several people write to ask questions about how to do certain steps, and I felt that a video tutorial would probably be helpful!

The video is embedded below, but if you can't get the embedded video to work, here's the link!


Here's the picture tutorial for how to make a simple ear cuff. I also have tutorials on making a swirly ear cuff which can have interchangeable dangles and a double-loop swirl ear cuff!

24 July 2013

Sketchbook Cover with Fabric + Mod Podge


Lately I've taken to shoving this little Strathmore sketchbook into every purse, backpack, or lunch bag that I happen to be carrying. I used to bring around a big 9x12 affair, but I've learned the importance of tiny sketchbooks. They are so easy to carry around, and now I find myself doing quick no-pressure sketches when I am out and about.

You can tell I don't create any little masterpieces in here, though, because I don't exactly treat it nicely. The paper cover is bent and wrinkled. It is also SUPER boring.

I decided to cover the front and back covers with fabric to make it prettier and sturdier. :) I found this darling, blue, swirly, brocade-y fabric at JoAnns on super sale and just had to pick some up. Since our sewing machine is broken, what is better than a quick no-sew project when you have delicious fabric just sitting around?


How to Make a No-Sew Fabric Sketchbook Cover

It's really super simple. :) You'll need:

A sketchbook or notebook to cover
Mod Podge
A paintbrush
Fabric
(optional) cardstock

Progress photos courtesy of my little sister!


To begin, cut a piece of fabric close to the size of the cover. Make the length and width of the fabric around 1/2 inch longer than the length and width of the sketchbook.


Next, coat the cover with Mod Podge. They do sell special fabric mod podge, but I found that my regular stuff works just fine.


Like so!


Set the fabric ontop of the Mod Podge glue and press it firmly-- you don't want any air bubbles!


Open the sketchbook cover, fold the excess fabric over, and glue (or tape) the fabric onto the backside of the cover.


Next, cut out a piece of fabric (or cardstock, as I chose) to the exact dimensions of the sketchbook cover and glue it onto the inside of the cover.


Ta-da! It's a quick and simple project, but it jazzed up my sketchbook quite nicely. :)


The backside of the fabric is lovely, too, so I used that side on the back cover. You can see that some of the wet glue bled through the fabric-- unfortunately that spot shows even when the glue dried. Beware of bleed-through glue!

I've decorated sketchbooks with doodles, collages, and stickers in the past, and I even made a pretty stamped-paper cover for my 30 Day Drawing Challenge book, but this is the first that I've used fabric on!


Also, check out my epic new Noodler's flex fountain pen. I love it. :) I'm starting to become addicted to writing tools, and at $20 this is my single most expensive pen. It's worth it for me, though, because it writes so beautifully and lets me do some unique calligraphy styles. (Ignore the poor calligraphy in this drawing! It's just what I did late at night after decorating my sketchbook with fabric).

What's the most unique thing you've ever done to decorate a notebook or sketchbook?
P.S. I'm starting to pack for college already! I'm overwhelmed in a wonderful way, and I'm so excited for my classes. :) My little sister is going to be born in just a couple of weeks, too, and I'm just bouncing up and down with excitement! Here's to life being crazy but good. :)

30 April 2013

My DIY Craft Fair Display


Yesterday I was a vendor at the St. Theodore Tea and Fashion show and I needed a display to put my jewelry in! I spent exactly zero dollars on this, and just used things we had lying around the house! Somehow it still managed to look pretty professional and now I want to do more craft fairs just to use it! (I don't know if I'll be able to this summer, because it's such a time commitment--- we'll see!).

I know that most of you won't have supplies like these on hand, but I always like to see how others come up with solutions for things even when I don't have the supplies on hand. It usually helps me to think outside the box-- something I had to do a lot of for this display. No way was I going to spend $100 or more buying the "real" supplies that "real" artists use at fairs. I can buy beads and wire instead! :) The only item that I personally bought was the white necklace stand, and I got that months ago to use in photoshoots.


As I thought about putting a display together, I kept thinking about height-- no one likes bending over to see things!

The main part of the display is an unfinished oak kitchen cabinet which my Dad bought for $20 because it was damaged. We haven't given it a proper home yet, so it was out in the garage receiving a coat of cobwebs. It's heavy, but not too heavy to carry by myself.


The earring racks are two pieces of thin wood which I cut into rectangles with the scrollsaw and drilled dozens of holes into. The only downside is that a couple of the earrings get stuck in the holes-- they aren't too hard to get out, but they aren't too easy, either. It does make it easy to transport because none of them fall out on their own!

(By the way, I'm curious to know how other artisans price their jewelry for craft fairs. I rarely have more than one of any item on hand, except the ever-popular Evenstar collection, and it's tedious work to put a price tag by every item. Online, I can set each item to the exact price for my supplies and time. I would up compromising yesterday and averaging out the price of items to the nearest even-dollar increment. This meant that I had $7 and $14 earrings on the same rack, priced at $10. It's not ideal but for a one-day event I didn't know what to do!).


The strip lights are something that Dad had in the garage-- something for his truck, I've no idea what they are exactly but they are battery operated and stuck to the top with double-sided tape!

The bracelets are all resting on an empty roll of wrapping paper which I covered with part of a papery fabric tablecloth-- the same one that I use to wrap orders in when I run out of fabric or organza bags!


I put all the cuffs on the bottom of the display and gave it some height using glass from picture frames and wooden blocks.

I'm pretty proud of the hooks for the guitar string bangles and chainmaille keychains! I made it out of this giant roll of cheap aluminum wire I have on hand.


I was trying not to damage the nice cabinet so I used masking tape-- it was just strong enough but I was afraid it would fall down as people fingered the items! (it didn't!)


We had this wooden box lying around with knickknacks in it. I rolled up some fabric into little rolls and laid them side by side to display my rings properly. The cheaper plain wire rings and guitar string rings got jumbled up on the left because I had too many!


The necklace display is made from the cabinet doors. It wasn't ideal-- I think that necklace displays do a much better job of showing off my full necklaces. If I do any craft fairs in the future I will reserve these door displays for the pendant necklaces only. It works *great* for that!


The doors were just propped up on a basket and a book. They also have wire hooks taped to the back.


Lookie! Lookie! More Evenstar colors! It turns out that it's very difficult to find the leaf beads that I use for the Evenstar sets, especially when the website I usually buy from stopped carrying half the colors. Other places have them for crazy expensive prices. Think 50 cents or a dollar a bead. Then I found Brightling Beads and Shipwreck Beads so now I have every color they have in stock. Lots of new Evenstars!

I also will start using silver-plated chain instead of aluminum for the Evenstars. The aluminum I had before was cheap but wasn't up to par.

Anyway, the Evenstar necklaces and Enchanted Forest earrings are on another thin sheet of wood. I drilled holes for the earrings and nailed nails in to hang the pendants up.

The sapphire blue set is on the necklace stand that I made with an old book and a cereal box-- check out the tutorial here.

This is the necklace stand that I bought at Michaels awhile ago, and a folded-over index card (the perfect earring display in a pinch!). 

This necklace very similar to the Eowyn necklace I made a few months ago, only (*cough* if I may say so myself) better made.


It's the first new item that I've had a chance to put up on my Shoppe-- check it out!

Hope you liked this peek at the jewelry display I dreamed up!

19 March 2013

DIY Sealing Wax Stamp


Today I stepped out of my comfort zone and made a video tutorial! I just snapped a few pictures as I worked, so the video is probably more illuminating.


I've always loved writing letters and have dreamed of the days of yore when people sent letters calligraphied on parchment, sealed with wax... there's something so romantic about it. Then, after I made the blog post about glass nib pens and several of you oh-so-lovely readers teased me about having sealing wax kits while I didn't... I just had to get or make one! :) 


I bought some sealing wax but didn't want to spend $20 or more on a stamp that I would only use when sending those long, rare, handwritten letters, so I decided to make my own! I tried using buttons as a stamp but we didn't have any pretty ones that worked, and I wanted to make my own cool design. Several months ago I saw this pin and memorized the steps from the photos. I just spent a couple of minutes searching, and it looked like this idea originated from this post on a design blog called RageHaus. 

Anyway, here's my spin on the DIY wooden sealing wax stamps!

You will need:
A wooden dowel or block
A woodburner / pyrography wand
A dremel tool
Oil
Sealing wax
Approximately 45 minutes

Above you can see my first attempt at making a wax stamp (the red stamp with the monogram "S). I was really pleased with how it turned out, especially considering the complexity of the design! For this tutorial I made a very basic heart stamp. It's a lot easier than it looks!


To begin, you'll need a circular wood dowel. I used a block from one of those ubiquitos toy block sets.


Draw the design that you want on the dowel. Remember, your image will be reversed when stamping. For the heart it doesn't matter, but for the monogram I freehanded a mirror image. If you don't like mirroring or drawing things without a reference, you can print out a reverse image and transfer the picture onto the wood.


Next, use the pyrography tool to burn the wood! Begin by simply using the smallest tip to slowly, slowly trace the design. After the initial burn, press down the the tool (it's best if you do this using the side of the tool, not just the tip) to deepen the valleys. It needs to be deep enough for the wax design to stand out clearly. Do your best to not just push a bunch of dots into the wood, as this will make the final design very bumpy.

Protip: If your design starts getting really bumpy, use a small flathead screwdriver to push the bumpy wood down flat. You want everything to be level-- unless you want a design with varying heights, such as my monogram, where I carved the main letter deeply but made the swirlies much lighter.

Also, if your wooden block is covered with paint like mine, and it smells really foul while burning it, you can always put on a mask. I wound up doing that because the smell made me queasy, so just watch out.


You're not done yet! The design needs to be sanded to make it flat and even. If you sand it well enough, the wax will not stick to the wood. Use a fine nib dremel tool to do this!


Ta-da! The design is finished, and all that remains is to dip the tip in oil and wipe off the excess (to discourage the wax from sticking to your stamp). Then it's time to test out your new toy!


I just wanted to send a little shout-out to GreenCraftStore, where I bought the wax. Their pieces were reasonably priced and just lookit that beautiful packaging! 

I'm not really an expert on stamping with wax, as the first time I did it was when I made the monogram stamp, but here's a couple of tips:

1. Don't catch the paper on fire if you are using a wax stick with a wick. Do, however, get really excited that you are holding a flame and dripping really really really hot wax on paper. It's cool.
2. Let the wax dry for just a couple of seconds before imprinting it with the stamp.
3. Let the wax dry with the stamp ontop of it, then wiggle the stamp off.
4. If you are going to mail this, use modern plastic waxes that won't break in the mail. I used beeswax, which is great for historical accuracy. However, historically seals were used not only as a sort of signature but also to keep prying eyes off of letters. If a seal was fiddled with, it would crack. I think that beeswax probably won't survive modern mail machines. I've yet to test it out, though!


Ahhh! It WORKED. 

Ignore the cheesy "To: You"-- I needed something to quickly write on the sheet of paper and "To: You Lovely Blog Readers and YouTube Followers and The Random Person Who Just Stumbled Upon This Video and/or Blog Post" would have taken too long to write.


Here's a shot of my "S" stamp. And an envelope which I marbled. That will hopefully be another tutorial someday, just as soon as I perfect my marbling technique...

You can see that I didn't sand the heart down all the way; it's still a little bumpy.
Now I need to go write some long-overdue letters to some dear friends and stamp them all with handmade sealing wax stamps. :)

20 December 2012

Ear Cuff Tutorial: The Double-Loop Technique


It's been a bit since I've done a proper tutorial, hasn't it? Don't worry, I'll be doing some craftsy ones soon-- but fellow jewelers are in luck today! I've photographed the making of another kind of ear cuff (which I'm calling the "Double-Loop" because you kind of loop it twice... I'm having a really hard time coming up with names for these different ear cuffs!)

For those unfamiliar with ear cuffs, they are awesome and comfortable pieces of jewelry that simply wrap around the cartilage of the ear-- no piercings required! They are easy to put on and really stay put!  If you aren't up to making some yourself, be sure to visit my Shoppe, where I sell some and also do custom orders.

Before you begin, I recommend that you check out my tutorials on the basic ear cuff and the swirly ear cuff. You should be able to create both styles proficiently. You can also check out the bow-tie ear cuff tutorial (which is about the same difficulty as this ear cuff). 

Now then. With a few cuffs behind you, it's time to get started with this fun technique! 

We are creating a left ear cuff. Simply mirror the design to create one for the right ear.

This particular design is a bit more understated than the other ear cuffs because the decorative swirls are limited to the bottom of the cuff!

You will need:
- 8 inches of 18 ga wire
- needle-nose pliers
- (optional) beads, other wire for decorative wrapping, headpins to add dangles, etc.


Cut a length of wire at least 8 inches long.


Bend it at the three inch mark. Make sure that the small loop this creates is actually a loop-- it's not as comfortable to wear ear cuffs in which the wire is pinched together tightly.


This is where the "double loop" comes into play.

First, bend the wire into a 1 inch zig-zag (just as you did with the swirly ear cuff). The next part is a bit tricky if you are working with tough wire like me (hard copper is not recommended to begin with). Take the tail end of the wire on the right-hand side and fold it down and around the right-hand loop. 

Did that make sense? Here's a picture of the finished double loop:


The next few steps are just like the other ear cuffs, so I won't narrate these photos...


Okay, now you get to have fun. How do you want the ends of the wire to look? What beads will you add? What loops and swirls and decorations will you make with the wire? Have at it!


I found that I had a bit of a hard time keeping mental track of the placement of the ear cuff, so I kept putting it on the marker (or my ear) as I designed, in order to make sure the swirls and beads were just perfect.

If you are adding beads, be sure to very, very slightly bend the wire just above and below the beads in order to hold them in place.


I only recently perfected this design, so I don't have any more double-loop ear cuffs to show you. Soon!

I hope you enjoyed this tutorial! Please be sure to leave a comment if you used it!

Also, please note that you may use this tutorial to make your own jewelry to sell, but only if you credit me for showing you how. It does take time for me to make these tutorials! Thanks!

  • bgbgb