They want to know how to keep their photos from looking like this (or much, much worse).
 |
| Click to enlarge.... but I don't think you want to. |
I don't use any fancy, high-end equipment. I can't afford that. But over the past few months, I've learned how to take some decent pictures. It took alot of trial-and-error, and maybe I can save some of you the pain!
How to Take Pictures of Jewelry
(...and many other things)
I'm absolutely no expert on this subject, but I thought I'd share some tips that I've found useful. These are the exact techniques that I use to take pictures such as this:
 |
The Camera
_______________________________
_______________________________
You don't have to spend big $$$ on a camera to take decent jewelry photos. I use a 10 (or more!) year old camera that used to belong to my grandparents. It's old as far as gadgets go... It's kind of falling apart through constant use, and it's pretty outdated.
 |
| My camera, taken with my dad's iPhone |
Gee, I've learned that iPhones can take great macro photos (if slightly grainy in certain lights), and those are quintessential point-and-shoot cameras. No settings, no nothing!
(I'm not excluding film cameras here... I just don't know how to work them, and it would be a pain to get those photos online!)
 |
| See the picture of my Olympus camera to see what an iPhone can do |
There are two things you can't skip on: the Macro setting and the ability to turn off the Flash
The Macro Setting
_______________________________
_______________________________
(Almost any digital cameras from the last 10 years has this setting)
The macro setting tells the lens to focus on the closer items rather than the farther ones. Totally indispensable. On most cameras, this setting is found somewhere near the dial or viewing screen. Some cameras even turn it on automatically.
 |
| Look around carefully for this fella. Reader, meet Macro Flower. Macro Flower, Reader. You're best buddies for life. |
Other Settings
_______________________________
_______________________________
If you have a point-and-shoot camera, you don't need to learn about other settings. You can take decent photos with just the macro turned on.
However, I suggest reading your camera guide to see if you can change other settings.
When taking pictures of jewelry, I usually let my camera know if the lighting is incandescent (yellowish), florescent (white), sunny (natural and bright), or cloudy (natural and dull). I only mess with other settings for non-jewelry photography.
Turning Off Flash
_______________________________
_______________________________
I know, I know. If your lighting isn't great, you think you need to turn on flash.
BUT IT WASHES YOUR PHOTO OUT!
Everything looks all white and dull and flat!
(Sorry, this is a peeve of mine! I still can't convince my dad of this... but then, he takes technical photos for work, and I take artsy photos.)
Turn off the flash. If you are taking a macro shot, the only thing the flash will do is overwhelm the subject. Turn if off, and find proper lighting. If you can't find proper lighting... take it without flash and edit on photoshop.
(Okay, there are times when it is appropriate to use flash. And people with fancy, removable flashes can probably put them to good use. Bouncing the flash is good, too. But unless you are an extreme photographer, go the safe way and turn off the flash.)
Lighting
_______________________________
_______________________________
The number one rule is to ensure that your subject is well-lit.
Use natural lighting when available. Simply moving your subject next to a window and turning off the flash can increase the quality 100 fold!
I am still learning how to put lighting to good use. You can see my trial-and-error progression by looking through old posts on my blog.
I like to set a piece of white paper next to a window. If the day is sunny, the outdoors is usually to bright to work with.
What if it is dark or cloudy?
 |
| My T-shirt, lamp, and window studio :) |
Shadows are very difficult to deal with. I just move my jewelry around until the lighting is decent... As you can tell, I'm still working on getting rid of those pesky dark shadows.
I recently made a lightbox, which evens the lighting and background. I LOVE this thing!
 | ||
| A handmade lightbox |
If you want to spend some money, you can get a good-quality, professional lighting setup.
A Steady Camera
_______________________________
It goes without saying that your camera has to be steady in order to get a crisp photo. Use a tripod, mini-tripod, box, book, or one of your limbs to prop the camera. :)
Setup
_______________________________
Alrighty, you have a digital camera, found your macro setting, turned off the flash, and found good lighting... Now what? Before you press the shutter button, check your set-up!_______________________________
Background: You want a background that compliments your jewelry (or other items) without overwhelming them.
Many people opt for the white background, especially when taking photos for online stores such as Etsy and Artfire. You can use posterboard, computer paper, or even a T-shirt to acheive this effect.
Don't be afraid to be creative, though. I've seen some beautiful jewelry photos where the jewelry is lain on a book, handwritten note, scrapbook paper, or even a cup! (Cups are wonderful for taking pictures of earrings, by the way.)
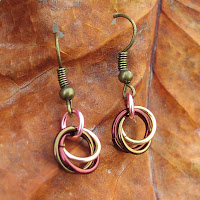
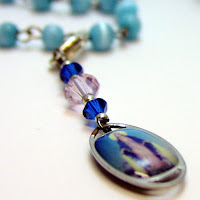

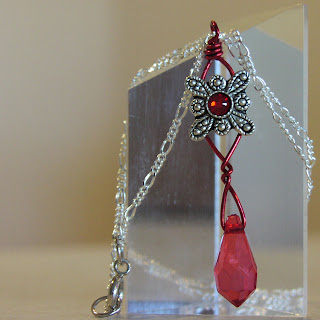
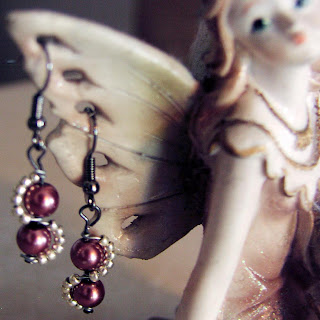
Props: Do you want anything besides the jewelry to appear in the picture?
You may opt for the plain white background, but sometimes adding a flower, rock, book, mannequin, or other item both
1) adds to the "feel" of the jewelry image, and
2) gives you something to lay or drape the jewelry on.
Sometimes the size, style, or use of a peice is not apparent unless it is shown on someone. Saying that a necklace is 18" long doesn't pack as much of a punch as a picture of the jewelry in use.
Angle: You may want to take a flat-on shot to show every bit of your jewelry piece, but "artsy" is the name of the game.
Shoot from an angle. Head-on photos are OK as secondary photos for people wanting more information on the overall look, but presentation is the key.
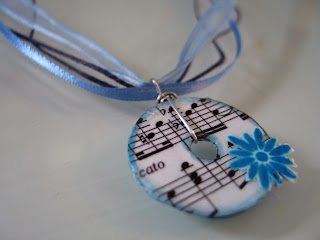
The left photo is very pretty, but the picture on the right should be the "featured" photo.
Editing
_______________________________
_______________________________
No matter how good your photo is, it can use editing. :D Many times an image will look wonderful on the camera display, but dull and uninspired on the computer.
Using Photoshop, Paint Shop, GIMP (a completely free, fairly powerful editing software), or other software, go crazy! Crop, change the contrast, brightness, color tone, etc.
I've had Photoshop for a few months, and knowing my camera's faults and the basics of the software, I now have a routine for quick fixes:
~Open the photo
~Auto Contrast
~Auto Color
~Auto Tone
~(If one of those gave a bad look, I undo it and sometimes edit that manually)
~Use "curves" and/or "levels" (depending on the lighting/background) to adjust the brightness of various hues
~Use the "band-aid" tool to remove any dirt or small unwanted items
~Use the "blur" tool to blur the background if it overwhelms the subject
~Crop
~Save
Some pictures take a bit more work, but my basic "routine" only takes a minute or two.
 |
| Before |
 |
| After |
Take a TON of photos, and Have Fun!
_______________________________
_______________________________
I take, on average, 1.5 photos for every good one that I use on my blog or the Shoppe. For each item in the Shoppe, I take 1-4 photos... you get the picture. Take lots of them. :)
(Even if your camera, like mine, takes 30-60 pictures, max, depending on which memory card is in it).
And have fun with it!
What do you do when you take photos? Any new tips? Have my tips helped you out any? Questions? Leave a comment!


No comments:
Post a Comment