Showing posts with label tips. Show all posts

05 April 2012

"Children of Lir" Linoblock

The Swan Children of Lir ~ Linoblock by ShaylynnAnn

This March, we did the an awesome project in art class. It's called linoleum block printing, and was truly something different-- you essentially carve your own stamp into a very graphic piece of art. It was ubiquitous in the old days, before computers and printers, and was favored  by graphic designers. (I was extremely delighted to learn that M.C. Escher-- my favorite artist-mathematician-- made linoblocks, along with woodcuts and various other kinds of "mechanical graphic art".)

These days, it's an antiquated technique. No longer do you need stamps to create multiple copies of artwork. We now have cameras and computers. It's no longer used by graphic artists and designers, because we have things like Photoshop and Illustrator and InDesign. I love those softwares, and I love computers, and I love cameras, and I'm a bit of a technology geek, but it makes me sad that linoleum blocks have been regulated to historical art classes.

The watercolor I based the print off of.

I don't know how much I've said about my art class, but a local artist teaches classes in her basement. I had found information about a linoleum block contest (no, I didn't place) and brought it to her to ask about it, since I'd never heard of the technique. Turns out, she did some in college and  was great enough to get us the supplies and teach us how to do it.

The day that we decided to start this project, I had no idea what I wanted to do. So I pulled out the 30 Day Drawing Challenge notebook and grabbed my favorite watercolor from it (see above). Yeah, it was pretty hard to come up with an 8X10 black-and-white design based off of a 4X6 watercolor... But I managed to get the entire drawing done in an hour. I transferred it to the linoleum block by coloring the back of the drawing with a pencil and transferring the graphite.

The picture is an illustration of the Swan Children of Lir. It's a beautiful and haunting Irish fairytale... I wrote about it here and included links to various telling of the tale.


Since I think linoblock printing is so cool, I want to share some insight on this technique...
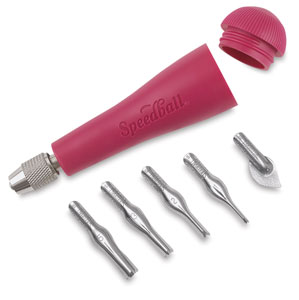


Picture from Dick Blick
The above is a picture of the tool that I used to carve my block in class. It's specially designed with all sorts of tips (that were way to big for all the details I used).


The above are pictures of the tools that I actually used. I brought the block home to work on in all that free time that I have, but there weren't linoblock tools to spare. I took this opportunity to draw all over the photograph with my Wacom tablet, but here's a text translation of my tools:


  • Linoluem block. A sheet of linoleum mounted on a block of wood.
  • X-acto knife. I can't image doing a linoblock without a scapel knife. I used it extensively for the lines in the water-- each line   (yes, each and every individual bajillion lines-- I'm crazy and obsessed with art) was outlined by two angled cuts with the xacto and then "popped out" with...
  • Screwdrivers. You use what you have! And in my case, I had a case of flathead screwdrivers in a variety of sizes. For small and medium-sized areas, I traced the shape deeply with the xacto knife, then slid the screwdriver underneath and "popped" the linoleum out. I also didn't like the way that the cut-outs were really rough (especially when I used the "real" tools), so I used the screwdrivers to burnish the cut linoleum. I am crazy.
  • Hair dryer. Great substitute for a heat gun. I used it to warm up the linoleum to make it easier to cut (but gave up on it because it took so long-- no easy cutting for me, because I'm too impatient, lol!)
  • Horsehair brush. Remember the box of old drafting tools I found this in? Super useful for brushing out bits of obstinate linoleum.
  • The drawing. 
  • A phone. To talk to a friend to while I slaved away, duh.
  • Book pages. Yup, those are the very book pages that went into the book page skirt.
  • Not pictured-- glue. Elmer's works. Because sometimes, you accidently cut out things like eyes because they are so tiny...
  • Also not pictured-- trash can. I tell you, the carvings pile up!


A closeup of the detail.


My favorite part was probably the problem-solving... it really takes a lot of thinking. You don't only have to worry about whether the art is good, whether it tells a story, whether the proportions are right... you also have to try and "shade" in just black and white, "think backwards" (because you are "drawing"-- that is, carving-- the negative space), figure out how to leave the right spaces uncut, AND pay attention to the fact that the entire image will be reversed when you are done!


This is the only in-focus picture I got of  the printing process.

It was fairly simple...

  1. Get good, thin paper. My teacher bought special printing paper that cost a dollar a page... it didn't work very well. You know what worked the best? Some kind of thin, newspaper-like (with some of the texture of rice paper) that my grandma gave me. The edges were yellowed with age and the cover of it said "79 cents". It's from a local store that went out of business ages ago.
  2. Spread printing ink out and rub it with a brayer. The printing ink is a gel-like substance. You have to rub it until it makes just the right tone of "squeek squalsh squish" noises.
  3. Transfer the ink to the block. It's harder than it appears. You can't have too much ink (it fills in the holes) and you can't have too little. You have to cover the whole thing in layers. And I found that it's best to roll the brayer (both in the ink and on the block) in the same direction. It keeps the ink from gridlocking. At least that's my theory. But it does help.
  4. Press the block to the paper. Believe it or not, our little press did barely anything. No help, really. You have to get gung-ho and use ELBOW GREASE, and a LOT of it. Use something flat and push and rub and kill your arm!
  5. Clean the block every 2-3 prints. Easy but messy if you use water-based ink.


I pulled 14 prints in all. Some had too little ink, some had too much, the first few had bad ink (old stuff that was too dry), most of them didn't completely transfer the large area in the sky, etc. It took 7 prints before I pulled a really good one. 

The best part? Lifting the paper up, seeing a good print peel from the block, smelling the wet ink...

I know that this whole things sounds time-consuming and difficult-- and it might sound like I'm complaining. I'm not. I quite inexplicably LOVE linoblocks. LOVE LOVE LOVE. They are AWESOME. It's such a different technique, I've never done anything like it before. I hope to do more-- when I have time. Because it is time-consuming.

One last note-- is it just me or does my Irish fairytale illustration look a little Japanese? It must be the lines in the water.I just did some googling, and it turns out that technique is often used in Japanese woodcuts (another thing I'd like to try).


WELL, I just wrote a book. (fellow geeks, I just thought that sentence in the accent of the 10th Doctor).
 Hope you don't mind my rambling!

08 July 2011

Storage Tip-- Tackle Boxes

Until the computer (and my files) are working, I'm going to share some shorter posts (with unedited pictures and everything). No tutorials or good photography yet... just some of my most recent tips, tricks, and little projects!

 
Beads.

 
They are so hard to store! The little things never want to be sorted or organized (or even get found when dropped on the floor). I buy beads in small amounts, and it is difficult to find containers to keep these little beads marching in order.

 
Craft stores have plastic containers with dividers, which are great for organizing beads and other little odds and ends. But $10+ for a plastic box? I don't think so.

 
My mom used to do some cross stitching, and she had two old plastic boxes that she kept embroidery thread in. I put the thread into a Ziplock baggie and put those boxes to good work. However, the "cubbies" were deep enough and the dividers far enough apart that the box was only good for the beads and jewelry findings that I had alot of. Sets of 100 little beads still had no storage, and there were no options for other sizes or types. Even so... I filled up the two boxes and needed more.

 
But I was not spending $20 on a little plastic thing.


Later that week, Dad stopped by the fishing aisle during a Walmart shopping trip.  That is when I saw them.

 
Tackle boxes.

 
Glorious little boxes, of all sizes. Big cubbies, little cubbies, super tiny tiny deviders. Huge boxes, miniscule boxes... Wonderfully sturdy plastic boxes. And all were HALF the price of the containers in the craft stores. (Half price, or sometimes even less).

These tackle boxes are great for many other things, too! Here's some ideas:
  • tackle (obviously)
  • sewing notions
  • random craft knicknacks (come on, we all have a bunch!)
  • jewelry (one of my friends uses these to organize her rather extensive collection of jewelry)
  • small office supplies (think cap erasers, pencil lead, paper clips...)
  • ...and basically any collection of small items!
 
The picture above shows one of the re-purposed embroidery thread boxes (bottom), and a tackle box (on top).

 
I love the little tackle box. It opens on both top and bottom (double sided) and has small, shallow (and adjustable) cubbies-- perfect for organizing my ever-growing collection of small sets of Czech glass beads. It is much, much sturdier than the "craft organizing box"-- and it was THREE BUCKS. Three bucks!

 
I also saw this:

 
$35 for a big giant tackle box, that includes about 8 little plastic cubby-boxes and even more compartments throughout it. If only I could justify spending $35! It really was very tempting, but I have a craft room with plenty of space to store supplies. This box would be perfect for someone who needs to maximize space.

 
So maybe when I go off to college...?

14 March 2011

Car Part Anvil and Celtic Knotwork

*best hillbilly voice* Ma daddy's reaaaal awesome. 'E got mea anvil!

That's right-- I now have an anvil for hammering wire jewelry. You'll never guess what the anvil actually is!


Honestly, I'm not even sure what this thing is. All I know is that it is a car part. Dad used to work in the automotive industry, and this is a casting of a thingamabobbers he worked on.


This random car part works wonderfully as that anvil I had on my wish list. I scrubbed it clean (even though it doesn't look it!) and have driven my family crazy with the bang, bang, bang of the hammer.

My brother is now officially jealous of me. His dream is to become a blacksmith someday, and he's been asking for a real anvil for ages. This is the first time he's actually bothered to help me make some jewelry!

I've been having too much fun with this whole idea of hammering wire. Below you can see all of the trinkets I have made so far:


I'm really impressed with how well this works! The hammering really strengthens the aluminum wire and is so pretty and sturdy!

And... I can do CELTIC KNOTWORK in jewelry!!!

I've listed some beautiful new hammered-wire jewelry on my artfire Shoppe! And on quite the sale, I tell you. :)


Since this is a new technique, I've got all the new designs on a first-batch sale for under five dollars-- some as low as one or two bucks! Seriously, that's like the price of the chain the designs come on. I would love it if some of you Faerie People could try out some of these designs and tell me what you think!


I've already made myself a pretty knotwork bracelet, which I shall wear on St. Patrick's day.


Now all I need is a wire jig... I'm having fun free-forming all of this, but whenever I try a repeating pattern (such as my bracelet, which you can see in the middle of the picture), I can't get it even.

That and sterling silver. Because if I were using silver wire, not aluminum, I'd be able to tell these same designs for $30! Seriously-- I was browsing Etsy and Artfire for inspiration. Apparently no one makes these desings in aluminum... but they do plenty in silver. You can have the same designs for 1/6 the cost. Although, I wish I could afford to work in sterling silver wire. (I'll do it if I have a custom order! Hint, hint!)


By the way, I was inspired to ask about an anvil after looking at my friend Leia's post on her hammered wire earrings. I fell in love with those... You can see that I used the same design on a necklace-- except I hammered much more.

13 January 2011

How to make a Lightbox

Hi, everyone. I'm having a few difficulties getting the pictures to upload. Since I got the really important pictures up, I decided to go ahead and publish the post. Check back in a day or to to see the example pictures.

My Lightbox
Do you want to know how to take great pictures? 
Have you ever wondered how to get those crystal-clear white backgrounds?

A lightbox is exactly what you need. They let you control the lighting and environment that your photos are taken in. They are especially good because they diffuse the light!

Fancy lightboxes are available for hundreds of dollars, but a simpler and effective lightbox can be made with materials around the house.


Supplies you will need:
  • A destroyable box. I used a "book size" moving box. Make sure that your box is the appropriate size for the items you will be photographing.
  • A lamp. Preferably two or more. "Natural light" lightbulbs are supposed to be the best, but I just use a florescent one. Detachable camera flashes and bright room or outdoor lighting work well, too.
  • Clear velum paper. I used tracing paper. Tissue paper and thin papers can also work.
  • A ruler.
  • Scissors. I also used one of those rolling knives. Cardboard can be hard to cut.
  • Tape. 
  • White poster-board or larger sheets of white paper.


Cut an entire side off of the cardboard box. This will become the bottom of the box, the part that lies on the table.

Tip: Don't break your knife while doing this.
Next, trace a sheet of the velum paper on one side. Cut out that rectangle.


Repeat for 3 sides.

^I made the far side pictured (the top of the finished box), larger than my sheet of paper. I simply used Scotch tape to combine two pieces of paper into a larger one.


Tape the velum paper so that they cover the holes.

(The box is pictured upside-down here).


I turned the box right-side up for this picture.

Tape a piece of white poster-board to the top back of the lightbox.

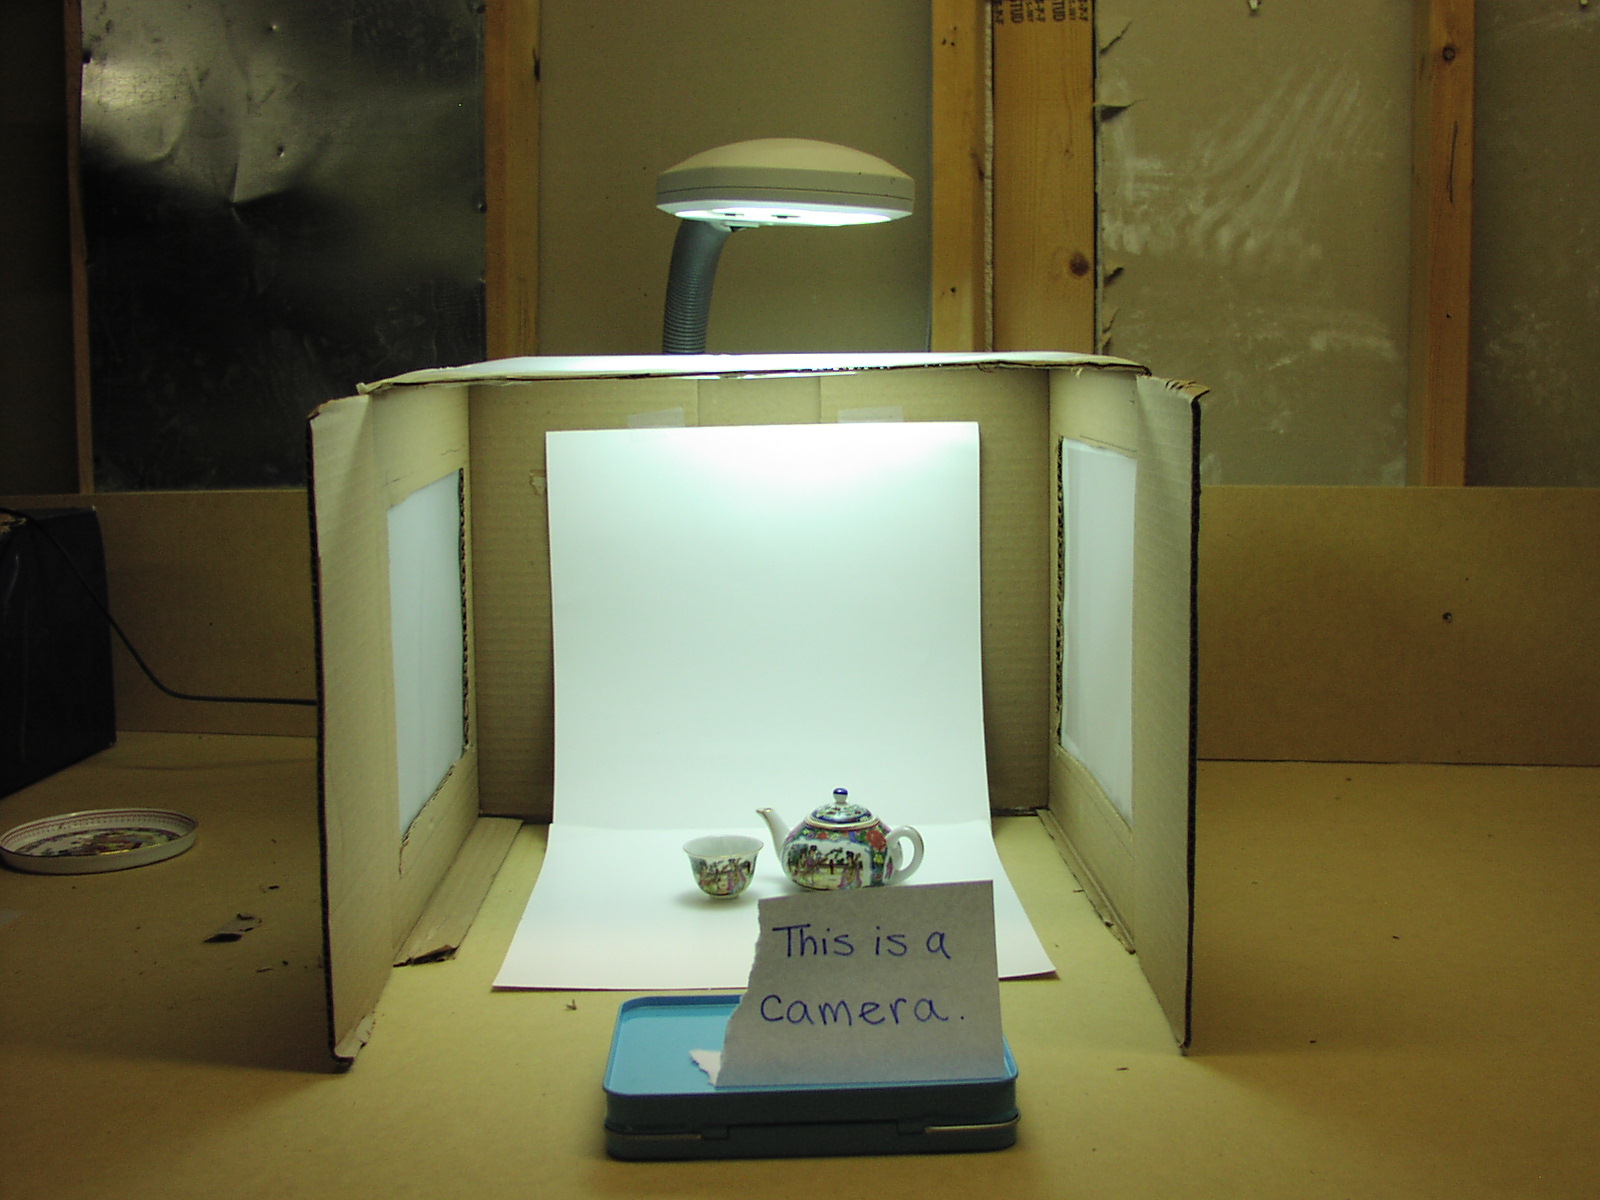
Here is a picture of the finished lightbox!

Set up a lamp to shine through the velum paper. I use one fluorescent light shining through the top for most of my photos.

Hold the camera steady. It's a good idea to use a mini-tripod or a box to set the camera on.

{ Check out my tips for adjusting your camera settings to make the most out of your lightbox. }

The big rule with a lightbox is NO FLASH unless it is indirect and shining through the velum paper.

I kept the flaps on the box so that I can control any lighting coming from the front of the box.


[IMAGE]
You can use multiple lamps for lighting from different angels. 


Be careful about mixing florescent and incandescent bulbs. I tend to get unbalanced images where one side is very white and the other side very yellow.

It can be hard to edit such photos. ---->


[IMAGE]

Do you like to have that "rainbow background" effect? Place your object near the end of the lightbox, where the diffused light hits part and the lighting of your environment hits other parts. [IMAGE]

[IMAGE]
 Use props! Everything from cups to fabric scraps to colored scrapbook paper will work wonders.

 [IMAGE]
 Having the hole in the bottom of the lightbox lets you use natural backgrounds.


Here you can see what the inside of my lightbox looks like. I used 2 pieces of white scrapbook paper.

Notice how the light from the lamp is diffused-- and how well the light bounces around the box!

When light is diffused, it is essentially scattered. It is not as harsh. It's pretty much what clouds do to the sun.

A photo taken from my lightbox.


Questions or tips? Please leave a comment!
Did YOU make this project? Please share a link! I'd love to see your lightbox and pictures you took with it!

01 December 2010

Jewelry Photography Tips

I've had many people ask how I take such crisp pictures of my jewelry.

They want to know how to keep their photos from looking like this (or much, much worse).

Click to enlarge.... but I don't think you want to.
In order to have a jewelry blog, or to simply sell jewelry online, you basically have to become a mini-professional photographer.

I don't use any fancy, high-end equipment. I can't afford that. But over the past few months, I've learned how to take some decent pictures. It took alot of trial-and-error, and maybe I can save some of you the pain!

How to Take Pictures of Jewelry 
(...and many other things)


I'm absolutely no expert on this subject, but I thought I'd share some tips that I've found useful. These are the exact techniques that I use to take pictures such as this:


The Camera
_______________________________

You don't have to spend big $$$ on a camera to take decent jewelry photos. I use a 10 (or more!) year old camera that used to belong to my grandparents. It's old as far as gadgets go... It's kind of falling apart through constant use, and it's pretty outdated.

My camera, taken with my dad's iPhone
Any digital camera nowdays will take decent pictures of jewelry. You just need to know how to work with it.

Gee, I've learned that iPhones can take great macro photos (if slightly grainy in certain lights), and those are quintessential point-and-shoot cameras. No settings, no nothing!

(I'm not excluding film cameras here... I just don't know how to work them, and it would be a pain to get those photos online!)

See the picture of my Olympus camera to see what an iPhone can do

There are two things you can't skip on: the Macro setting and the ability to turn off the Flash

The Macro Setting
_______________________________

(Almost any digital cameras from the last 10 years has this setting)

The macro setting tells the lens to focus on the closer items rather than the farther ones. Totally indispensable. On most cameras, this setting is found somewhere near the dial or viewing screen. Some cameras even turn it on automatically.

Look around carefully for this fella.      Reader, meet Macro Flower.      Macro Flower, Reader.      You're best buddies for life.
 The macro setting is the best way to get an in-focus close-up shot. Some cameras have better macros than others. Some let you get within an inch of the subject. My camera won't focus unless I am in a range of 2-3 feet from my subject, and it won't focus if I zoom in completely. This just means that I have to crop the images.

Other Settings
_______________________________

If you have a point-and-shoot camera, you don't need to learn about other settings. You can take decent photos with just the macro turned on.

However, I suggest reading your camera guide to see if you can change other settings.

When taking pictures of jewelry, I usually let my camera know if the lighting is incandescent (yellowish), florescent (white), sunny (natural and bright), or cloudy (natural and dull). I only mess with other settings for non-jewelry photography.

Turning Off Flash
_______________________________

I know, I know. If your lighting isn't great, you think you need to turn on flash.

BUT IT WASHES YOUR PHOTO OUT!

Everything looks all white and dull and flat!

(Sorry, this is a peeve of mine! I still can't convince my dad of this... but then, he takes technical photos for work, and I take artsy photos.)

Turn off the flash. If you are taking a macro shot, the only thing the flash will do is overwhelm the subject. Turn if off, and find proper lighting. If you can't find proper lighting... take it without flash and edit on photoshop.

(Okay, there are times when it is appropriate to use flash. And people with fancy, removable flashes can probably put them to good use. Bouncing the flash is good, too. But unless you are an extreme photographer, go the safe way and turn off the flash.)

Lighting
_______________________________

The number one rule is to ensure that your subject is well-lit.

Use natural lighting when available. Simply moving your subject next to a window and turning off the flash can increase the quality 100 fold!

I am still learning how to put lighting to good use. You can see my trial-and-error progression by looking through old posts on my blog.

I like to set a piece of white paper next to a window. If the day is sunny, the outdoors is usually to bright to work with.
What if it is dark or cloudy?

My T-shirt, lamp, and window studio :)
An easy fix is to shine a lamp at your subject. Oftentimes, the light is too bright, so diffuse the light by taping a piece of computer paper over the light bulb. (Be careful not to do anything dumb, such as setting the paper on fire. Keep an eye on it.)

Shadows are very difficult to deal with. I just move my jewelry around until the lighting is decent... As you can tell, I'm still working on getting rid of those pesky dark shadows.

I recently made a lightbox, which evens the lighting and background. I LOVE this thing!


A handmade lightbox

If you want to spend some money, you can get a good-quality, professional lighting setup.

A Steady Camera
_______________________________ 
 It goes without saying that your camera has to be steady in order to get a crisp photo. Use a tripod, mini-tripod, box, book, or one of your limbs to prop the camera. :)

Setup 
_______________________________ 
 Alrighty, you have a digital camera, found your macro setting, turned off the flash, and found good lighting... Now what? Before you press the shutter button, check your set-up!

Background: You want a background that compliments your jewelry (or other items) without overwhelming them.

Many people opt for the white background, especially when taking photos for online stores such as Etsy and Artfire. You can use posterboard, computer paper, or even a T-shirt to acheive this effect.

Don't be afraid to be creative, though. I've seen some beautiful jewelry photos where the jewelry is lain on a book, handwritten note, scrapbook paper, or even a cup! (Cups are wonderful for taking pictures of earrings, by the way.)


Props: Do you want anything besides the jewelry to appear in the picture?

You may opt for the plain white background, but sometimes adding a flower, rock, book, mannequin, or other item both
1) adds to the "feel" of the jewelry image, and  
2) gives you something to lay or drape the jewelry on.


Sometimes the size, style, or use of a peice is not apparent unless it is shown on someone. Saying that a necklace is 18" long doesn't pack as much of a punch as a picture of the jewelry in use.


Angle: You may want to take a flat-on shot to show every bit of your jewelry piece, but "artsy" is the name of the game.

Shoot from an angle. Head-on photos are OK as secondary photos for people wanting more information on the overall look, but presentation is the key.


The left photo is very pretty, but the picture on the right should be the "featured" photo.


Editing
_______________________________

No matter how good your photo is, it can use editing. :D Many times an image will look wonderful on the camera display, but dull and uninspired on the computer.

Using Photoshop, Paint Shop, GIMP (a completely free, fairly powerful editing software), or other software, go crazy! Crop, change the contrast, brightness, color tone, etc.

I've had Photoshop for a few months, and knowing my camera's faults and the basics of the software, I now have a routine for quick fixes:

~Open the photo
~Auto Contrast
~Auto Color
~Auto Tone
~(If one of those gave a bad look, I undo it and sometimes edit that manually)
~Use "curves" and/or "levels" (depending on the lighting/background) to adjust the brightness of various hues
~Use the "band-aid" tool to remove any dirt or small unwanted items
~Use the "blur" tool to blur the background if it overwhelms the subject
~Crop
~Save

Some pictures take a bit more work, but my basic "routine" only takes a minute or two.

Before
After

Take a TON of photos, and Have Fun!
_______________________________ 

I take, on average, 1.5 photos for every good one that I use on my blog or the Shoppe. For each item in the Shoppe, I take 1-4 photos... you get the picture. Take lots of them. :)

(Even if your camera, like mine, takes 30-60 pictures, max, depending on which memory card is in it).

And have fun with it!


What do you do when you take photos? Any new tips? Have my tips helped you out any? Questions? Leave a comment!

  • bgbgb