Showing posts with label Shoppe. Show all posts

13 May 2015

Autumn Wedding Jewelry Ensemble


This past autumn, I had the honor of designing a jewelry set for five bridesmaids!


The color theme was reds and golds, with hints of pearl and green. Each of the girls would be wearing a different dress in the same color, and each girl had different jewelry requirements (pierced/non-pierced ears, short/long necklace, etc). 

The necklace shape is also adjustable-- since I created a braided base, it could be gently pinched into a pointed shape, or a flat, or rounded style. If you look closely at the pictures of the bridesmaids, you'll see that each necklace is worn differently!

The bride wore a thick lace veil with a bright, bold wreath of red and gold flowers and leaves on top, and the jewelry was designed to coordinate with her style.


It goes without saying that these five sets were a fair bit of work! Each necklace had a braided base that looks very similar to my braided circlets. Beads and glass leaves of all kinds were woven on in matching patterns, and beads adorned the adjustable golden chain.


These are the earrings and ear cuffs designed for the bridesmaids!


The ear cuffs were beautifully decorative; the bride loves fairytale styles so I had fun going overboard with the sparkly bling!


One of the girls had double piercings and wore two sets of dangles! I'd never really heard of that kind of pairing before, but wouldn't you agree that it is a lovely combination?


The other girls all wore variations of my Enchanted Forest Earrings in gold and red.


I also created a pair of barefoot sandals for the bride! The picture below is with shoes from our outdoor photoshoot, but these "fairy sandals" work well barefoot, too!


This is the entire set of jewelry, representing a couple weeks of work!


I didn't photograph the rings very well, but in this picture you can see the leaf flower ring and the gold-and-red wirewrapped rosette ring on the maid of honor!


This was one of the most unique weddings I've attended, style-wise, and I had a blast designing jewelry for such lovely girls!


I've created many pieces of jewelry for various brides, and I've even designed an entire set of jewelry for a bride, bridal party, and mother-of-the-bride, but this was the first time creating wedding pieces for someone I knew! I am also friends with all of the bridal party, so I had the opportunity to take their personal styles into consideration.


In addition, I also helped out last minute by being the second shooter at the wedding! I wound up taking over three hundred pictures of the ceremony, photoshoot, and reception.


It's not a fairytale wedding with friends until you do a hilarious gag photo, is it?

The park we took photos had at these awesomely weird concrete frogs...


So... I did mention that this was a group of my friends from high school and that everyone involved are fantastic geeks, yes? While the main photographer was off taking sweet pictures of the bride and groom, the bridesmaids and groomsmen posed with my Lord of the Rings weaponry.


Aren't they just too cute?

Best wishes and lots of prayers for the new Mr. and Mrs.! 

26 December 2014

Merry Christmas! | Copper Tannenbaum Ornaments


I write this curled up on the couch, sipping hot holiday spice tea (compliments of Santa), with the Christmas tree lighting the room. Gathering Blue by Lois Lowry is on the couch beside me, and the rest of my family is asleep. This Christmas was beautiful; while we officially began our celebration with Mass on Christmas Eve, we really began Christmas break a few days ago when both my brother and I returned from college and my dad took off work.

A tornado of little children tore through our living room on a mission to create messes. The remainders of a long day are strewn every which way. Instrumental Christmas music is playing and there is the promise of a day of unwinding and cleaning before more family events.

I hope that all of you have had beautiful Christmases, full of family and friends and crazy weird traditions!

My Christmas gift, both to myself and from my parents, is a TORCH!

That's right-- I now have a propane/oxygen little torch that can heat up to, you know, just a couple thousand degrees. I also now have a crockpot labeled "poison" (for heating up pickle, a substance which cleans metal when it is discolored from heat and flux). I can now solder!!!!!

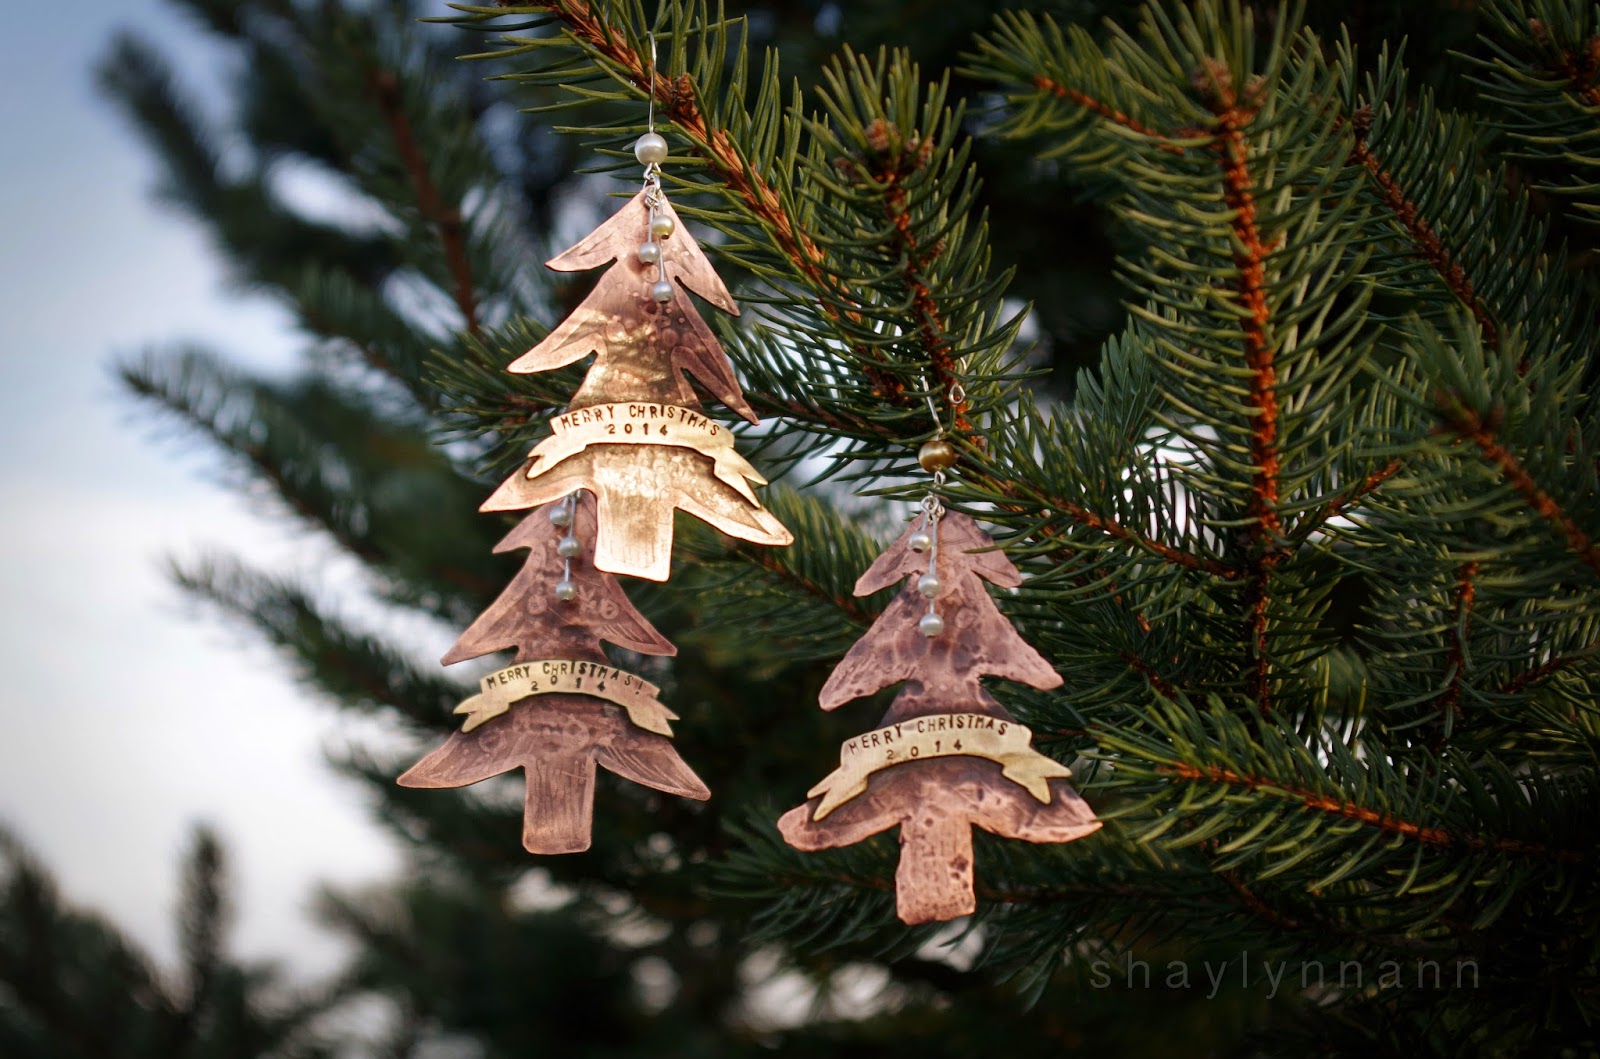
My little sister and I test-ran the torch, my metal stamping set, and my miniature hacksaw to create  these Christmas gifts! These Christmas tree ornaments are handmade from copper and brass.


My eleven-year-old sister cut out the brass banners and stamped the numbers on them. (Can you believe it?!) She requested to be my apprentice over Christmas break, and while she sometimes makes things take forever, on the whole she's actually been very helpful and is becoming quite skilled.


The trees are hand-cut from copper which I etched and then drilled.

Normally I would etch copper with ferric chloride, but I recently ran out and discovered that buying more would be quite expensive. I was using etchant from my grandpa's old PCB etchant kit before. So, I did some research, and my dad and I mixed up an acid bath that is essentially a cupric chloride --> cuprous chloride etchant. So now I also have an apple juice container with bright yellow duct tape that shouts "DANGER: Poison" in thick Sharpie!

Unfortunately I had already etched quite a few pieces of copper by the time I got around to etching the trees and didn't properly reconstitute the solution, so the etch was not very deep. That or my resist came off. I'm not 100% sure what went wrong.

I think that the idea of little handdrawn ornaments comes through nonetheless.

I then soldered the stamped brass banner onto the tree (THAT was a process because I had a difficult time getting the whole copper tree up to temperature).


As you can see, my sister and I had a lot of stamping to do. Each letter is hammered in by hand.

At the very end of the process, we submerged the ornaments in a Liver of Sulfur solution, sanded it down, and sealed the pieces with a spray expoy resin.

Then, we strung glass pearls onto headpins, and made a pearled tree hook from an eye pin!


I am so fascinated by all of these new metalwork processes that I am discovering. :)

My grandparents gifted me a dip pen for calligraphy (and for my upcoming illustration class) so I'll be experimenting with that, too! I've been using a worn-out fountain pen with three nibs since I was eleven or twelve.

But that is not now. Now is time for bed, and visions of sugar plum fairies-- it's almost surreally peaceful tonight.

02 August 2014

Rosie's Fashion Lookbook

My little sister "Rosie" helped me create a fashio video featuring my jewelry. She designed all of the outfits and picked out the jewelry herself! She also chose the song.

The video is under four minutes long; please check it out! Not only is it stinkin' cute, but if you've been eyeing anything in my Shoppe it's always nice to see it "in action" on someone.

But, mostly, watch because Rose is stinkin' cute!

23 July 2014

Tea and Jewelry

In the midst of studying for the four tests I take today (yes you read that correctly!) I was pretty productive this last week! Here's a quick look at my latest projects. :) 

(Also I need help naming posts, apparently. I was going to name it "New Finished Projects" or "Updates" and then decided to be boringly descriptive and name it "Tea and Jewelry"... oh well. Please tell me that other bloggers have this problem, too!)

New in the Sketchbook:

You can never get a cup of tea large enough or a book long enough to suit me.' - C.S.Lewis
I'm working on a series of small sketches and illustrations for the wonderful Regina Doman. It's actually an old project that didn't go anywhere before-- she's bringing it to life! Regina Doman is the author of some wonderful fiction novels (such as the Fairy Tale Novel Retold series) and fellow fans of hers have been very instrumental in my life.

During her travels, Regina will do "Fairy Tale Tea Parties" in which she will give talks and sign books at small tea parties hosted by fans. The illustrations are for a tea party booklet!


This is a work in progress shot from my Instagram account (which y'all should follow for more behind-the-scenes of making art and jewelry) with a couple more of the sketches.


 New in the Shoppe:


Here's a peek at the newest listings in my Shoppe. I made some pieces for custom orders, too.

Bluebell Chainmaille Bracelet-- I'm especially proud of figuring out a brand new chainmaille weave! (Well, brand-new to me!)
Aurora Rhinestone Pearl Earrings -- designed to go along with my Princess Aurora circlets and cuffs
Blue to green ombre chainmaille bracelet
This bracelet took quite a bit longer than most pieces I make using this weave, since it is too tiny! It's more feminine and elegant, and of course I made this with my all-time favorite color pairing: bright, non-tarnish sterling silver, and a huge variety of shiny blues and greens!
Autumn Red flower spray leaf hair clip -- that's a really long name for this piece but at least it's descriptive. 
Here's the same hair clip on a lovely model!
Mint Green chainmaille flower bracelet. I LOVE combining the ultra-modern, sleek look of colorful enameled wire with the historical look of chainmaille and the whimsical fun of my signature leaf flowers!
Golden Galadriel Star Flower Earrings-- with green crystal dangles
Rustic Celtic Copper Cuff
OK, so this one is a bit of a cheat-- it's not a new item in my Shoppe. It's been up for a couple weeks. But during a fantasy-themed photoshoot, I photographed this stunning model wearing the copper cuff from Eowyn's Jewelry Set. The gown was handmade by a friend of mine, and the sword is a replica of Glamdring-- Gandalf's sword from the LotR movies!

Summer Greens Enchanted Forest Earrings. The Enchanted Forest earrings seem to be a favorite-- they are at once elegant and elven. I normally make them in solid colors, but these various shades of green just called to me. Also, can I geek out about this photograph? I don't know how I got the sunray to be "just so" but I'm loving it!

On My Workdesk Wednesday

I'm staring a new, regular blog feature: Workdesk Wednesday.

It is inspired by the WOYWW link-up over at the blog Stamping Ground, but I'm going to use it as a personal challenge to keep this blog updated on a weekly basis!

(You should check out WOYWW to see the workdesks of other artists and crafters!)

Every Wednesday, I will take a picture of the workbench in my garage studio at home, or my dorm room at school, or one of the tables at my school's studio.

So, what have I been up to this week?

What's On My Workbench:


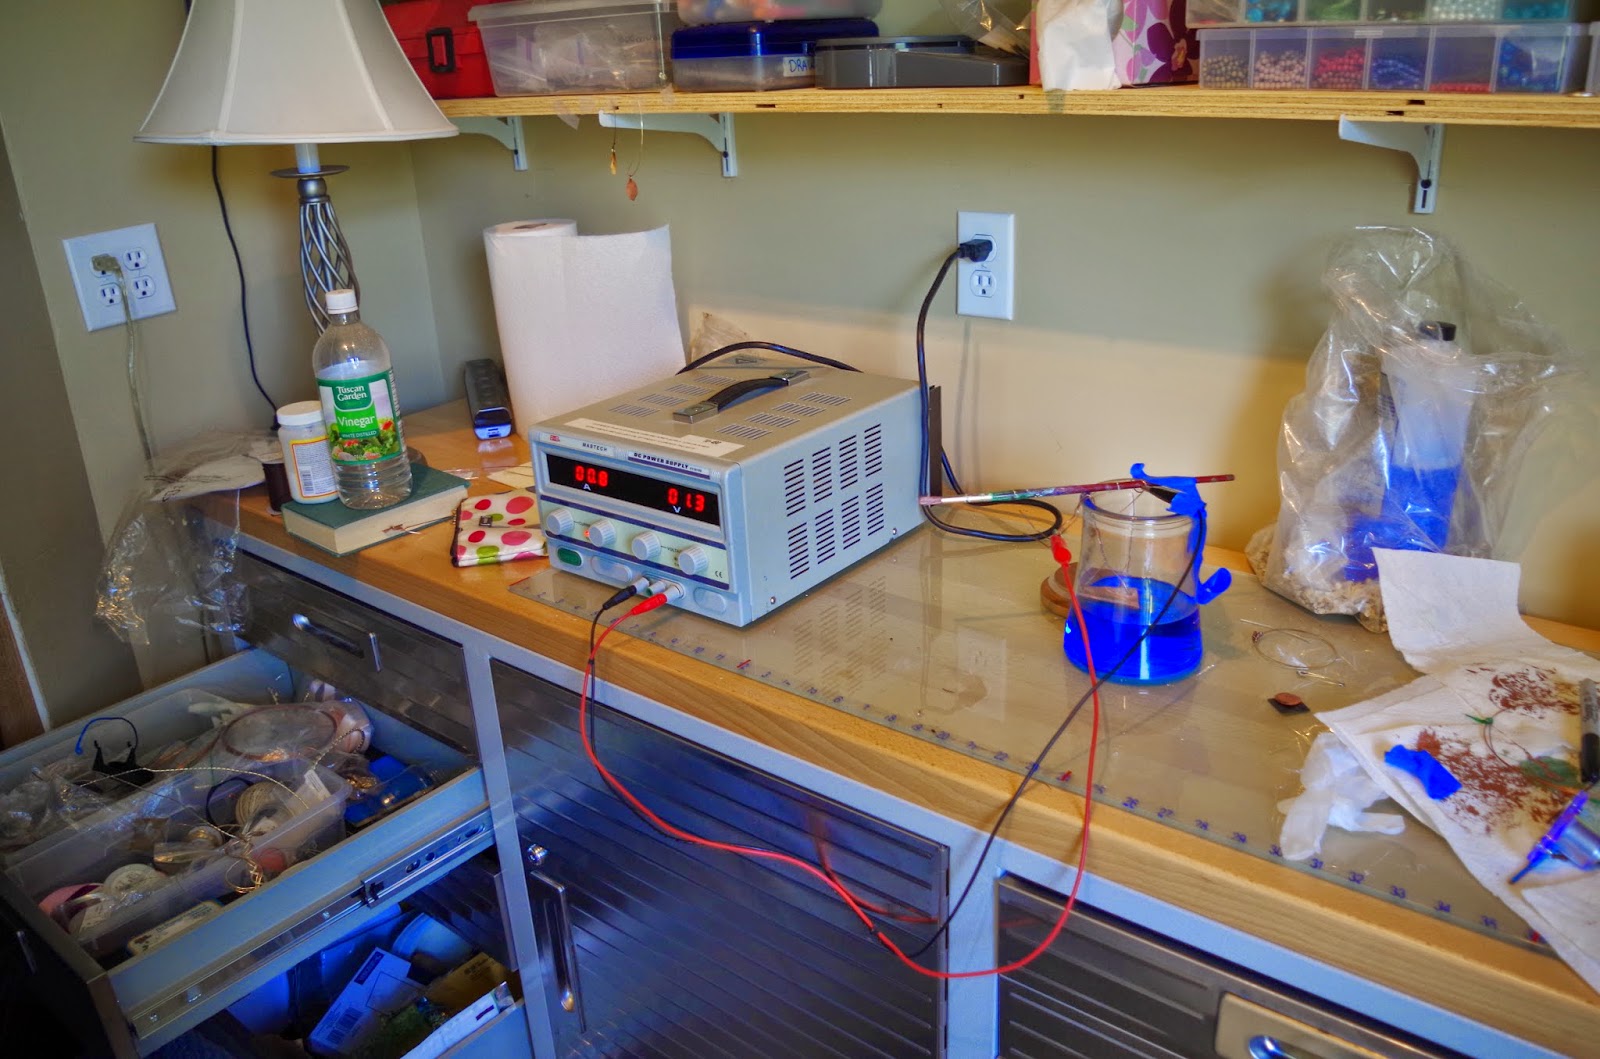
What's this? A gigantic power supply running electricity through an acid bath?

Ooooooh, yeah. After learning how to etch and oxidize copper using all sorts of chemicals, I just had to keep going. This technique is my largest monetary investment into supplies... so I'm really hoping it works well. I'm having some hiccups right now.

I'm learning how to electroform organic materials! This means that I will be able to literally turn real leaves into copper. Well, not literally. What I'm literally doing is plating them in a nice, sturdy coat of copper.

I can then take the copperized leaves and patina them in various colors to make jewelry. I'm also looking for a way to create a sparkle dip that doesn't look cheesy, so I can make the leaves a little iridescent.

Hiccup #1: I can't skeletonize the leaves very well. I've been boiling the leaves in baking soda, soaking them for a day, and scrubbing gently with a toothbrush, but all I've managed to do is tear the leaves apart. If anyone has ANY tips, please let me know!

Hiccup #2: The conductive paint is taking some trial and error, as I can't seem to get an even coating and only parts of the leaves are turning copper.

Hiccup #3: The rectifier I bought online was defective and I had to return it. I'm borrowing this one from my dad's work but it's only for a couple days. They recently got an upgrade to a stronger power source, so maybe I can buy it from his boss?

(edited)

17 July 2014

Giveaway at Aquariann's Blog

Hello fairy friends! Today I am pleased to announce that I am hosting a giveaway over at the lovely fantasy art blog Aquariann.


The giveaway is a $25 gift card to my Shoppe, but even if you don't win, you are in store for a treat! I am letting all customers raid my little pirate treasure chest of wirewrapped rosette rings and sparkling leaf earrings. Check out Aquariann's blog post to get the coupon code (good until August 10th 2014)! You'll have to visit her blog to enter the giveaway (which you can do by leaving blog posts, following myself and Aquariann on social media, spreading the word, etc!). I love her writing style, by the way, so be sure to read through the whole post!

12 July 2014

Dragonfly Wings, Rhinestones, and Fairy Garlands

I found this post in my drafts from earlier this spring! 


When I was little, I used to think that dragonflies were the fairies' cousins. They are so quick and beautiful, with sparkling, flitting wings... I actually got the idea for this necklace while sitting out by the pond watching some dragonflies hover above the water!

It's a stylized version of a dragonfly, though. Very Art Nouveau. The tassle thing is new. I've never used anything like that in a necklace before but I like it!

Copper is so beautiful to work with and so deliciously creamy when paired with pearls.

(This necklace is on my Shoppe).


Here is the necklace, along with other assorted jewelry I've made, on one of my lovely models.


This one's called the Woodland Fairy Garland! I made a necklace similar to this for my friend Laura's Entwife Costume that she wore to a Lord of the Rings ball-- pictured below.


So, the new necklace is not a new idea, but I do like it better the second time around. The vine-like branches are studded with iridescent Czech glass leaf beads and I made a flower pendant as a centerpiece.


This little fella is just something pretty. It wasn't inspired by anything but shiny beads. I think I'll name it after something related to stars, though. Think it looks like a shooting star? I'll go with that. :) This is a Shooting Star pendant.


These two beaded necklaces were not as complex to make (although I'd forgotten how long it takes to string a necklace instead of using chain!) but that doesn't mean they are boring!

I've found myself wearing smaller pieces like these quite often; more will be appearing in the Shoppe. Sometimes the simple things are the most elegant.

Also this necklace was featured in the Saint Louis Post Dispatch. :) Here's the link to the story! I thought it was funny that they chose this necklace set, because it was far simpler than the other ones I brought by their photography studio. However, I think they chose it because it's more conventional than the all-out costume fantasy jewelry I lean towards.

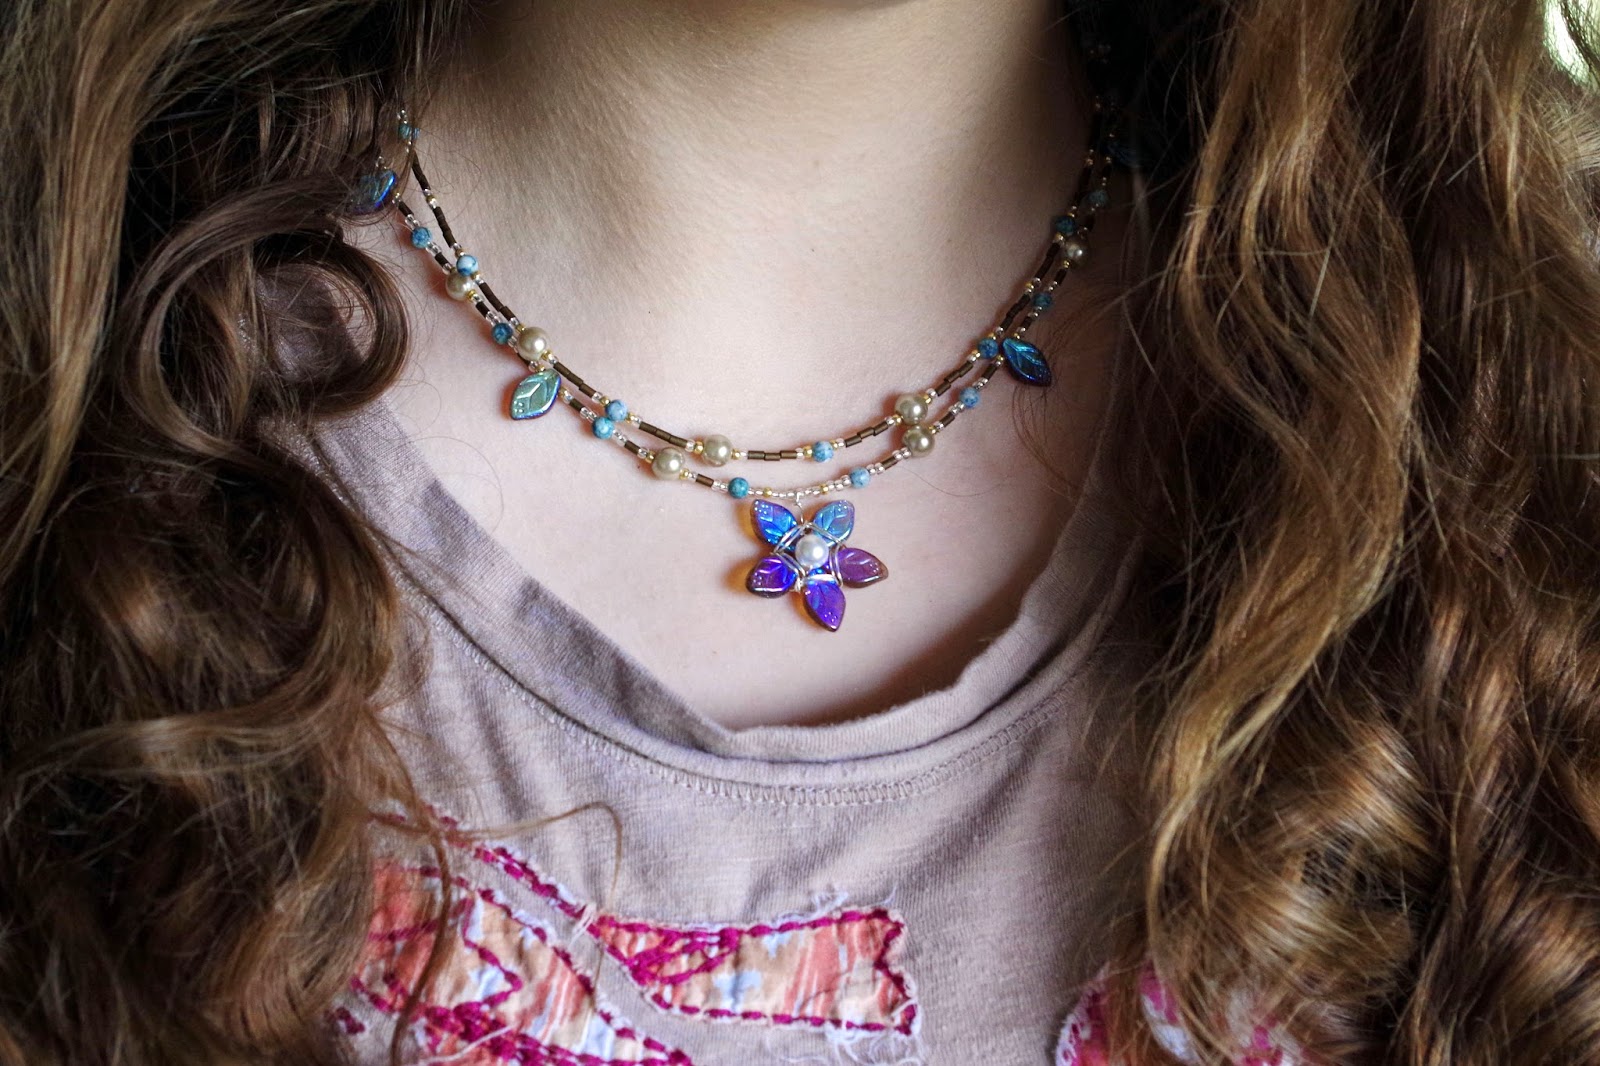
EDIT: I wrote this in the spring, but I wanted to let you know that this summer I've made more variations on this beaded double-stand leaf and flower necklace. Here is one, in more busy summer sunset colors!


Another Aurora Circlet! This one already sold, but I usually have one or two in stock. These pieces are frequently made to order in any case, so I can adjust band size and colors and such.

Here it is, modeled by a beautiful friend:


You can see more pictures of various Aurora circlets I've made here on a masterlist of all posts containing the circlet and it's variations!


And here is another piece that I completed recently; an arm cuff (now sold) inspired by the same Entwife jewelry set.

That's all for now, I'm busy with classwork but keep in tune because this summer I will be working on jewelry full-time in the midst of my summer classes!

EDIT: Hi, now it's me from the summer, aka NOW! I hope you enjoyed this peek at just a couple random jewelry pieces! Love, Shaylynn. :)

  • bgbgb