28 March 2013

A Blue Box


This weekend, we had over a foot of snow in one day. We built some epic igloos in the backyard, and then, suddenly, POOF! Someone crash landed in our front yard!


Geek out time! It's a snow TARDIS, people! It's made out of at least 98 cubic feet of snow and is definitely bigger on the inside.


Just for a sense of scale, this is my brother (taller than me) next to the TARDIS on top of a snow pile. This sculpture was done almost entirely by the two of us because our other brothers wimped out or started snowball fights! My little sister turned the top of the TARDIS into a little playfort-- I'm going to get those pictures off of Mom's phone to share with you if I can.


We built this as the snow was falling heavily, but it was dark out when we finished. The next day, we had to leave in the morning, and by the time we got back, it had melted! This TARDIS as pictured is several inches shorter than it was originally and has also morphed into the Leaning Tower of TARDIS. It was very straight, smooth and right-angled when we built it-- with half my family destined to be engineers like Dad, there was no other way to do it!

There totally would have been some awesome photoshoots with my siblings and I dressed as the Doctor & Co., only our TARDIS has died already. Silly weather. First you snow in late March, then you decide to hang out in the mid-forties all day? We wanted to make Daleks and Weeping Angels!

(P.S. We love our snow sculptures-- last year we didn't get any appreciable snowfall, but you can see Sir Herbert Junior the Snow Giant and Smaug the Dragon, right here!)


Photo update! Here are some more from Mom:


25 March 2013

Shabby Apple Gift Card Winner

Right now I am sitting at my desk, cuddled up in my warmest sweater with a cup of tea by my laptop, and staring out at a plain white canvas. Yesterday we had a major storm and I believe it is the second-largest snowfall that I have ever experienced! Well over a foot of snow and big drifts by my window. My brothers and I are in the process of making snow sculptures, and we've calculated that each one will require 98 cubic feet of snow. We're over halfway done!

But you don't want to know about the weather, do you? You want to know who won the Shabby Apple giveaway. I don't blame you! You had to wait an extra day because our internet speed was inching along during the snow.

And the winner is...

...

...

Melissa P.

Congratulations! I'm sending you an email right now. 


19 March 2013

DIY Sealing Wax Stamp


Today I stepped out of my comfort zone and made a video tutorial! I just snapped a few pictures as I worked, so the video is probably more illuminating.


I've always loved writing letters and have dreamed of the days of yore when people sent letters calligraphied on parchment, sealed with wax... there's something so romantic about it. Then, after I made the blog post about glass nib pens and several of you oh-so-lovely readers teased me about having sealing wax kits while I didn't... I just had to get or make one! :) 


I bought some sealing wax but didn't want to spend $20 or more on a stamp that I would only use when sending those long, rare, handwritten letters, so I decided to make my own! I tried using buttons as a stamp but we didn't have any pretty ones that worked, and I wanted to make my own cool design. Several months ago I saw this pin and memorized the steps from the photos. I just spent a couple of minutes searching, and it looked like this idea originated from this post on a design blog called RageHaus. 

Anyway, here's my spin on the DIY wooden sealing wax stamps!

You will need:
A wooden dowel or block
A woodburner / pyrography wand
A dremel tool
Oil
Sealing wax
Approximately 45 minutes

Above you can see my first attempt at making a wax stamp (the red stamp with the monogram "S). I was really pleased with how it turned out, especially considering the complexity of the design! For this tutorial I made a very basic heart stamp. It's a lot easier than it looks!


To begin, you'll need a circular wood dowel. I used a block from one of those ubiquitos toy block sets.


Draw the design that you want on the dowel. Remember, your image will be reversed when stamping. For the heart it doesn't matter, but for the monogram I freehanded a mirror image. If you don't like mirroring or drawing things without a reference, you can print out a reverse image and transfer the picture onto the wood.


Next, use the pyrography tool to burn the wood! Begin by simply using the smallest tip to slowly, slowly trace the design. After the initial burn, press down the the tool (it's best if you do this using the side of the tool, not just the tip) to deepen the valleys. It needs to be deep enough for the wax design to stand out clearly. Do your best to not just push a bunch of dots into the wood, as this will make the final design very bumpy.

Protip: If your design starts getting really bumpy, use a small flathead screwdriver to push the bumpy wood down flat. You want everything to be level-- unless you want a design with varying heights, such as my monogram, where I carved the main letter deeply but made the swirlies much lighter.

Also, if your wooden block is covered with paint like mine, and it smells really foul while burning it, you can always put on a mask. I wound up doing that because the smell made me queasy, so just watch out.


You're not done yet! The design needs to be sanded to make it flat and even. If you sand it well enough, the wax will not stick to the wood. Use a fine nib dremel tool to do this!


Ta-da! The design is finished, and all that remains is to dip the tip in oil and wipe off the excess (to discourage the wax from sticking to your stamp). Then it's time to test out your new toy!


I just wanted to send a little shout-out to GreenCraftStore, where I bought the wax. Their pieces were reasonably priced and just lookit that beautiful packaging! 

I'm not really an expert on stamping with wax, as the first time I did it was when I made the monogram stamp, but here's a couple of tips:

1. Don't catch the paper on fire if you are using a wax stick with a wick. Do, however, get really excited that you are holding a flame and dripping really really really hot wax on paper. It's cool.
2. Let the wax dry for just a couple of seconds before imprinting it with the stamp.
3. Let the wax dry with the stamp ontop of it, then wiggle the stamp off.
4. If you are going to mail this, use modern plastic waxes that won't break in the mail. I used beeswax, which is great for historical accuracy. However, historically seals were used not only as a sort of signature but also to keep prying eyes off of letters. If a seal was fiddled with, it would crack. I think that beeswax probably won't survive modern mail machines. I've yet to test it out, though!


Ahhh! It WORKED. 

Ignore the cheesy "To: You"-- I needed something to quickly write on the sheet of paper and "To: You Lovely Blog Readers and YouTube Followers and The Random Person Who Just Stumbled Upon This Video and/or Blog Post" would have taken too long to write.


Here's a shot of my "S" stamp. And an envelope which I marbled. That will hopefully be another tutorial someday, just as soon as I perfect my marbling technique...

You can see that I didn't sand the heart down all the way; it's still a little bumpy.
Now I need to go write some long-overdue letters to some dear friends and stamp them all with handmade sealing wax stamps. :)

14 March 2013

Habemus Papam

To my Catholic readers: I know this is old news to you by now, but WE HAVE A POPE!

After Pope emeritus Benedict XVI resigned, we had several pope-less days and I was so excited to see a Twitter post proclaiming "Habemus Papam-- we have a Pope!" Then I got a text from Pope Alarm just a few seconds later (why yes, I did sign up to get a text for the big news!) and had the honor of being the first one to run around the house telling my family!


I don't remember much about Benedict's election so this week was, I think, the very first that I heard about the smoke tradition. The Cardinals vote on the Pope multiple times each day. After each set of votes, they light a fire and send smoke up the chimney of the Sistine Chapel. Black smoke signifies that they have not reached a decision, and white smoke means that they were led by the Holy Spirit, made a conclusive vote, and HABEMUS PAPAM!

We turned on EWTN (a Catholic channel, where you are much more likely to just get to see everything going on at the Vatican and not have to suffer through all the snide comments on how everyone thinks that they can be a better pope than the popes).

We basically sat there for an hour, watching the smoke and the crowds in the square of the basilica, praying for the new pope, and wondering who it is!


I of course grabbed my travel sketchbook and sat doodling. Lately I've been trying to be more decisive with my sketches, so these are all drawn directly with pen (no erasing mistakes) and then splashed with a bit of watercolor. (I recently discovered the epic Urban Sketchers' blog, and I'm surprised by how much these sketches are similar to their style!).

I think that the Swiss Guard are pretty awesome. I wish they'd shown more of them!


 The wait was very very long... so I drew St. Peter's, a happy pilgrim girl who appeared on screen for about two seconds but was so picturesquely joyful, a clock that they kept filming, and some of the crowds. It's surprisingly difficult to draw things on TV; they sure don't keep the camera pointed in one direction all the time!

The excitement and prayerfulness of the crowd there was inspiring.


And finally, they announced the Pope! Francis I is from Argentina and looks like he will be a wonderful pope. He's a theologian and from the Americas and, judging by his speech, has a sense of humor. I'm excited, hopefully he'll be just as strong and totally epic as JPII and Benedict.

(this is a REALLY rough translation that a friend shared on facebook; more polished ones are now online) 
I was impressed by his humble request for prayers before he even gave the Apostolic blessing. 
He surprisingly didn't come out in the full garb with the red cloak; just the white habit and the stole (basically a prayer shawl but with deep symbolism).


(Here's the Altoids watercolor tin that I made several months ago if you were wondering how it's holding up! It works really well. Also, I found a waterbrush in Mom's scrapbook stash yesterday. It's pretty epic.)

Just because I'm posting pictures that I drew of Pope Francis' election today... here's a pen-only sketch from when when pope emeritus Benedict announced his resignation. Just pretend that the hands are the right size and all that.
I don't remember too much about the previous papal election. We were on a class trip to the state Capitol, and someone said something about the pope being sick during a tour of one of the offices. When I got home that day, Mom told me that John Paul II had passed away. Even though I'm racking my brains, I don't have any strong memories of Benedict's election. We just got a new pope and everything was as it should be. When you are in fourth grade, things seem to just work out like that and there is nothing remarkable in it.


Several months later (Jan 2006, judging by where this was in my old sketchbook) I drew a picture of JPII and then a quick sketch of Benedict XVI. It was only after JPII's death that I read encyclicals and books by him and his sucessor and the wisdom of these two saintly men has really strengthened my faith!

Let's pray for the new Pope Francis I and the entire church!


12 March 2013

Shabby Apple Gift Card Giveaway

Calliope Skirt by Shabby Apple
If you haven't heard of Shabby Apple before, you are missing out. I can't tell you how many times I've browsed their website, gushing over all the eye candy and wishing that I had a good excuse to buy another dress! So it was with great excitement that I read an email asking me to host a $50 gift card giveaway for them (and boy, do I wish I could enter my own giveaways!).

They make some beautiful, vintage, bold, modest, and feminine clothing. My favorites have got to be the dresses... And some of the skirts, like the bright Calliope skirt pictured above. But mostly the dresses. Lookie lookie look!


{left to right: Cider, Veni Vidi Vici, Blue Eyes}


I literally just grabbed some random favorites here, I have a bajillion more but don't feel like organizing a bajillion photos for one blog post! You should definitely check out their website and take a peek at all the beautiful dresses. They even have a cool tool to help you find dresses that are especially flattering to your body type!

One of you will get to win a $50 gift card! This is enough to purchase a fun skirt or pretty blouse, or put it towards buying one of the dresses! Most are in the $60-100 range so they are definitely affordable if you want to splurge. 

Also, Shabby Apple is offering a coupon for everyone!

Enter shealynnsfaerieshoppe10off at checkout to receive 10% off your purchase. (Good until 4/12/13)

The giveaway linky is below. Please note that you do need a facebook account to participate in this particular giveaway. It lasts until next Friday.


a Rafflecopter giveaway

06 March 2013

A Copper Grecian-style Headpiece


There is something so yummy about warm copper, crisp pewter, and bubbly cream freshwater pearls, isn't there? Or is this just me? It's probably just me, but the flavor is almost as palpable as the colors. I've decided that I don't use copper and bubbly freshwater pearls nearly as much as I should!


This is a custom piece I recently made for a bride who wanted a Grecian-style headband set made out of copper!


It was a rushed order so I used the odds-and-ends from my bead stash for the fascinator part. This always forces me to be extra creative about what kinds of beads go together. The dress is a blush with hints of pewter in it, and I wound up using many more gray and blue tone beads than I normally would in a copper piece. I think it works!


image via

The headbands are designed to be worn separated on the head with a messy bun. To the right is the hairstyle that the headpiece will be worn with!

They are thinner than most of the braided circlets and headbands, as I used 20 gauge copper. It is designed to accent her hairstyle rather than overwhelm it. Copper is stiff enough that the headbands will hold their shape on their own but I imagine that she will use bobby pins or ribbon to make it extra-secure on the day.


After taking these pictures we decided that a patina (basically oxidation that makes the copper look older, less shiny, and more rich) would be the perfect finish!


Aaaand, I randomly stuck the main headband onto my cloche hat. I kind of want to make one of these for me now, so that I can tie it onto my hat with a nice poofy ribbon in the back and be all fancy! :)

Pieces like these are so much fun to work on. ^_^

P.S. I have a cool tutorial coming up in the next few days (hopefully)! There has been so much to do lately that I haven't had a chance to finish up with the pictures, but I promise I'm going to blog about something other than custom orders soon. :)

28 February 2013

The Prop Replica Weapons from "The Lord of the Rings" and "The Hobbit"!!!

Major image overload post! This one is for my geeky readers who, like me, have to see ALL THE PHOTOS if The Lord of the Rings is involved.

Gandalf the Grey's staff, Orcrist, Andruil, Glamdring, Gandalf the White's staff, and Sing at the bottom. Kili's weapon is yet to arrive!

A few months ago, I won in the Weapons category of an art contest for my favorite series of all time (Lord of the Rings/ The Hobbit) judged by three of my favorite Tolkien-artists of all time! The prize is prop replica weapons from the movies! And they finally arrived!!!

(If you want to see more of the picture, see my old posts here and here).
I will be doing a more detailed description of all the swords and staffs down the line and will probably do many themed photoshoots. For now, here's enough snapshots to fill Smaug's lair to the brim!


When the boxes finally arrived after weeks of waiting, I had to wait three whole hours for Dad to get home from work. It was torture, staring at the boxes without opening them!


When we finally got them out of the boxes-- AHH! They are gorgeous, very accurate and honest-to-goodness swords. I now have a lot of respect for any warrior (or actors) who lugged around heavy swords all day!


We were all too caught up in the moment to bother with cameras much, but here's some of my family geeking out with me!

All of the swords came with these beautiful wooden plaques to hang them on the wall. The staffs have smaller resin and metal ones.

My favorites are Sting's plaque (top right, with the celtic knotwork and Fellowship brooch leaf) and Andruil's (bottom right, with the tree of Gondor). Orcrist (top left) has the same design has the hilt of the sword-- it's the emblem of the Gondolin king to whom the sword used to belong.


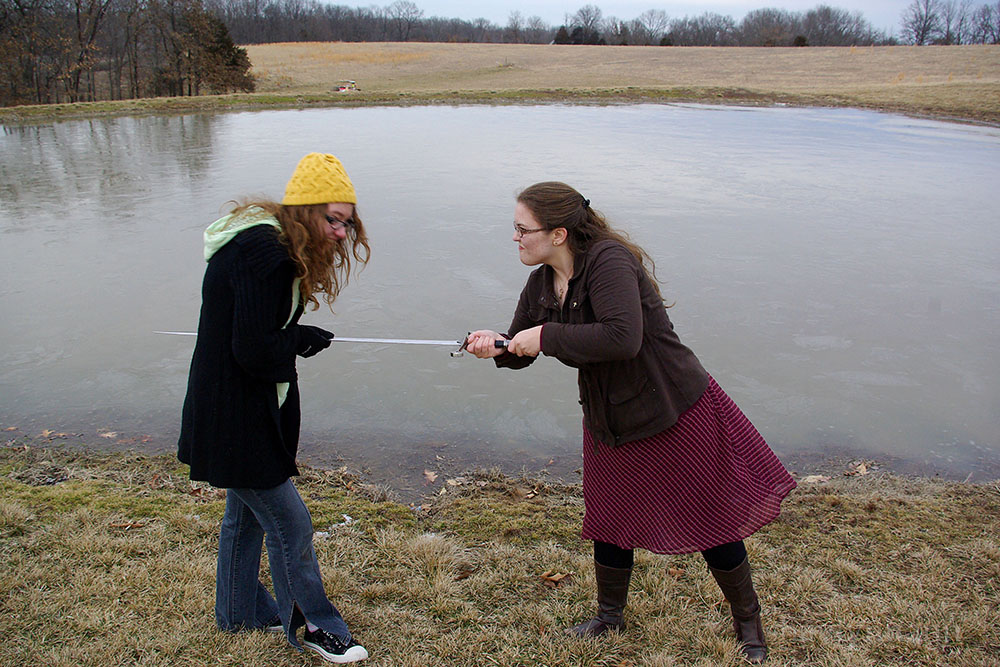
Thus far, I've only been able to do one quick impromptu photoshoot with two of my friends, but I know how much some of you have been looking forward to seeing the swords, so I'd thought I'd share this now! I have plans to do a costumed photoshoot sometime down the line and to get nice close-up photos of the swords and staffs (without fingerprints all over them), but that will probably have to wait until spring.

Isn't her hat cute??
It was freezing and none of us had planned on being outside taking photos, so if we look a little pale and red-cheeked, that's why. :)


Here I am, holding Orcrist, the "goblin cleaver" which was a Gondolin Elf sword used by Thorin Oakenshield in The Hobbit. If you aren't a Tolkienite, none of that made sense to you. If you are, OHMYGOSH isn't it cooooool?! :)


Detail of Orcrist.


We all geeked out. A LOT. Seriously-- we were holding swords from LotR and the Hobbit. What is there to NOT get extremely excited about?


This beautifully engraved sword is the replica of Gandalf's trusty blade Glamdring.


Gandalf's staff even has the "G" rune carved into it.


This sword is Anduriel, Flame of the West, the sword of the Aragorn the King of Gondor. Forged from the shards of Narsil, "Renewed shall be blade that was broken / the crownless again shall be king" and all that-- THIS IS ANDRUIL and it is HUGE and heavy!


The runic engraving says, in Quenya, "I am Anduril who was Narsil, the sword of Elendil. Let the thralls of Mordor flee me."


My brother, the Hobbit.

Thanks to a completely obsessed family (I must admit that I am not the most die-hard fan compared to my tween/teen brothers), he is a true Tolkienite. I kid you not. He loves Middle Earth. Yesterday I was wearing a golden skeleton key on my necklace and he came up to me, fingered it, and said in his cute five year old accent, "One key to rule them all! It's a prrrrrecioussss!" He then pestered me to read him "That funny poem that goes 'Troll sat alone on his seat of stone'!"


When I am geeking out because I won an art contest and now own actual prop replicas from my favorite movie trilogy of all time (and it's 'prequel'!), it is very difficult for me to keep a straight face. I also don't do well in front of the camera. Lots and lots of classic "Shaylynn pictures" ensued. :P


The cloak which made my friends look like Elves made me look like a Jedi.


Above is a photo of me holding Sting the 'letter opener'! It's very difficult to imagine an accurate size for Hobbits until you are holding a to-scale knife that is a long sword for Bilbo and Frodo.

Also, I was so very serious. Don't you totally see the resemblance to the warrior-like Bilbo Baggins?


Yeah, I thought so.

I can't help it, I'm too excited!


DON'T WANNA GROW UP.


My little brother kept photobombing our pictures!

While I was in the process of writing this blog post my little sister came and offered to take pictures of me "all dressed up like Eowyn or Arwen or somebody"! I need to teach her how to hold the camera steady but we had fun in the snow! 

(This is our first sledding-worthy snowfall of the season and we've spent countless hours riding down the hills. It's heavenly!)

I only used Glamdring for these shots because it was way the heck too cold to stay outside long enough in order to pose with multiple props.


I think you've seen more photos of me in this one blog post than I've ever posted before. :P

I promise that I'll take detailed close-up shots of the swords sometime soon!

Still I am a bit in shock-- the honor of winning in an art contest, and the extreme awesomeness of the prize... eeeeeeeek! 


  • bgbgb