Today I'm going to teach you how to dye fabric using crayons! You can make something like this:

It all began with Ukrainian eggs! A couple of months ago, I was excitedly talking to my art teacher about pysanky, in which eggshells are decorated with bright dyes using a wax-resist technique. This made her remember a project that she did in art school: batik.
Those of you who frequent fabric stores might recognize that word. The really pretty, brilliantly colored fabrics with intricate designs at around $15 a yard? Yup. Those are imitation batik fabrics. Traditional batik is even more expensive because of the ardourous handmade process. A swath of fabric is dyed in a light color, and then beeswax designs are drawn onto the fabric by hand to "lock in" the light color. The fabric is then dipped in a darker color and waxed again, and the process is repeated many times before the dye is allowed to set and the beeswax is removed.
Just as I made Sharpie Easter eggs because I didn't have the tools for pysanky, we figured out how to "cheat" at batik using crayons! (It's not an original idea-- I had seen it done once before on a blog called Suzy's Artsy-Craftsy Sitcom).
This is definitely a do-and-learn project. If you attempt it and have any tips for me, please share!
DIY Crayon Batik
SuppliesCrayons (the perfect way to use up that old box of broken crayons-- my family had two shoeboxes full, but we only used half a box in art class, shared between six or seven batik projects)
Muffin pan (mini muffin pan recommended for lots of colors/mixing)
Heating tray or oven
White cotton fabric
Cold water dye (hot water will melt the wax) and gloves
Cheapie paintbrushes
Iron
Newspaper
Now, the whole idea is that you paint the crayon wax onto the material, crumple it, spray the black dye into the cracks in the wax, and iron the wax off the material. The dye from the crayon will remain, all pretty and bespeckled with the black dye.
And as a bonus, you get these weird flat crayon discs.
I've all sorts of pictures to help you along. :)
 Start by peeling the crayons and putting them in a muffin pan. Melt them on a heating tray (or in the oven-- beware that they will cool quickly in that case). Then prepare your design on the cotton with a pencil.
(At this point I'm going to point out that my Celtic knot is not a real knot because I made several mistakes in the over-under pattern!)
 |
| front |
 |
| back |
Use cheap paintbrushes to paint the melted crayon onto the cotton (the paintbrushes will be ruined). Once the wax is on, there is no getting it off-- so be careful! Start with the main design first.

Make sure that the crayon has completely permeated the material. I set the cotton on the heating tray between each color to make sure that the dyes really "set."
This is important! We ruined our first attempts because crayon cools quickly and cool wax just sits on top of the fabric. The color didn't set.
(Melt the most important colors first so they don't bleed together badly).
(Melt the most important colors first so they don't bleed together badly).
 |
| Front |
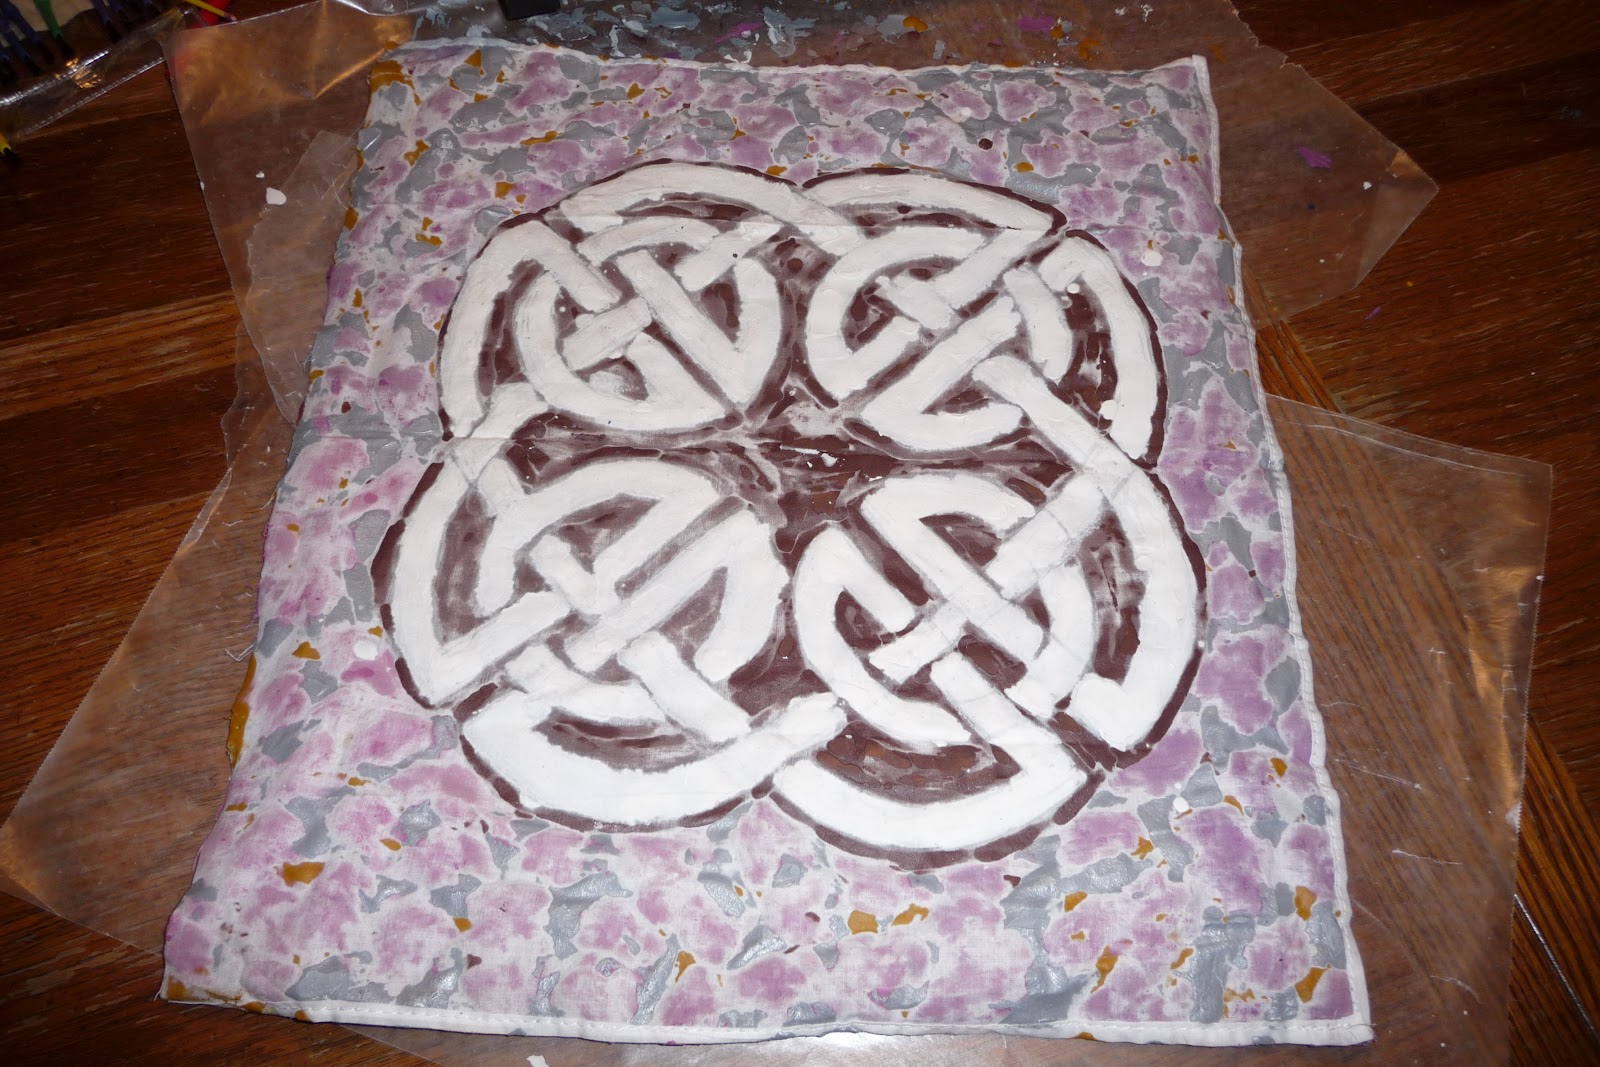 |
| Back-- notice how very little of the yellow actually permeated the material? |
Continue this process until the entire piece is covered with crayon.
 |
| This was my first project, a pseudo "Dan-Cheong" based off a Korean style of architectural painting. I did not heat the material between colors. Instead, I melted everything all at once and made the colors run together. Be sure to melt the wax between each color and pay attention because you don't want the colors to run together. |


Both of these pictures show crayon batiks by the younger kids. You can see a few of them whose colors ran together. As always, click to enlarge.
Then wrinkle it up!
Then wrinkle it up!
Every time you wrinkle the fabric, it creates cracks for the black dye to seep into. Don't wrinkle too much or else your final piece will be almost completely black. (Yes, another thing learned the hard way.)
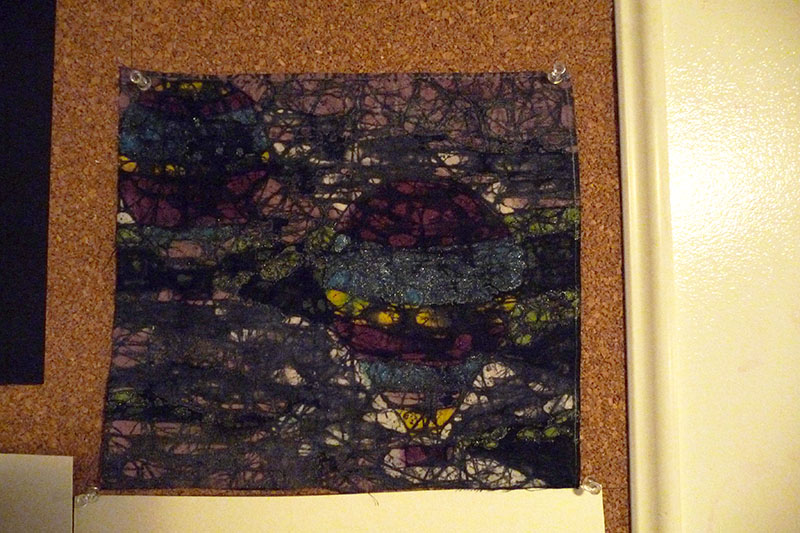 |
| This is my teacher's first project; she crinkled the fabric too much and dipped the material in the dye, rather than spraying the dye. You can barely see the hot air balloons. |

Spray the dye onto the material and let it set as per label instructions.
We based this project off of Suzy's and took her advice about cold water dye. You certainly do not want hot water melting your crayon artwork into a big blob!
We based this project off of Suzy's and took her advice about cold water dye. You certainly do not want hot water melting your crayon artwork into a big blob!


Next, place the material between layers of newspaper and heat the iron to the highest setting.
Iron the wax out of the cotton.
This is a tedious process. DON'T keep ironing after the wax is showing through the newspaper or you will do what I did and re-melt the wax back into the material, creating a big mess and making colors run. Change the newspaper several times a minute.
Yes, you'll go through a lot of newspaper.
Iron until the fabric loses its stiffness. Rub the material with a paper towel. If no color rubs off, you are good to go.

I haven't tried putting this through the wash. I figure that as long as no color rubs off, it isn't going to stain anything!

Do whatever you want with your handmade art fabric! I turned mine into a decorative pillow, proving that I cannot sew a straight line (it's horribly loppy!). Now my Celtic-knot obsession gets to live on my bed! It even matches my curtains. :)

Enjoy!