Showing posts with label books. Show all posts

16 April 2013

DIY Book Box {Tutorial}


Secret book boxes. These are the stuff of old whodunits, with cursed and precious jewels hiding in the library of mysterious mansions. The only word to describe it is cool.

I've tried my hand three times in the past at making book boxes in the past. At first, I simply used an x-acto knife to cut out hundreds of individual pages. I did a tutorial for it and everything, but it is a very time consuming process and your hands get really tired.

Last year I attacked a book with power tools, and learned what not to do! Don't worry, though. I just helped a friend make her own book box and now I can (finally) show you how to make a nice book box using a drill, two screws, a scrollsaw, and some glue!

The project takes around half an hour to complete, but you'll want to let it dry overnight.


Begin by taking a destroyable book. What is a destroyable book? Something like a Reader's Digest Abriged book, which has a beautiful cover but it generally rubbish inside.

Do NOT destroy good books. You'll make bibliophiles like me die a little inside. ;)


Fold back the cover and a few pages from the front and back of the book.


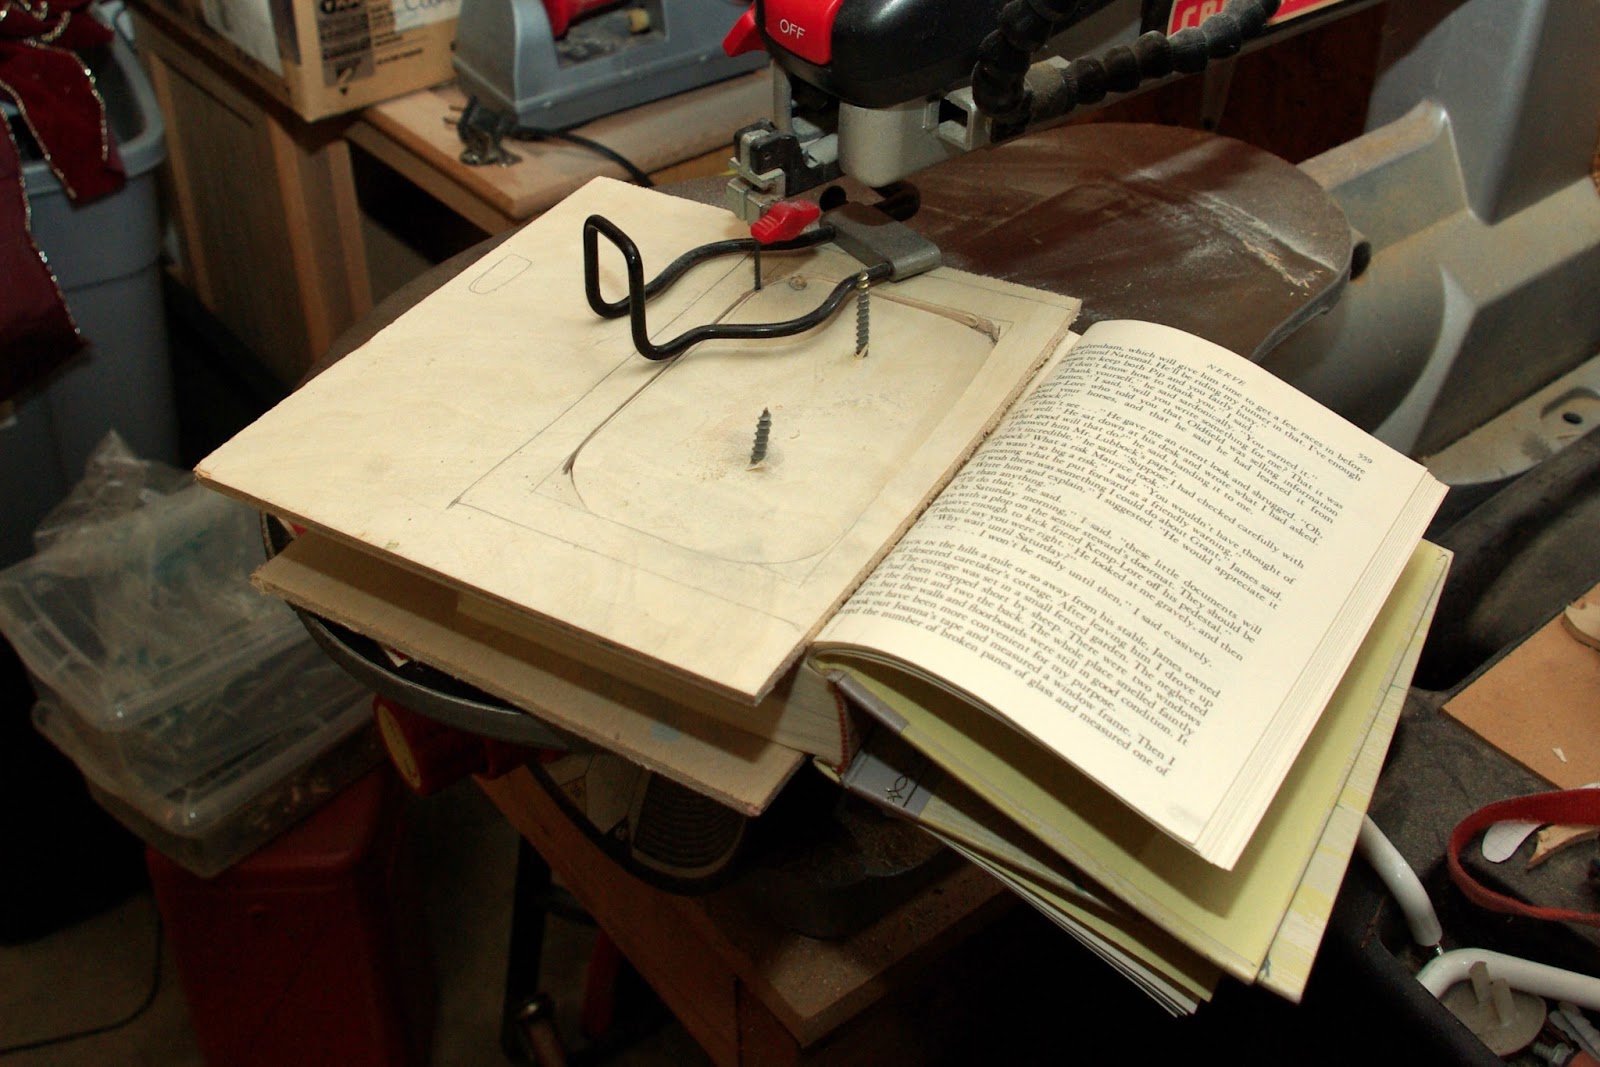
This next step is very important-- if you forgo it, you'll ruin the book box. Sandwich the book between two pieces of wood and screw two screws through it.


Make sure everything is very snug.


Next, trace the edges of the book on the wood and draw the design you'd like to cut out. We chose a rectangle with rounded corners. Be sure to leave at least a half-inch border around the design.

It's difficult to twist a scrollsaw to make sharp edges, and even the curves we worked with were sideloading the blade. If you would like to make a straight rectangle, I'd recommend drilling holes at each corner. This gives the blade enough room to wiggle so that you can cut ninety-degree corners.

Drill a hole all the way through the book, push the blade through it, and set up your scrollsaw:


Then, DESTROY THAT BOOK!


When you are finished, you'll have a nice block of paper left. These book guts are lots of fun. You can use the paper for origami, artwork, and even costumes!


Next, do a victory dance because IT WORKED! :D


The book will feel very smooth where you cut it. You are done hollowing it out at this point, but it doesn't work all that well as a box because the pages can be opened.


Paint the insides of the box with glue. This will make your box sturdy but let it look like a very normal book from the outside.

(This is different from the technique that I did with my previous book boxes, when I glued the outsides of the pages shut. If you are sure to sandwhich the book between the pieces of wood, you won't need the extra stability that gluing the outside of the book shut gives.)


Glue a piece of decorative paper or fabric on the first non-cut page at the back of the book.

Now, set a nice heavy dictionary on top of the book and let it dry flat and even.


This would make a really cool afternoon project! It takes around half and hour and only requires a basic knowledge of how to use a drill and scrollsaw. My book box is the perfect place to hide candy from little siblings, and my little sister keeps her favorite pieces of jewelry inside of hers. I've seen some neat pictures of people putting engagement rings inside of book boxes or hiding ipods and other valuables in  hollowed textbooks inside backpacks.


17 April 2012

Power Tool Book Box-- It's a Start, At Least


This one is a little bit of a crafting fail-- but like all failures, I've learned from it. Someday I intend to use what I learned from this experiment and make a proper book box, but for now, here are my "lab notes," per se, if anyone else wants to put them to use.

Last month, I wanted to make a last-minute present for a friend (as in, I saw her at church that morning, remembered with a blush that it was her birthday, and wanted to make something for her that day). I also wanted to use POWER TOOLS, OH YEAH!

(Power tools are cool.)
(Please tell me you pictured the Doctor saying that.)

I wanted to make her a book box. However, as I explained in the ordinary-book-box-tutorial, you use up two x-acto blades, kill your fingers, spend at least two hours cutting, and wind up with very ragged edges on the inside of the book. This is when I had an epiphany. POWER TOOLS, OH YEAH!

My dad is absolutely brilliant about letting us kids fiddle around with whatever we want to do with his garage full of tools, so as soon as we got home from church, I knocked several books of the shelf looking for a destroyable book (never desecrate a perfectly good book! please!), grabbed the screwdriver bag, and rushed across the cold yard into the garage, still wearing my church clothes. (By the way, doing this in church clothes is a bad idea.)


Note: the top few pages were cut out with an x-acto knife. Ignore that.
I began with a book box I'd started on earlier-- the outer pages were already glued together. See the old tutorial for that.

 First, I folded the book covers and a few pages back and drilled a hole in each corner of the book so that the scrollsaw blade could have some maneuvering space. 


This caused some unfortunate separation of the pages. However, once the hollow is cut out of the book, you can also cut out this pileup of torn paper and the book will lie flat again.

I removed the blade from the scroll saw, threaded it through one of the drilled holes, and tried for five excruciating minutes to wrangle the book and blade into place. It finally worked.


Scrollsaws work by vibrating a blade up and down. Guess what the resident genius forgot to consider? Oh, yeah. The book pages might vibrate so much that 1) you can't hold onto the book, and 2) the scrollsaw turns into some sort of goblin that tries to shake its prey to death. Poor book.

Not just a poor book-- poor me. I snapped the blade in half while trying to make the scroll-saw-goblin behave. This is the point where I called my dad in tears, worried that he will be extremely upset that I just broke his power tool.

Did I mention my dad is brilliant about us using his power tools? He told me where he kept spare blades, and I went back to work. A different plan of attack was in order, however.


Laying a piece of scrap wood ontop did nothing.


A short AHA! moment later, the resident genius came up with a plan. Screw scrap wood tightly to the top and bottom. (In hindsight, two screws would have worked even better. And this ought to be your FIRST STEP. Got it? It will save you mucho trouble.)


That did the trick. The resident genius rubbed her hands together in glee, re-drilled the holes, and started cutting. 


*cough* You know, it might have been more genius-ier if I had traced the size and shape of the hole onto the scrap wood. I wouldn't be doing guesswork, and I might actually have wound up with straight lines and sharp corners.


I kept on a'cuttin'. You'll wind up with a giant stack of papers like this. 

Did any of you notice that the book pages on my sister's artsy skirt had holes in the middle? I used these drilled-through pages to make her book skirt. :)


Tip: straight lines and sharp corners seem to be a near impossibility with books and scroll saws. A more organic, curvy design might turn out better.


Wear work clothes if you attempt this project. You shall be a mess.

Use an exacto knife to cut the hole out of the pages from the font of the book (the pages that were pulled back with the cover).


Ta-da! A book box!

It didn't turn out like I wanted-- but it was done in well under half the time of my old book boxes. However, I like where this is going. I can't wait to go out and try this project again-- but before I do, I might think things through a bit more. :)

(P.S. I seem to be having all sorts of technical issues. The links under my header got messed up, and I my best attempts to fix it didn't completely fix it, and now a few of the images in various posts are strange sizes and discolored (thanks, E, for letting me know). No idea what is going on but I'll get everything fine-and-dandy as soon as I can!)

11 April 2012

Bookish Adventures {part three}


This is the third part of the photoshoot I did with my little sister wearing a book page skirt.

{Part One}
{Part Two}

I'm also experimenting with some different editing styles (some very drastic due to weird lighting and white balance), but some of the photos are left unedited. Which is your favorite?


23 March 2012

Bookish Adventures {part two}


into the woods

She wore a skirt made of stories and I wore a camera strap. Together, we traveled to our favorite haunt: the magical forest on the borders of our neighborhood.


As usual, click each photo to see it larger and on a dark background.

(As I'm trying to improve my photography skills... which pose/editing do you like best?)

{part of my destroyable books blog series}


14 March 2012

Bookish Adventures {part one}


Books come to life in your imagination. The stories become a part of you, shaping your view of the world and occasionally making you stand on your head in order to see that your life is not, in fact, mundance and prosaic.

One March dawn, my (very patient) little sister and I journeyed throughout our neighborhood and turned it into our own little Wonderland. Several days before, I had made a secret book box using an unloved Reader's Digest Condensed Book. We used the cut-up pages to create a paper skirt and ran outside before schooltime to do my first "artsy photoshoot."

My point-and-shoot isn't the most reliable when it comes to taking good photos, and I snapped away until my memory card held over three hundred pictures. As it turned out, most of the photos were good, and I loved so many that I'm going to have to split up the photos into several different posts. This is Part One of our Bookish Adventures photoshoot, all taken in a lovely little field. Over the next week or two, I'll post photos from the woods and the creek.

Click on each picture to see a slightly larger version against a black background (the pictures look so much nicer that way!).


{ part of my destroyable books blog series}

  • bgbgb