Showing posts with label how. Show all posts

27 August 2012

Crayon Batik {Tutorial}

Originally published at Confessions of a Seamstress as a guest post.

Today I'm going to teach you how to dye fabric using crayons! You can make something like this:


It all began with Ukrainian eggs! A couple of months ago, I was excitedly talking to my art teacher about pysanky, in which eggshells are decorated with bright dyes using a wax-resist technique. This made her remember a project that she did in art school: batik.

Those of you who frequent fabric stores might recognize that word. The really pretty, brilliantly colored fabrics with intricate designs at around $15 a yard? Yup. Those are imitation batik fabrics. Traditional batik is even more expensive because of the ardourous handmade process. A swath of fabric is dyed in a light color, and then beeswax designs are drawn onto the fabric by hand to "lock in" the light color. The fabric is then dipped in a darker color and waxed again, and the process is repeated many times before the dye is allowed to set and the beeswax is removed.

Just as I made Sharpie Easter eggs because I didn't have the tools for pysanky, we figured out how to "cheat" at batik using crayons! (It's not an original idea-- I had seen it done once before on a blog called Suzy's Artsy-Craftsy Sitcom).

This is definitely a do-and-learn project. If you attempt it and have any tips for me, please share!

DIY Crayon Batik
Supplies
Crayons (the perfect way to use up that old box of broken crayons-- my family had two shoeboxes full, but we only used half a box in art class, shared between six or seven batik projects)
Muffin pan (mini muffin pan recommended for lots of colors/mixing)
Heating tray or oven
White cotton fabric
Cold water dye (hot water will melt the wax) and gloves
Cheapie paintbrushes
Iron
Newspaper

Now, the whole idea is that you paint the crayon wax onto the material, crumple it, spray the black dye into the cracks in the wax, and iron the wax off the material. The dye from the crayon will remain, all pretty and bespeckled with the black dye.

And as a bonus, you get these weird flat crayon discs.

I've all sorts of pictures to help you along. :)

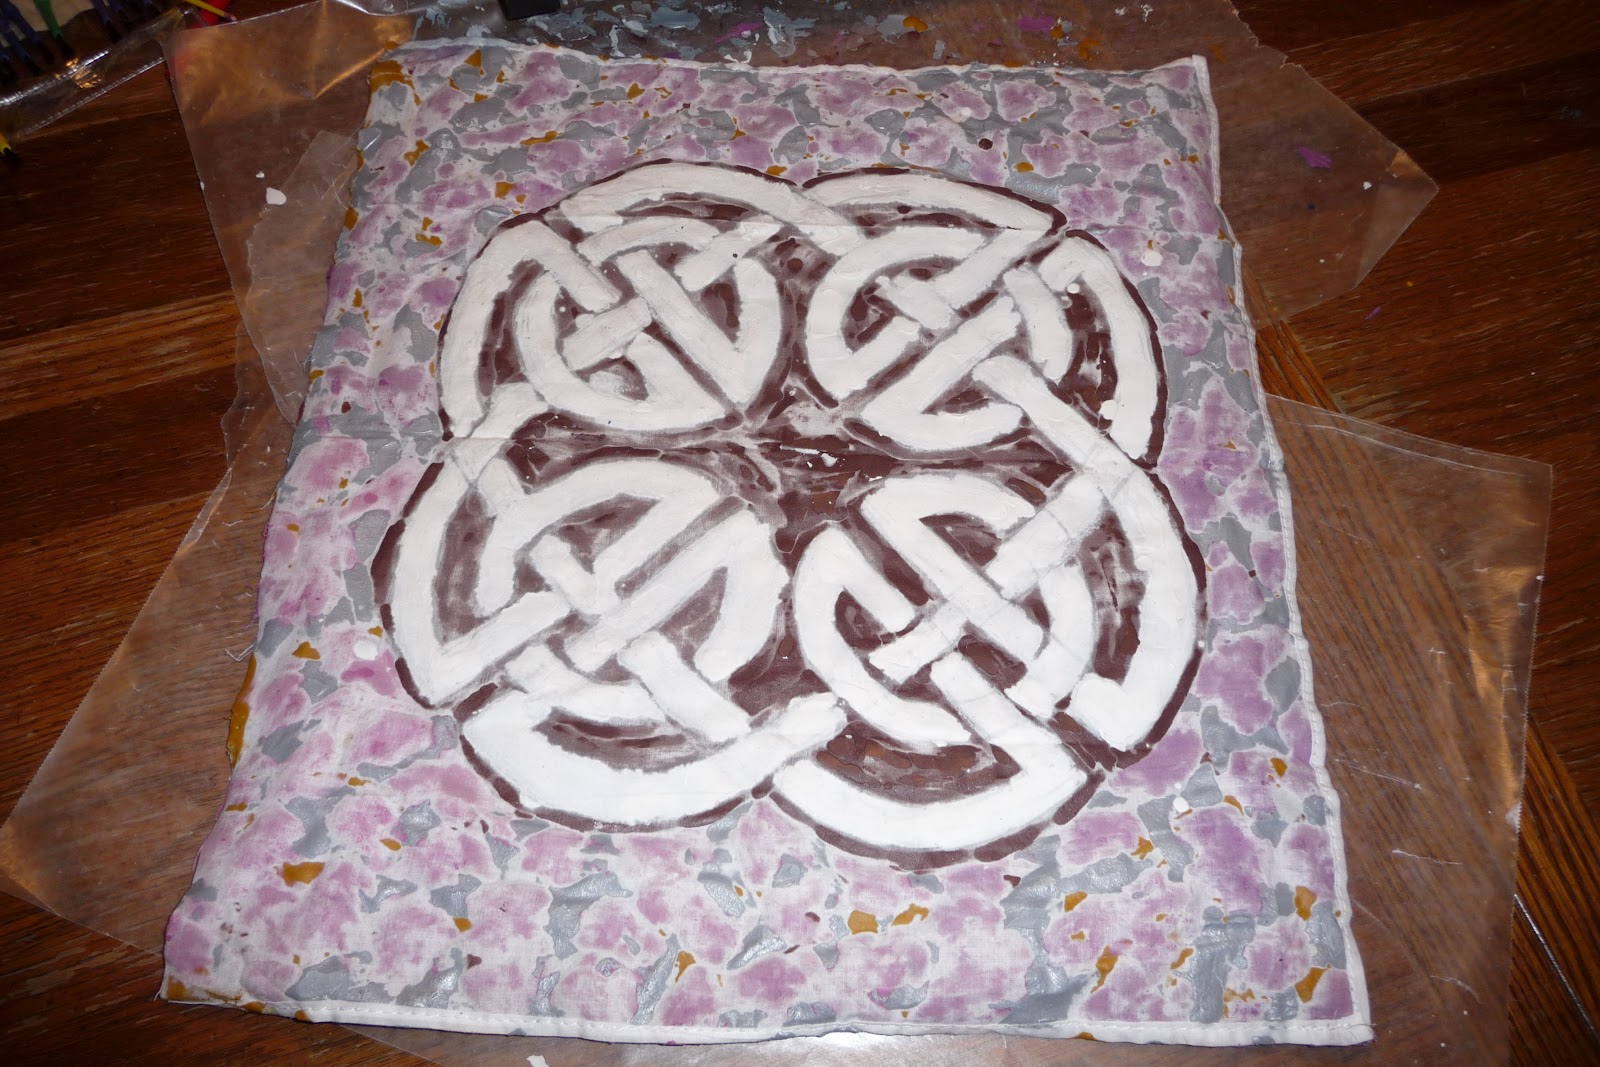
Start by peeling the crayons and putting them in a muffin pan. Melt them on a heating tray (or in the oven-- beware that they will cool quickly in that case). Then prepare your design on the cotton with a pencil.


(At this point I'm going to point out that my Celtic knot is not a real knot because I made several mistakes in the over-under pattern!)

front
back
Use cheap paintbrushes to paint the melted crayon onto the cotton (the paintbrushes will be ruined). Once the wax is on, there is no getting it off-- so be careful! Start with the main design first.


Make sure that the crayon has completely permeated the material. I set the cotton on the heating tray between each color to make sure that the dyes really "set."

This is important! We ruined our first attempts because crayon cools quickly and cool wax just sits on top of the fabric. The color didn't set.

(Melt the most important colors first so they don't bleed together badly).

Front
Back-- notice how very little of the yellow actually permeated the material?
Continue this process until the entire piece is covered with crayon.

This was my first project, a pseudo "Dan-Cheong" based off a Korean style of architectural painting.
 I did not heat the material between colors. Instead, I melted everything all at once and made the colors run together.
Be sure to melt the wax between each color and pay attention because you don't want the colors to run together.


Both of these pictures show crayon batiks by the younger kids. You can see a few of them whose colors ran together. As always, click to enlarge.

Then wrinkle it up!

Every time you wrinkle the fabric, it creates cracks for the black dye to seep into. Don't wrinkle too much or else your final piece will be almost completely black. (Yes, another thing learned the hard way.)
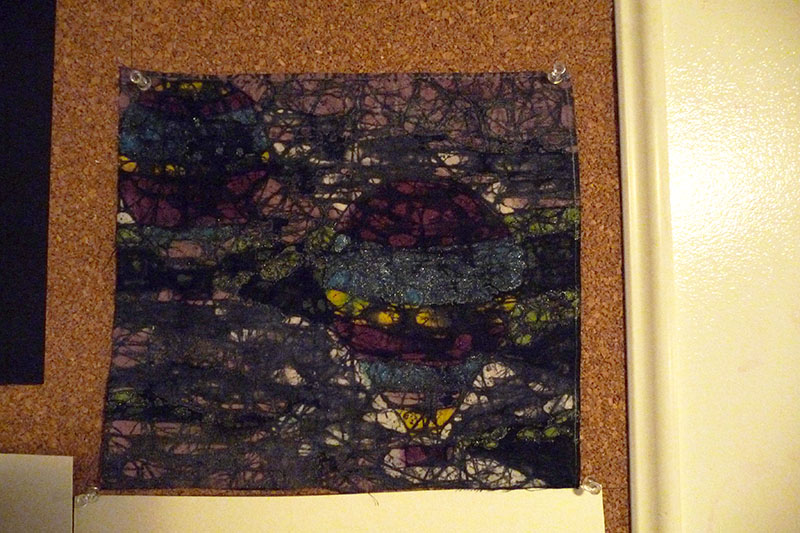
This is my teacher's first project; she crinkled the fabric too much and dipped the material in the dye, rather than spraying the dye. You can barely see the hot air balloons.

Spray the dye onto the material and let it set as per label instructions.

We based this project off of Suzy's and took her advice about cold water dye. You certainly do not want hot water melting your crayon artwork into a big blob!


Next, place the material between layers of newspaper and heat the iron to the highest setting.

Iron the wax out of the cotton.

This is a tedious process. DON'T keep ironing after the wax is showing through the newspaper or you will do what I did and re-melt the wax back into the material, creating a big mess and making colors run. Change the newspaper several times a minute.

Yes, you'll go through a lot of newspaper.

Iron until the fabric loses its stiffness. Rub the material with a paper towel. If no color rubs off, you are good to go.


I haven't tried putting this through the wash. I figure that as long as no color rubs off, it isn't going to stain anything!


Do whatever you want with your handmade art fabric! I turned mine into a decorative pillow, proving that I cannot sew a straight line (it's horribly loppy!). Now my Celtic-knot obsession gets to live on my bed! It even matches my curtains. :)


Enjoy!

17 August 2012

Ear Cuffs: The Bow Tie Technique


Bow ties are cool.

(I'm not going to stop quoting the Doctor until things stop reminding me of the Doctor. I should have made this cuff out of blue wire, then I could have called it the TARDIS Ear Cuff!)

In case you haven't heard of ear cuffs before, they are basically jewelry for your ears that don't require piercings! They are comfier than clip-on or screw-back earrings, and they can range from elegant to funky. You can see a few here on my Shoppe.

Whenever I have a smidge of free time, I'll head to the craft room to tinker. I've been experimenting with different kinds of ear cuffs, and thought I'd share some behind-the-scenes photos! I've got three new techniques and variations figured out already. These posts aren't going to be full tutorials, but hopefully they will inspire you to do some creative tinkering of your own!

Before you go any farther, you'll need to check out the basic ear cuff tutorial and the swirly ear cuff tutorial. You need to be able to make both of those designs with a decent amount of ease before you tackle this not-TARDIS ear cuff.

You'll need:
- 6 inches of 18 ga wire
- needle-nose pliers
-flat-nose pliers
- (optional) 24 ga wire and beads

Cut 6 inches of wire


And create a double-loop bow-tie with your pliers. Use the bottom of your pliers, the widest part, to create the loops. The overlap from both ends should be on the same side.

Experiment with the placement of the bow-tie. The ear cuff will look really different depending on how long those ends of the wire are.

 (I did mention that this is not a full tutorial, right? You're on your own to figure out how to make the loops. It should take less than 5 minutes of playing with the wire to get the hang of it, though, it's really easy).


Take the loose end of the wire on the top of the ear cuff and fold it over along the backside of the bow tie.


Fold the other loose end of the wire (in this case, the 'other loose end' is very clear because it's longer) up along the backside of the bow tie.


(Optional) Fold that same end (in this case, the long length of wire) back down across the front of the bow tie.

If you leave the end of the wire sticking up, the ear cuff will climb up and down the length of your ear. The ear cuff I'm making in this semi-tutorial is only going to climb down the ear.


Now you've made the knot to tie the bow tie up nice and snug; just use some flat-nose pliers to flatten that knot so it's more comfortable.


Ta-da!

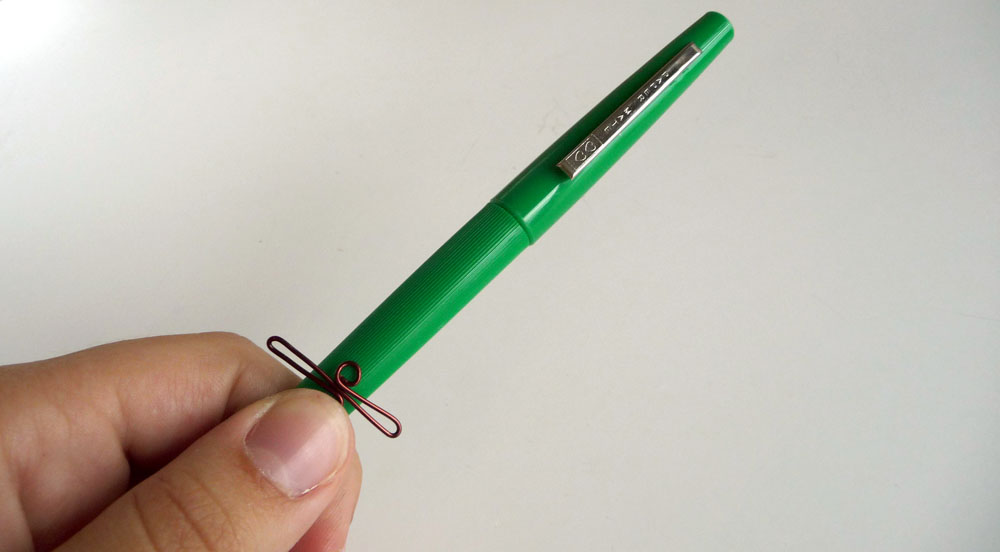
Next, wrap the bow-tie around a marker and tweak it with pliers to make the bow-tie grip your ear comfortably. (The how-to for this step is found in the basic ear cuff tutorial.)


 Next, use needle-nose pliers to swirl the ends of the wire however you would like! (a la the instructions I gave in the swirly ear cuff tutorial).

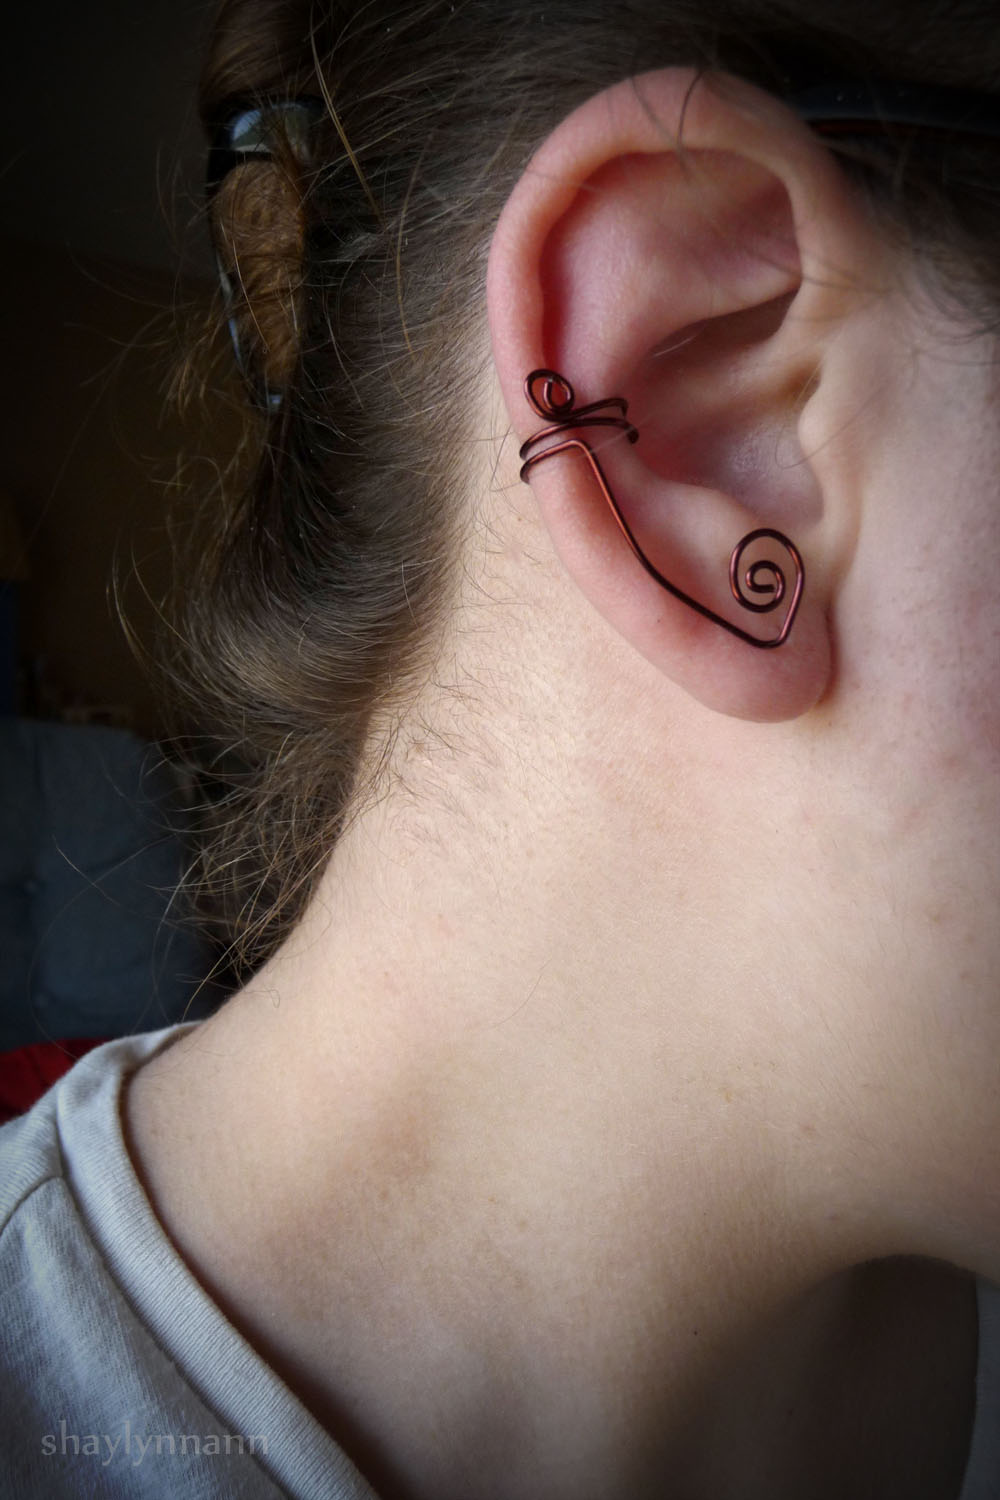
Note that the knot sits on the outside of your ear. The swirls are the only thing that determine which ear the ear cuff belongs on-- unlike the swirly ear cuff, which has to be designed from the start with either the left or the right ear in mind.


Here's a nearly identical one on my ear; you can see that I added a small brown bead to the top swirl and I made the bottom swirl pointier.


You can also take thin 24 ga wire and use that to wrap coils, loops, and beads onto the ear cuff. In this photo, I let the ear cuff 'climb' both up and down my ear.

Voila! Hip hip hooray and happy day! You have a bow tie ear cuff, and bow ties are cool!

(As always, please be sure to reference me if you use this technique in making your own ear cuffs. Thanks!)

17 July 2012

Swirly Ear Cuff Tutorial


This is not the easiest ear cuff tutorial; if you are just getting started, I'd suggest making several of the Simple Ear Cuffs to warm up!

A primer for those unfamiliar with ear cuffs: You don't need peircings to wear these! They slide on to the cartilage of your ear. (Here's a description of the proper way to put on ear cuffs). It's typical to wear only one ear cuff for bold designs, but the simpler ones worn in pairs are great replacements for regular earrings. They are far more comfortable and customizable than clip-on or screw-back earrings!


This swirly design is by far my favorite and it is the best-selling ear cuff style at my Shoppe.


For this tutorial I am using 20 gauge enameled copper wire to make a right-ear ear cuff. My favorite wire to work with for this type of jewelry is silver plated copper; it is pliable enough to bend, sturdy enough to last, and of course is very good quality.


Begin with several inches of wire. The basic swirly cuff needs only 6 inches.


Create zig-zags an inch (or slighly over an inch, depending on your ear type) long, just like I did in the simple ear cuff tutorial.

Add the swirly at the top and bend the bottom wire down. Make sure the swirl and bend are not in the middle of the "arms." At this point, you need to have either a left-ear cuff or a right-ear cuff, or else the cuff won't fit either ear properly. (See the Simple Cuff tutorial for details, study the blue cuff in particular).

Bend the bottom bit of wire at one inch.

(Note: if you want to dangle a bead on these ear cuffs, make sure that the swirl you add in later does not overwhelm this bend. I'm not really sure how to describe this, but you'll notice that I keep the end of the ear cuff pointy. Usually I make it even pointier than I did for this tutorial.)


This is the perfect time to hammer the wire to harden it, if you so desire. Don't hammer the "arms" and make sure you don't harden the wire so much that it becomes brittle. I didn't hammer this example.


Fold around an appropriate marker and use pliers to finish bending the very ends so that the cuff creates a proper circle. (See the other tutorial!)


The finished ear cuff! The left image shows it worn normally (but slightly cricked; I didn't have a lot of patience while taking these photos!) and the right image shows it worn upside down on the "wrong" ear.


You can use a longer piece of wire and add in extra swirls and twists and all kinds of goodies on both the top and bottom.


A couple more fancy designs, click to englarge.


(I did warn you last week that you'd be seeings lots of pictures of my ears! Do you know how difficult it is to get pictures of your own ears???)

This ear cuff (which is on my shoppe) uses interchangeable dangles. You can see that I left the bottom of the swirly extra pointy. On the right you can see that it makes my ear look a little pointy and elvish. :)


This is a double ear cuff set with many interchangable dangles made from Czech glass leaf beads.

It's meant to be worn by people who don't have peircings for normal earrings. I like double ear sets to be very simple and elegant and in neutral colors so that they can camouflage as very unique earrings. Normally when I make bold ear cuffs, I only wear one.

And voila! You are set to make and customize your own ear cuffs! If you make some, leave a comment or send me a picture (shealynnsfaerieshoppe{at}gmail.com), I love seeing what others do with my tutorials. :)

You may use this tutorial to make your own ear cuffs, or your own modified design, for personal use or even for selling. All I ask is that you please reference me (Shaylynn Ann / Shealynn's Faerie Shoppe), and include a link back to my blog where appropriate. I do put a lot of time in coming up with tutorials and offering them for free, so thank you for this courtesy! And if you don't feel like making one of your own, they are available in my Shoppe and can be custom ordered!

04 July 2012

Simple Ear Cuff Tutorial


What you've all be waiting for... an ear cuff tutorial! I've been making ear cuffs for over a year, but unfortunately haven't had the time to make some of the insanely complicated designs I've dreamed up. This, however, is a very simple ear cuff that takes only a few minutes to master!

Ear cuffs (also known as ear clips, cartiliage cuffs, ear vines, and more) are fabulous for people who don't have pierced ears-- or pair them with other earrings for a "double piercing" look. They are easy to wear, and stay in! I wore one on several rollercoasters and it stayed in place. The only thing to watch out for is hair tangling in them; tug your hair, and you might tug off the cuff.
I've had many friends test these ear cuffs and the sizing shown below has fit everyone because it is adjustable.

All you need is pliers and some wire (the pictured wires are 20ga blue silver plated copper and 20ga enameled copper in various colors).


Begin with 3 inches of wire.


Fold at one inch.


Fold again, creating a little zigzag.


Twist the ends into swirls and pinch the swirls until they touch the center wire. Having loops on the far left and right edges makes the cuff more comfortable (so don't pinch the zigzags into a straight line).


You will need a mandel to form the ear cuff correctly. Anything in a good small circle-- I found that this PaperMate marker was the perfect size. Bic pens are too small for some people, and other markers are way too large. Experiment and find what works best for you.


Push the ends down...


The tips of the ends will still be straight. Using pliers, gently twist them to complete the circle.


Tada!


This brown ear cuff fits both ears. The swirly decoration sits on the outside of the cartilage. Next I'll show you have to make an ear cuff specific to one ear-- a very important skill for some of the more difficult ear cuff tutorials I've got planned.


This ear cuff is for the left ear.


You can use a larger length of wire and create bigger swirlies. You can then add a simple wirewrapped bead dangle onto the cuff.


Or, create something a bit more gothy or piratey by adding chain and a stud earring! Be creative!


UPDATE: I've made tutorials for two more ear cuffs, the 'Swirly Ear Cuff' and the 'Double-Loop' style, and I plan on posting step-by-step or behind the scenes shots for some more complex ear cuffs, which you will be able to find here.


As I said before, ear cuffs are not my idea, but this tutorial is. You may use this tutorial to make your own ear cuffs, or your own modified design, for personal use or even for selling. All I ask is that you please reference me (Shaylynn Ann / Shealynn's Faerie Shoppe), and include a link back to my blog where appropriate. I do put a lot of time in coming up with tutorials and offering them for free, so thank you for this courtesy! And if you don't feel like making one of your own, they are available in my Shoppe, and can also be custom ordered!

UPDATE AGAIN: I made a video tutorial! Watch it below, or, if it won't load, here's the YouTube link.

  • bgbgb