02 September 2011

DIY Book Page Necklace Display

Royal Filigree necklace. Find it {here}.

   Once upon a time, in a land quite near you, there was a sixteen year old who made jewelry. She sold the jewelry to make money for art supplies and saving for the big, scary future. She took pictures of the jewelry to put online. She even did a craft fair or two.

     One day, while in the land of A Great Many Supplies, the girl saw a giant tower of shelves-- and upon them were items that she needed: jewelry displays.

     Happily she danced over to the aisle, but her heart fell when she saw the paper tucked inside of the display. Two numbers were writte on it. 2-0.

     For a little cardboard thing.

     Now, that wouldn't do. $20 is a lot. Even with the magic slip of paper that lessened the price... it was too much. So the girl, being learned in the ways of the DIY (do-it-yourself), decided to make it.


Necklace Display Tutorial
You will need:
Cardboard (I used a cereal box)
Scissors
Paper (I used book pages)
Glue (I used Mod Podge)
Tape
Knitting needle or other hard, pointy object
Sewing pin


This project is part of my Creative/Destroyable Books series. See other book crafts {here}.

Trace the shape of the necklace display onto the cardboard.
The front of the cereal box will be the front of the display. Line up your drawing so that the folds of the cereal box align with the folds of the finished display.
Click the image to enlarge it. Hopefully that will help you see the placement and shape of the template. You just have to wing it. Remember, it's just a cereal box and it costs nada, so don't be afraid to mess up.
(After I finished this project, I saw a similar type of DIY display that has a printable template for making the flat shape. Check it out here.)


Cut out the shape that you drew.
Note that my drawing included curvy lines-- don't cut those out, leave those marking for later.
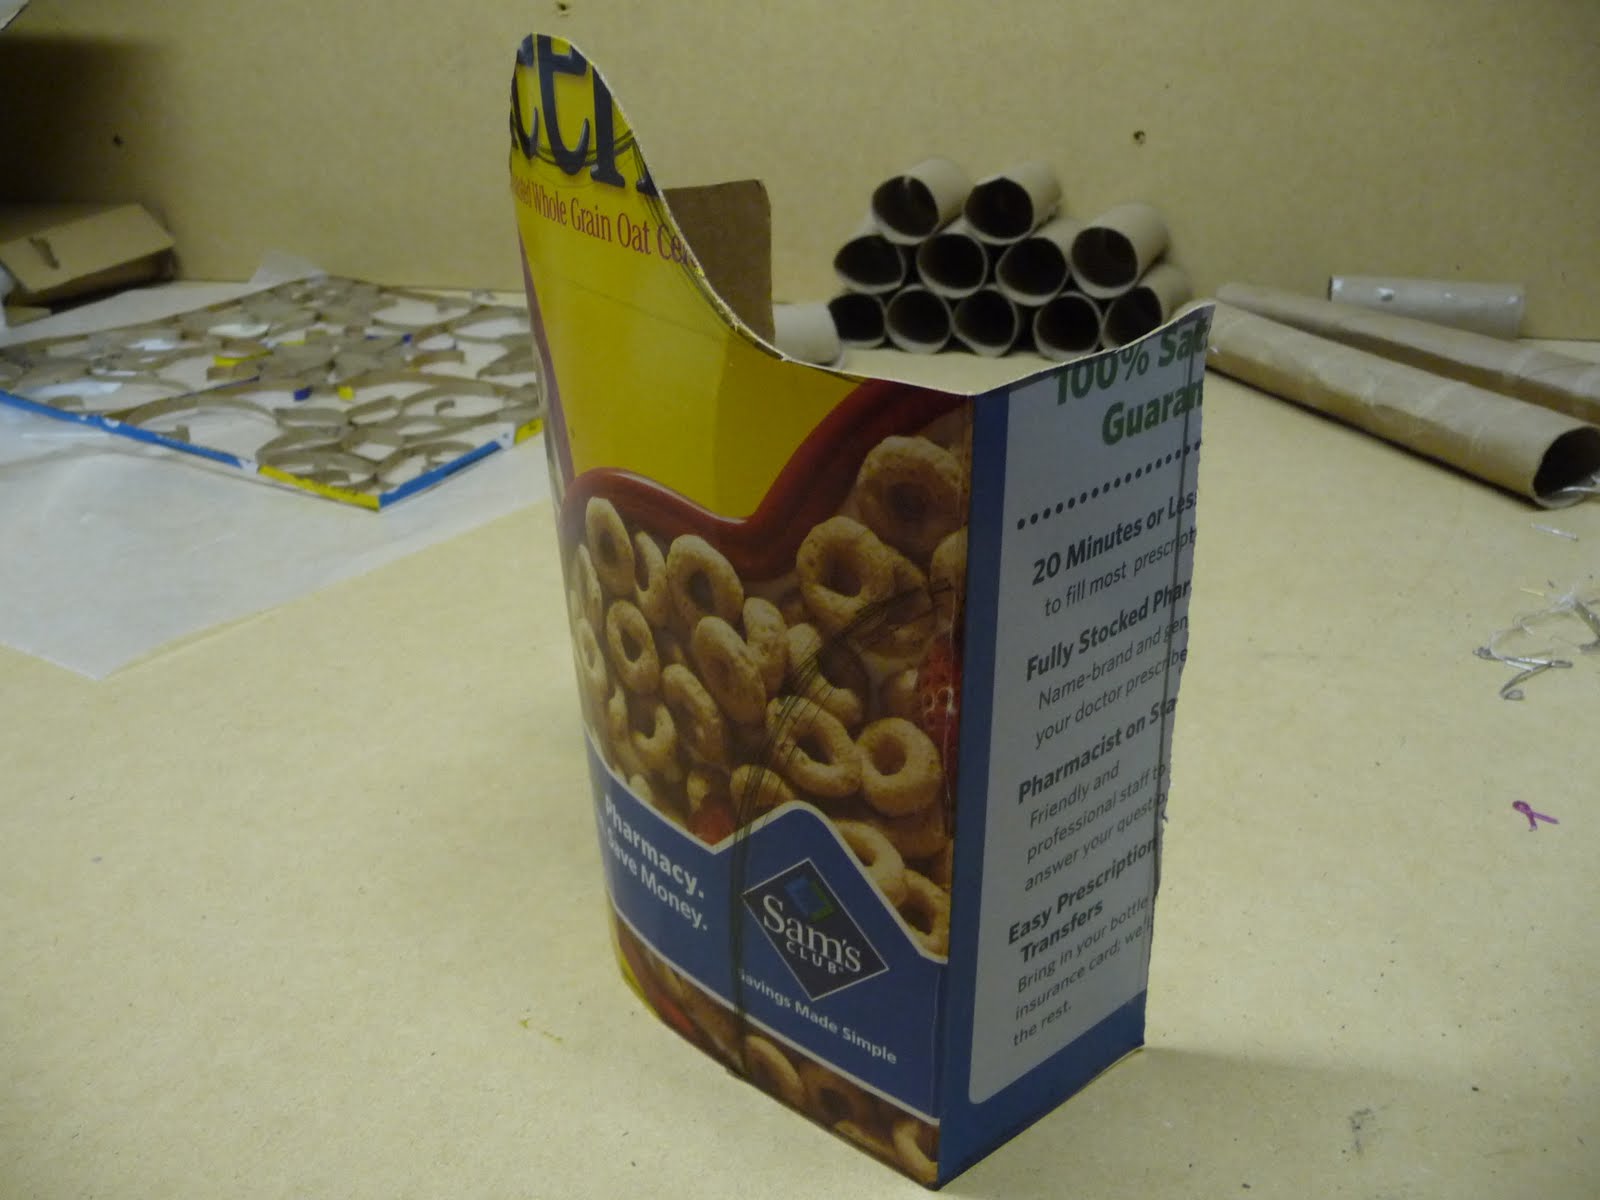
Roll it into a somewhat round shape so that it stands on its own.
(Sidenote: see those toliet paper rolls? I made some pretty cool wall art with them. Check it out here!)


Remember those curvy lines I told you not to cut out? Trace over them with a knitting needle. I found that I had to trace them over on the front and then again on the back.

The knitting needle dented the cardboard so that it is easy to fold the curvy lines back. This makes the display more stable and pretty.

Secure the back with tape.
The Cheerios box isn't exactly pretty, now is it? Let's resolve that.
Grab a Destroyable Book and tear out some pages.
Then tear up the pages.:)
Decopauge the paper bits onto the Cheerios box necklace display.
(Put on a layer of glue, set down a piece of paper, put more glue over that, overlap another piece of paper, etc, etc.)

I thought that the book pages stood out too much, so once the glue had dried, I painted on a light layer of white gesso (acrylic paints works too).
Chainmaille cross necklace. . Email me if you want to know why. 
Ta-da! A beautiful, DIY necklace display.
(And in my opinion, book pages are waaaaaay cooler than the boring black velvet and stark white plastic that I saw in the Land of a Great Many Supplies).
Rivendell Twilight necklace. For sale {here}.
.

P.S. Sorry this is a day late. As I mentioned in my last post, I am being haunted by the evil Blue Screen of Death and the computer is being pickley. :)
By the way, a question for you dear blog readers: should I keep doing Sketchbook Tours? I have several more videos made, but my four most recent sketchbooks haven't been filmed yet.

29 August 2011

Glorious Old Supplies

First off, I wanted to let you all know that I had several great posts planned for over the weekend/ early this week. More sketchbook tours, more bookart, more new jewelry designs...

But I am being haunted by the Mysterious Blue Screen of Death.


A couple of weeks ago, we were unpacking some more moving boxes and I found a treasure trove of interesting supplies. I snapped some pictures and am uploading them (unedited) via the back computer. I have thus won one small victory over the Terrible Blue Screen of Death.


This is what we found:


Mom actually got it at a garage sale a few years ago.

It's engineering drafting tools. You know, from those dark ages before computers. Or at least before computers that could do design work.

This is the same sort of stuff that my parents used in high school and college.

Weird. :)


Apparently engineers had to be artists. Just look at this glorious collection of pencils! Sharpened to an inch tall... these are well loved pencils with lots of history.

And just look at that pencil tin! I wish that artist pencils were still sold in tins rather than cardboard and plastic.

There is also a really bizzare pencil in the mix. Mom calls it an old style of mechanical pencil. It is a wooden pencil with an interesting, albeit broken, mechanism in the hollow part.


This is when I got really excited. Old watercolors... sandpaper stacks for sharpening pencils... an interesting bottle of ink (with the labeling all auf Deutsch, in German), a horsehair brush, and a strange pillow of white sandy stuff.

The sandpaper is going to be super useful, and I was excited to find the horsehair brush. It is good for brushing eraser bits off of drawings without smearing pencil lines.

Mom says that the interesting pillow thing with white sandy stuff is used in a similar way: you rub it onto your drafting work to keep the graphite on and other things off. I don't get it, though. Why would you want to get white sandy stuff all over your artwork drafting work?


Rulers and a huge assortment of thingamabobs. I know what those thingamabobs are called. Honestly, I do! Mom and Dad have many old ones that we kids love to play with.

The word is on the tip of my tounge, but is playing hide and seek with my brain.

I do know what they are called.


Here are a few of the more interesting thingamabobs. The only one I recognize is the well-loved French Curve. The top thingamabob is all swirly and pretty. Me likey.

The middle thingamabob is a lettering guide. It had instructions taped onto it: they are very confusing. o.O It makes me glad that I have Photoshop (well, I would have a working Photoshop if I weren't haunted by the Blue Screen of Death)-- if I want to add lettering to anything, I can just type it in and move the text wherever I want.

However, I'm going to learn how to use the confusing-looking-lettering-guide. It might prove to be useful for calligraphy! (The real calligraphy. The kind that doesn't use a computer.)

(Ha. Take THAT, Mr. Evil Blue Screen of Death. I have thwarted your plans. I have posted on my blog. A quick and rambling and mildly uninteresting post, but a post nonetheless.)

24 August 2011

Book Clock {Tutorial}


For someone who is as obsessed with books, like I am, you can't beat this piece of time-telling art.

It has graced my bedroom for months, showing off my bookishness, geekiness, and craftiness (and all of that adds up to awesomeness, yes? lol, now I sound like my brothers).


You can see more of my Destroyable Book projects {here}, and more of my DIY bedroom decorating {here}.


You will need:

  • a Destroyable Book
  • and Xacto or utility knife
  • a clock movement (buy one from the store or gut an old clock)
  • Mod Podge or other glue


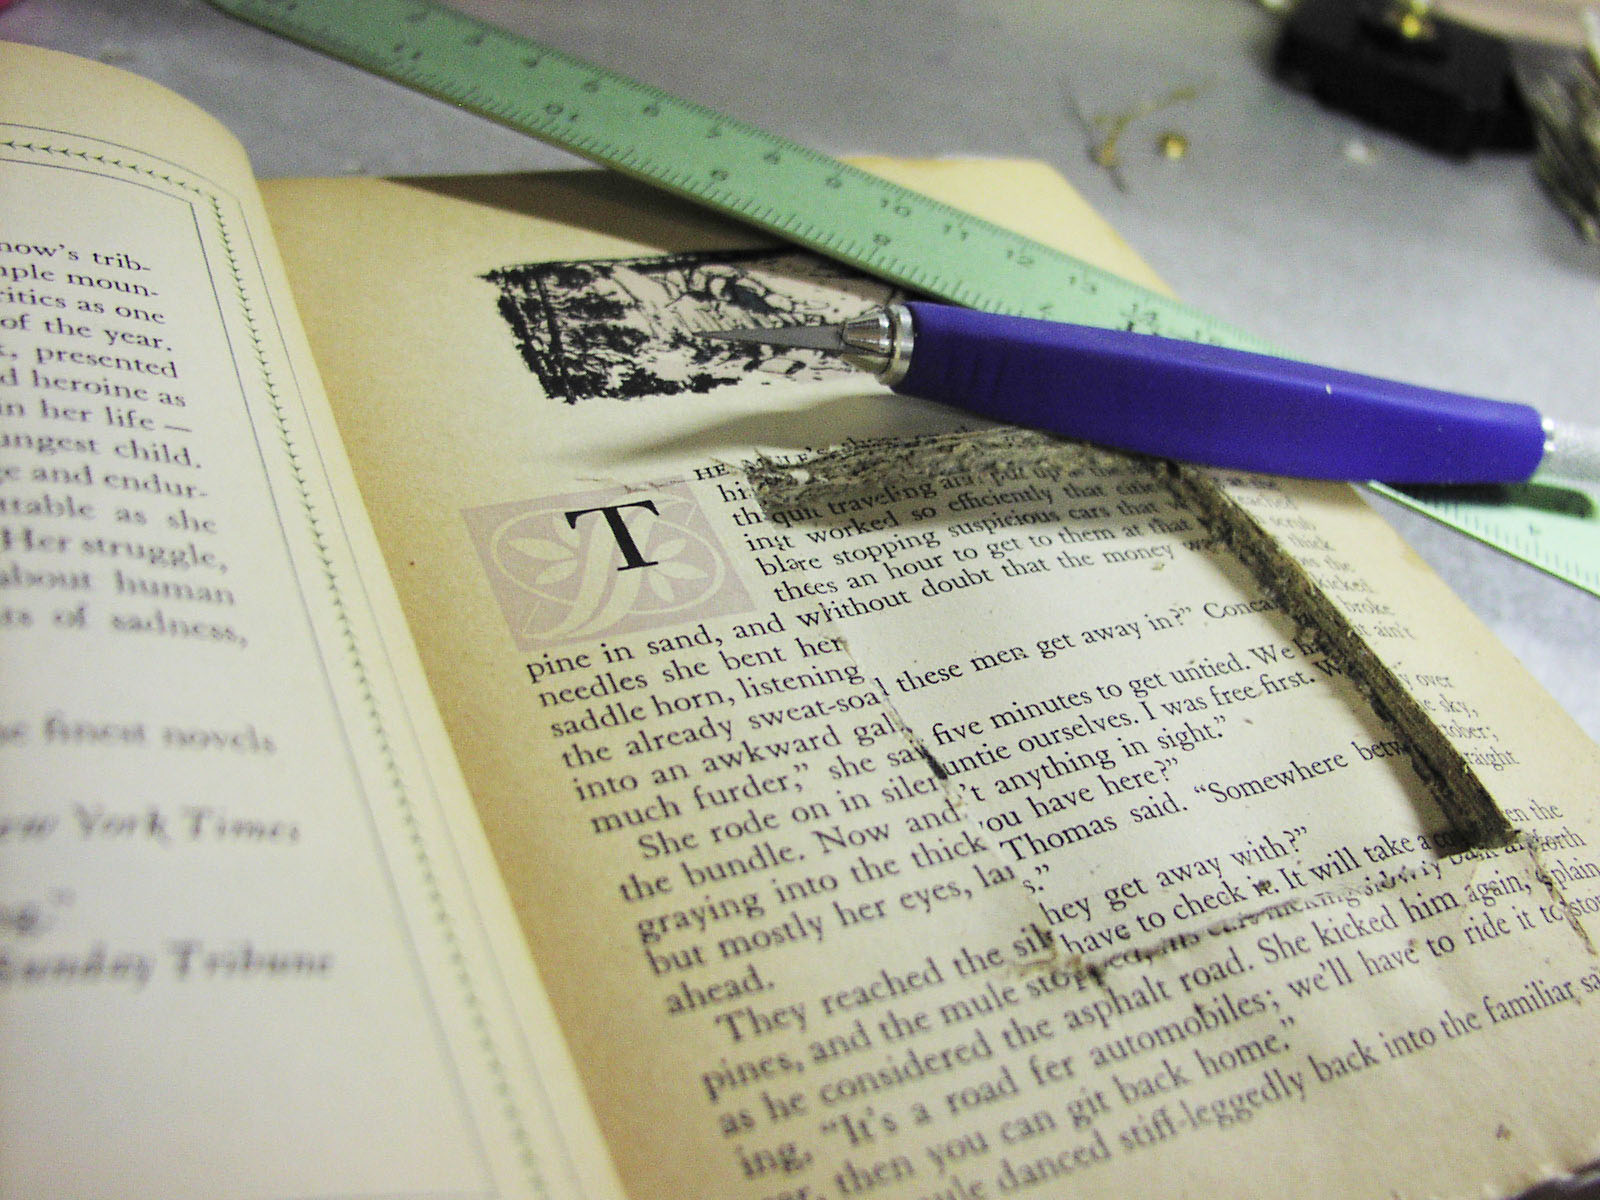
This tutorial will be mostly pictorial, since much of it is quite redundant to the Secret Book Box that I made recently. If you are confused about any step, please refer to the post on how to make a hollow book, or leave a comment.


Gather your materials


Figure out where you want the clock to be situated.


The next few pictures show me hollowing out a hole in the book. These are the same steps used to create the Secret Book Box. In just a few words, I cover the cover and a few pages with plastic (from a shopping bag), glue the edges of the book pages together, and use an X-acto knife to cut out the hole.


(You also have the option of gluing after you have cut out the hollow portion. You can glue from the inside of  of the book so that from the outside, the book doesn't look like it has any glue on it.)


If the pictures didn't make sense, the instructions for making a hollow book are {here}.

Note: I had some difficulty aligning my clock with my hole, as you will see. If you run into this problem, you can simply make the hole larger to allow more wiggle room. No one said that the hole has to be the size and shape of your clock movement!


Make a hole where the clock hands will go. I did this without any fancy tools; just lots of muscle, a stray nail to poke the hole, and a pencil to enlarge it.


The next few photos show how I "cleaned up" the hollow part of the book:


At this point, I realized that the hole in the cover, the hollow part of the book, and the clock movement did not line up. Ooops.


Rather than cut out more of the book to scoot the clock movement over to the right by a few centimenters, I just made the hole in the cover bigger.


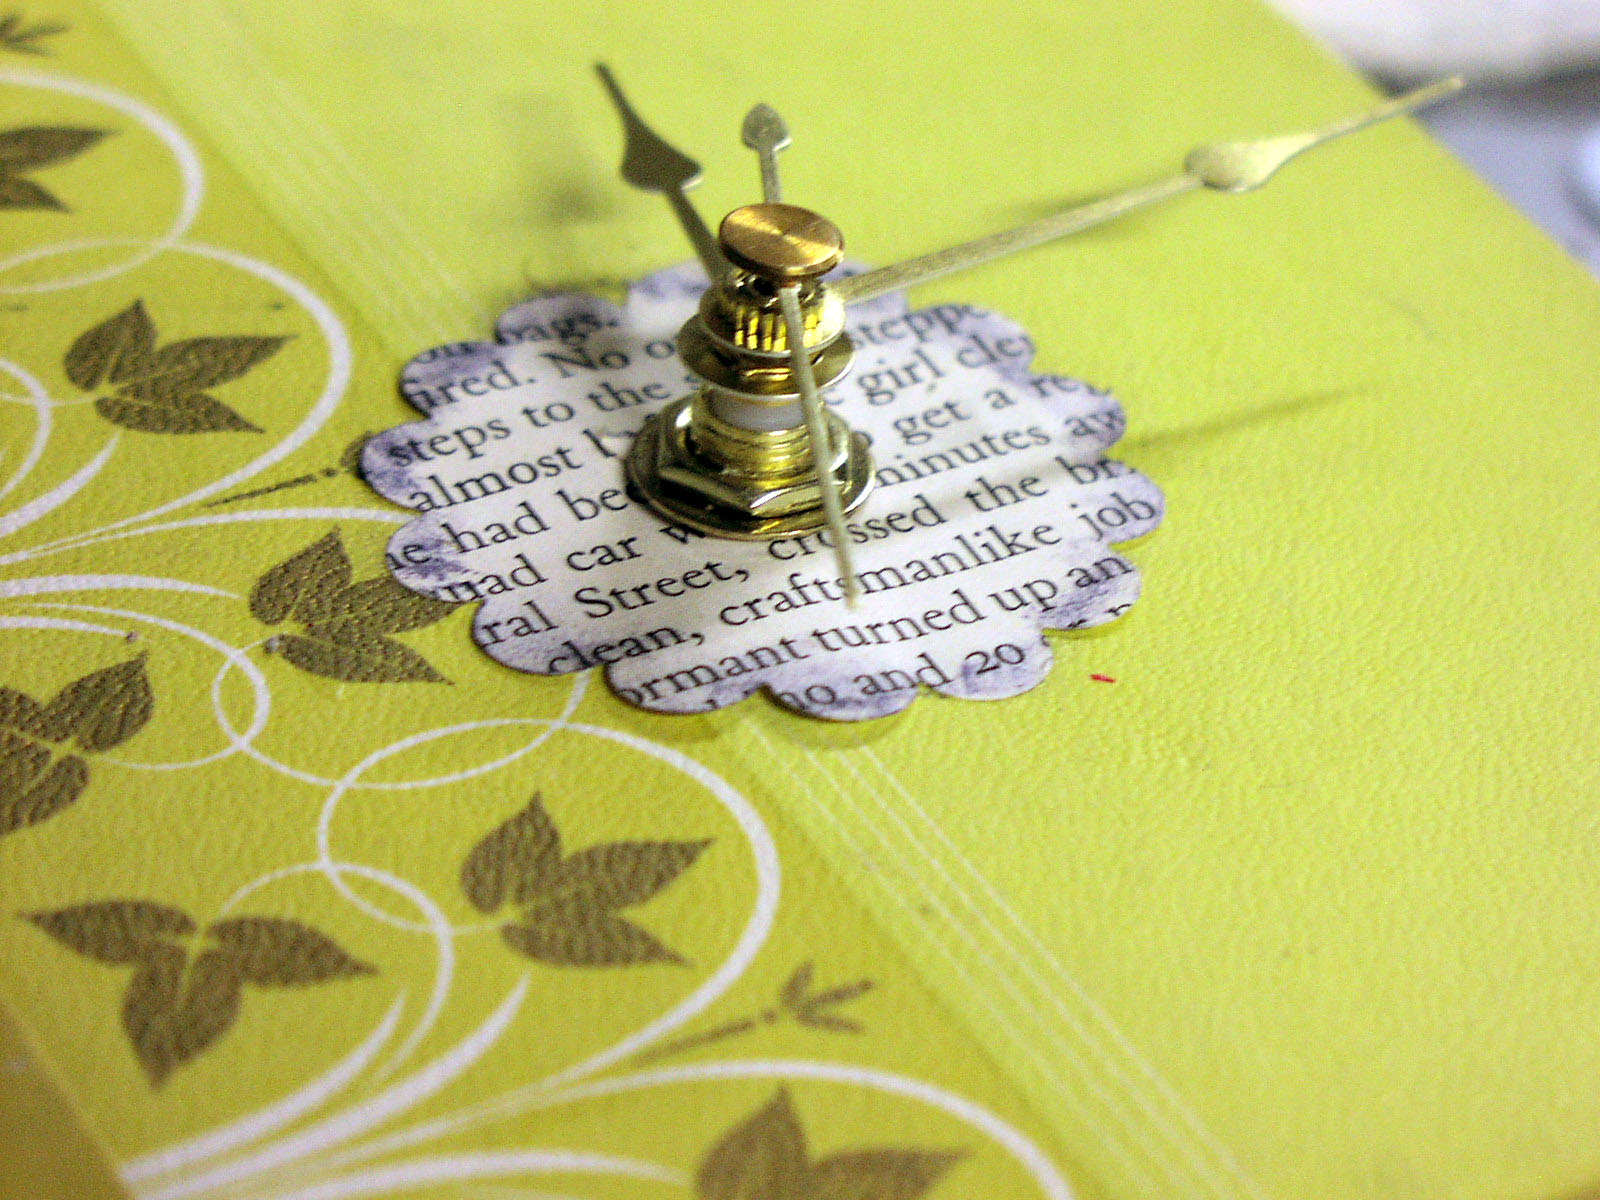
You won't believe how long it took me to figure out how to screw the clock movement together! I was having a totally "duh" day... In case any of you are having such a day, here is a photo to show you how it is done. :)


Because I had to adjust the size of my hole, it was too big and did not look very handsome. I decided to cover it up-- I just used a paper punch to punch out a page from the book.


Ta-dah! A finished Book Clock!


As you can see here, I added some brown paint to the clock hands. It helps them stand out more from a distance.

I might be something of an anomaly as far as sixteen year old girls go-- I can actually tell time on an analog clock without any problem.
However, if you want to mark off the numbers on the clock, feel free to!
You can use those flat thumbtacks (if you get the white ones, you can even decorate them with Sharpies). You could use number stickers.... miniature paper mustaches.... whatever you want!


P.S. Were you inspired to make something using the tutorial? Please leave a comment, I'd love to see it! 

23 August 2011

Confessions of a Teenage Caduceuturg


I would like to introduce you to Kat, guest blogger for today. She is a lovely Christian young lady, with bright red hair and a love of Tolkien, Anne of Green Gables, and more. 
(In other words, she is pretty awesome).

Today she is going to share with us the story of the wands that she makes with her family!
 .
(I know that many of my blog readers are vehemently anti- or outspokenly pro- Harry Potter. I'd like to ask that we don't go into that discussion here... However, if you, like me, love HP, then please read on! Kat's story is brilliant!)
.
P.S. In the picture, Kat is wearing her prom gown... with jewelry that I made! Eeep!
                            Also, be sure to  check out her blog, Carrots!


 Confessions of a Teenage Caduceuturg

Oh, I know what you're all wondering: What on Middle Earth is a "caduceuturg?" Well just hold your hippogriffs and we'll get to that.

This all started more than a year ago now, around January of 2010, all because I wanted to make my cousin (we'll call her "Hermione) a wand for her birthday in March. I started sketching out designs, and then asked my dad (hereafter labeled "He-Who-Can-Do-Anything") for help with the specifics.

The first step--planning and design


Hermione's wand: Linden and Dragon Heartstring, 9.65 inches.

I continued working on Hermione's wand, but really didn't think that much of it until my own birthday in February.

My family and I were all in the dining room for my birthday dinner when my brother looked out the window and said, "Is that an owl?" He then went around to the door, and returned with a package. A brown-paper-wrapped package. With a label on it. And the label had not only my name and street address, but also the exact room we were in. Now almost hyperventilating with excitement over the best prospective birthday gift ever, I tore off the packaging to reveal this:


That's right, folks. My dad had made me a wand--Willow and phoenix feather, 8 and three-quarter inches. And from there, things kind of went crazy. My dad created three separate wand companies with three distinct styles and started churning out unique, hand-made wands like mad.
H.L. Gryphon and Sons (Purveyors of Fine Magical Mercantiles since 1327) use a shaft-and-handle construction like mine and Hermione's.


Wilkinson and Silverwood make turned wands on the lathe.


Greensward of Glencoe specializes in single-piece nature-inspired wands.


Dad made wands for every member of our extended family, and then we started selling them. Dad took them to his work, and I was the official vendor at my high school. The reception was fantastic--especially around Christmas and, oh, November 18th. (The day of the premiere of Harry Potter and the Deathly Hallows: Part 1). In fact, that week we completely sold out! Dad calls himself a caduceator, using the Latin word "caduceus," meaning "wand." 


Now, Dad's the real craftsman here; he makes every single wand himself (except for my friend "Bellatrix," whose wand was made by my brother.) But I myself got more and more involved--after all, I did inadvertently start the whole thing. I was head saleswoman, but after a bit I was also head...consultant? Wand-lore-and-Harry-Potter-expert? C'mon, I needed a cooler name than that! Caduceuturg. Yep, that'll about fit the bill...and, ok, so it does just mean wand-expert...but it sounds all cool and Latin, right? Right. 


Here's what I do. In general, I'm in charge of wand description--I measure them, choose the cores, and make sure anything that's Harry Potter-related is accurate.  (That last bit has become less necessary as we started selling them--copyright issues, you know.) I get to experiment with lots of fun terms, too: "variegated walnut," "power nodes," "engraved pommel." Wands have endless invented vocabulary. Usually, though, I'm an employee of Wilkinson and Silverwood's. We specialize in "historical" wands--that is, we make them, but they come with certificates detailing their long and no doubt glorious past. And I'm in charge of writing those certificates. I research some minor historical figure, usually an alchemist or something of that kind, from a few hundred years ago or so, and then invent names and dates and events all about how the wand came to be in the possession of its current lucky owner. You may now admit that I have the coolest job in the world. 
  
The three most common wand cores: Dragon Heartstring, Phoenix Feather, and Unicorn Tailhair.

The certificate which accompanies a W&S wand.


As of right now, we only sell wands ourselves. I keep telling Dad that he should open a shop on the internet--so many people would want one of these! They're completely one-of-a-kind, handmade, can be personalized, and they're much cheaper than any other wands out there. Dad's worried about the time it would take to keep an internet shop up, but who knows? Maybe if enough people expressed interest, it could win him over.
  
My wand--shaft, handle, and core---in the first phases of construction.

My brother's wand, modeled partly after the Elder Wand as depicted in the Harry Potter movies.

 (Hi, it's Shaylynn again. Thank you so much, Kat, for your lovely blog post! I'm sorry it took me so long to get it up-- for some reason, Blogger wouldn't let me upload photos for a long time. Hence the reason that this post, which I wanted to schedule for Friday, wasn't actually published until today, Tuesday....)

  • bgbgb