12 September 2011

Pinning Pictures of Inspiration


Have you heard of Pinterest?
It's a "visual bookmarking site." I'm totally addicted.

It's exactly what I need (I used to rely on my brower's bookmarks toolbar, but that makes it hard to find projects and artwork-- Pinterest's "picture pinning" is much easier), but at the same time, it's exactly what I don't need (another time killer because I enjoy spending waste time browsing other people's pins).


Please check out my Pinterest boards to see the things that have been inspiring me lately!
Follow Me on Pinterest

Pinterest is still in Beta mode, so if you would like to join the fun, email me at ShealynnsFaerieShoppe{at}gmail{dot}com and I'll send you an invite. :)

08 September 2011

Guest Blogging!

Today I'm guest blogging over at Polish the Stars!

Head on over to learn how to make a super-easy Floating Bookshelf!

Thank you, Megan, for asking me to guest blog! :D And for the birthday wishes!

06 September 2011

Sketchbook Tour-- Frodo Baggins

If my last post, full of recent drawings, is not enough art for you... here's the latest sketchbook in my Sketchbook Tours! All drawings done by an 11-12 year old me.

Why did I name this sketchbook Frodo Baggins? Well, Frodo Baggins is far more interesting than Sketchbook Number Five from Five Years Ago. Plus, there is a drawing of Frodo Baggins on the last page, and it is a drawing that I was/am very proud of.


(wow-- has it seriously been five years since I drew in this sketchbook? It feels like yesterday. Goodness. I'm 16. I shouldn't be feeling like an old lady).
I was not feeling the best when I made this video. This means there is a distinct lack of goofiness...
A good rule of thumb: If I am not hyper/goofy/crazy, I am generally sick/tired/doing school/cleaning.

Hopefully my cute little brother's appearance will alleviate your misery concerning my obvious lack of insanity.


P.S. Perhaps one of my technical-minded readers could explain to me why all of my videos have a large black border around them when I upload them to YouTube?

03 September 2011

Colored Pencil on the Ceiling

"Lying in bed would be an altogether perfect and
supreme experience if one only had a coloured pencil long enough to draw on the ceiling."
~G.K. Chesterton
I love those weeks when the world sparkles with new beauty hidden in every mundane corner... just begging me to draw, draw, draw, and draw.

School has already been going for four weeks, and I've had several other projects keeping me busy, but an artist just can't resist the call of pens and pencils. :)

So, here are a few of the drawings I've done over the past month! Enjoy, and I hope you have a great holiday weekend! I'll be off spending my free time making some jewelry and drawing when I'm not hanging with friends and family!

(click to enlarge. the first nine are on deviantart-- click the image for a description!)
unfinished frontispeice for my sketchbook.
A comic for each hour of the day


A 3cm drawing of Samwise Gamgee.
(Facebook fans are familiar with this drawing-- only a few people guessed who it was! I need to work on miniature drawings, methinks.)


 Erm.... a self portrait. Have pity on me! It was my first real project at art class-- and my first time trying to draw me in a mirror-- and I hadn't touched chalk pastels for... I think literally for years. :) So have mercy on me... can you tell that chalk pastels don't like to co-operate with me?!

(eeep! you guys know I'm taking art classes now, right? i'm so excited, i've never done them before and my teacher is amazing! the watercolor painting above the self-portrait was done at art class, too.)


02 September 2011

DIY Book Page Necklace Display

Royal Filigree necklace. Find it {here}.

   Once upon a time, in a land quite near you, there was a sixteen year old who made jewelry. She sold the jewelry to make money for art supplies and saving for the big, scary future. She took pictures of the jewelry to put online. She even did a craft fair or two.

     One day, while in the land of A Great Many Supplies, the girl saw a giant tower of shelves-- and upon them were items that she needed: jewelry displays.

     Happily she danced over to the aisle, but her heart fell when she saw the paper tucked inside of the display. Two numbers were writte on it. 2-0.

     For a little cardboard thing.

     Now, that wouldn't do. $20 is a lot. Even with the magic slip of paper that lessened the price... it was too much. So the girl, being learned in the ways of the DIY (do-it-yourself), decided to make it.


Necklace Display Tutorial
You will need:
Cardboard (I used a cereal box)
Scissors
Paper (I used book pages)
Glue (I used Mod Podge)
Tape
Knitting needle or other hard, pointy object
Sewing pin


This project is part of my Creative/Destroyable Books series. See other book crafts {here}.

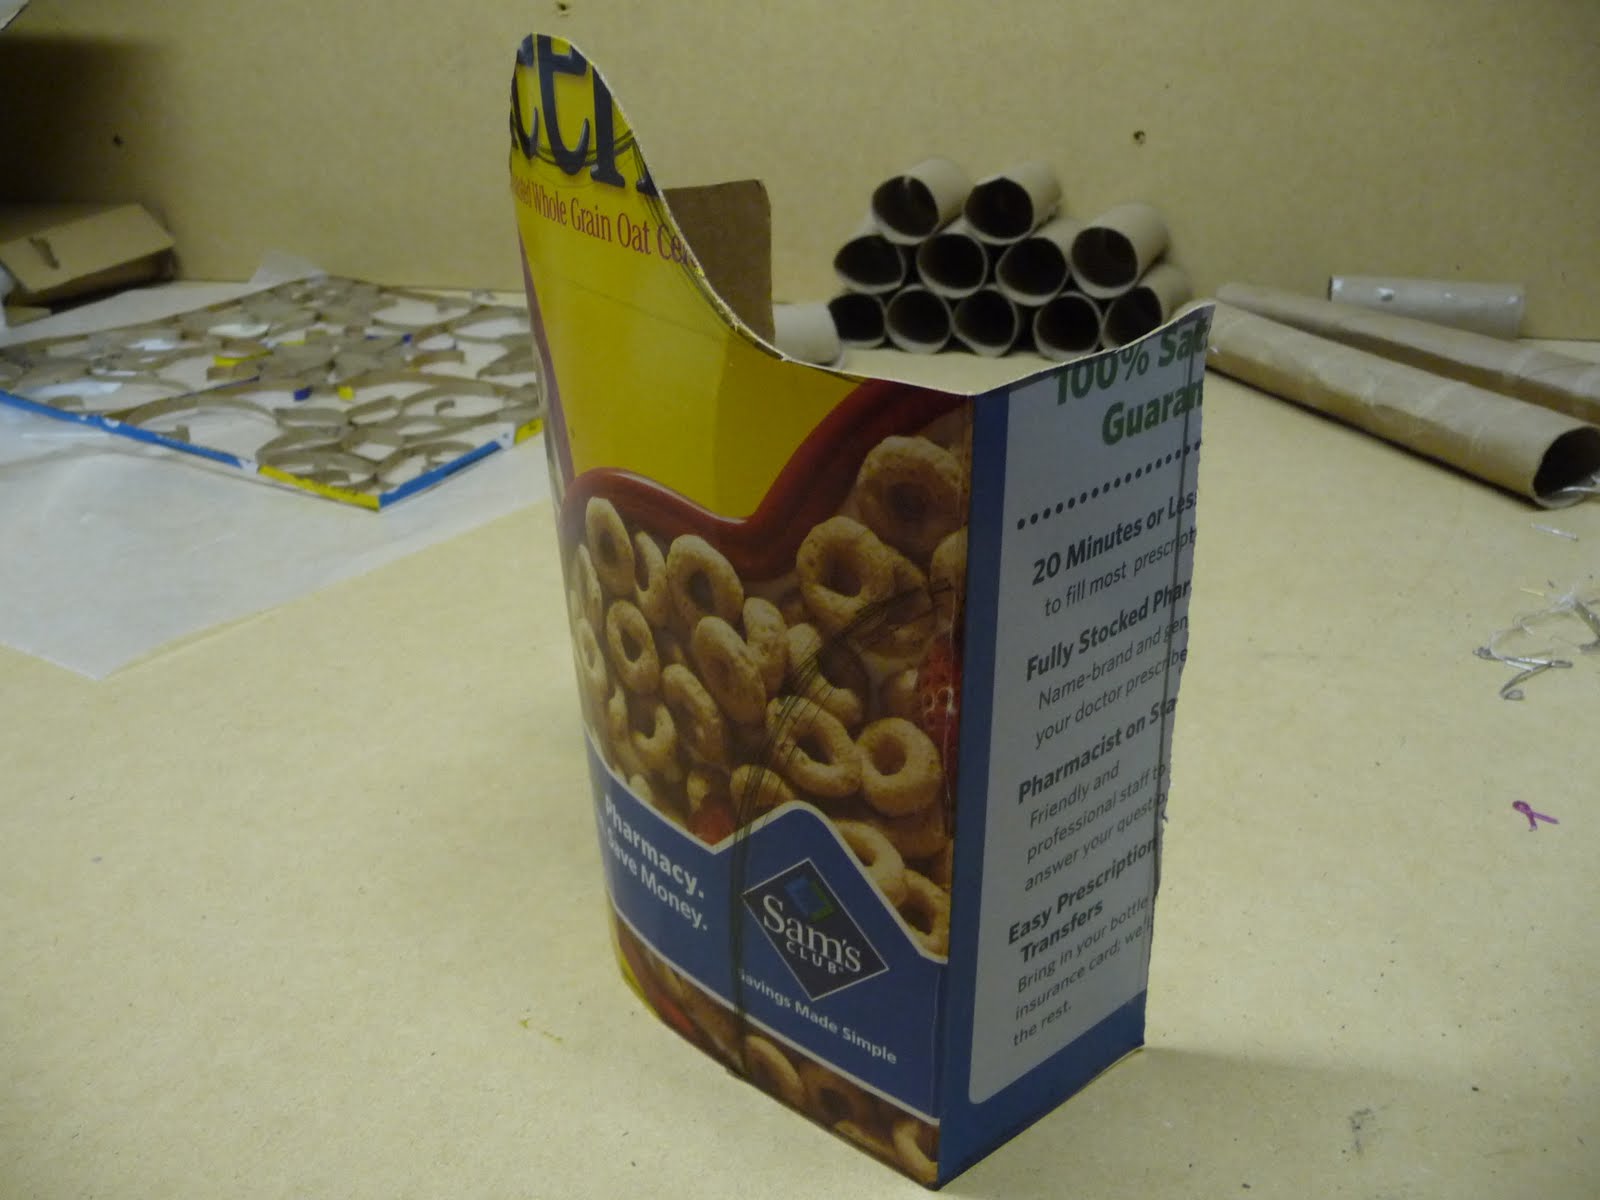
Trace the shape of the necklace display onto the cardboard.
The front of the cereal box will be the front of the display. Line up your drawing so that the folds of the cereal box align with the folds of the finished display.
Click the image to enlarge it. Hopefully that will help you see the placement and shape of the template. You just have to wing it. Remember, it's just a cereal box and it costs nada, so don't be afraid to mess up.
(After I finished this project, I saw a similar type of DIY display that has a printable template for making the flat shape. Check it out here.)


Cut out the shape that you drew.
Note that my drawing included curvy lines-- don't cut those out, leave those marking for later.

Roll it into a somewhat round shape so that it stands on its own.
(Sidenote: see those toliet paper rolls? I made some pretty cool wall art with them. Check it out here!)


Remember those curvy lines I told you not to cut out? Trace over them with a knitting needle. I found that I had to trace them over on the front and then again on the back.

The knitting needle dented the cardboard so that it is easy to fold the curvy lines back. This makes the display more stable and pretty.

Secure the back with tape.
The Cheerios box isn't exactly pretty, now is it? Let's resolve that.
Grab a Destroyable Book and tear out some pages.
Then tear up the pages.:)
Decopauge the paper bits onto the Cheerios box necklace display.
(Put on a layer of glue, set down a piece of paper, put more glue over that, overlap another piece of paper, etc, etc.)

I thought that the book pages stood out too much, so once the glue had dried, I painted on a light layer of white gesso (acrylic paints works too).
Chainmaille cross necklace. . Email me if you want to know why. 
Ta-da! A beautiful, DIY necklace display.
(And in my opinion, book pages are waaaaaay cooler than the boring black velvet and stark white plastic that I saw in the Land of a Great Many Supplies).
Rivendell Twilight necklace. For sale {here}.
.

P.S. Sorry this is a day late. As I mentioned in my last post, I am being haunted by the evil Blue Screen of Death and the computer is being pickley. :)
By the way, a question for you dear blog readers: should I keep doing Sketchbook Tours? I have several more videos made, but my four most recent sketchbooks haven't been filmed yet.

29 August 2011

Glorious Old Supplies

First off, I wanted to let you all know that I had several great posts planned for over the weekend/ early this week. More sketchbook tours, more bookart, more new jewelry designs...

But I am being haunted by the Mysterious Blue Screen of Death.


A couple of weeks ago, we were unpacking some more moving boxes and I found a treasure trove of interesting supplies. I snapped some pictures and am uploading them (unedited) via the back computer. I have thus won one small victory over the Terrible Blue Screen of Death.


This is what we found:


Mom actually got it at a garage sale a few years ago.

It's engineering drafting tools. You know, from those dark ages before computers. Or at least before computers that could do design work.

This is the same sort of stuff that my parents used in high school and college.

Weird. :)


Apparently engineers had to be artists. Just look at this glorious collection of pencils! Sharpened to an inch tall... these are well loved pencils with lots of history.

And just look at that pencil tin! I wish that artist pencils were still sold in tins rather than cardboard and plastic.

There is also a really bizzare pencil in the mix. Mom calls it an old style of mechanical pencil. It is a wooden pencil with an interesting, albeit broken, mechanism in the hollow part.


This is when I got really excited. Old watercolors... sandpaper stacks for sharpening pencils... an interesting bottle of ink (with the labeling all auf Deutsch, in German), a horsehair brush, and a strange pillow of white sandy stuff.

The sandpaper is going to be super useful, and I was excited to find the horsehair brush. It is good for brushing eraser bits off of drawings without smearing pencil lines.

Mom says that the interesting pillow thing with white sandy stuff is used in a similar way: you rub it onto your drafting work to keep the graphite on and other things off. I don't get it, though. Why would you want to get white sandy stuff all over your artwork drafting work?


Rulers and a huge assortment of thingamabobs. I know what those thingamabobs are called. Honestly, I do! Mom and Dad have many old ones that we kids love to play with.

The word is on the tip of my tounge, but is playing hide and seek with my brain.

I do know what they are called.


Here are a few of the more interesting thingamabobs. The only one I recognize is the well-loved French Curve. The top thingamabob is all swirly and pretty. Me likey.

The middle thingamabob is a lettering guide. It had instructions taped onto it: they are very confusing. o.O It makes me glad that I have Photoshop (well, I would have a working Photoshop if I weren't haunted by the Blue Screen of Death)-- if I want to add lettering to anything, I can just type it in and move the text wherever I want.

However, I'm going to learn how to use the confusing-looking-lettering-guide. It might prove to be useful for calligraphy! (The real calligraphy. The kind that doesn't use a computer.)

(Ha. Take THAT, Mr. Evil Blue Screen of Death. I have thwarted your plans. I have posted on my blog. A quick and rambling and mildly uninteresting post, but a post nonetheless.)

24 August 2011

Book Clock {Tutorial}


For someone who is as obsessed with books, like I am, you can't beat this piece of time-telling art.

It has graced my bedroom for months, showing off my bookishness, geekiness, and craftiness (and all of that adds up to awesomeness, yes? lol, now I sound like my brothers).


You can see more of my Destroyable Book projects {here}, and more of my DIY bedroom decorating {here}.


You will need:

  • a Destroyable Book
  • and Xacto or utility knife
  • a clock movement (buy one from the store or gut an old clock)
  • Mod Podge or other glue


This tutorial will be mostly pictorial, since much of it is quite redundant to the Secret Book Box that I made recently. If you are confused about any step, please refer to the post on how to make a hollow book, or leave a comment.


Gather your materials


Figure out where you want the clock to be situated.


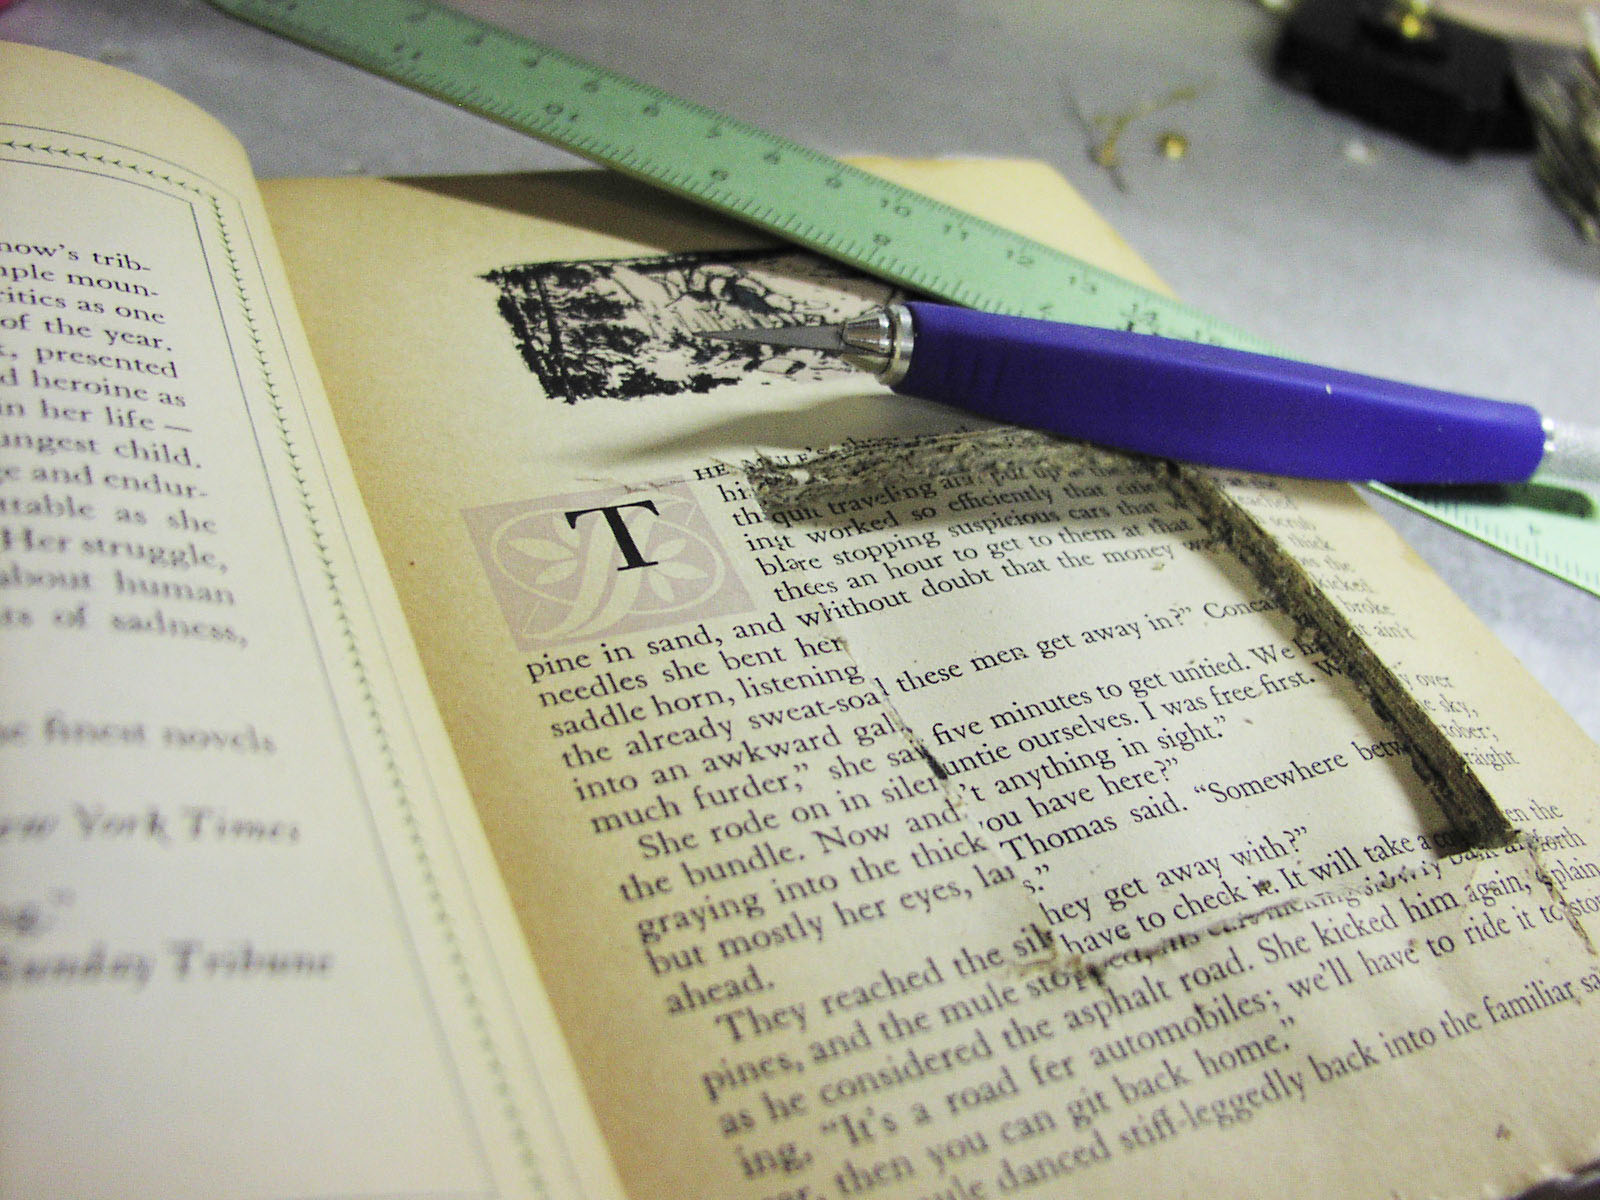
The next few pictures show me hollowing out a hole in the book. These are the same steps used to create the Secret Book Box. In just a few words, I cover the cover and a few pages with plastic (from a shopping bag), glue the edges of the book pages together, and use an X-acto knife to cut out the hole.


(You also have the option of gluing after you have cut out the hollow portion. You can glue from the inside of  of the book so that from the outside, the book doesn't look like it has any glue on it.)


If the pictures didn't make sense, the instructions for making a hollow book are {here}.

Note: I had some difficulty aligning my clock with my hole, as you will see. If you run into this problem, you can simply make the hole larger to allow more wiggle room. No one said that the hole has to be the size and shape of your clock movement!


Make a hole where the clock hands will go. I did this without any fancy tools; just lots of muscle, a stray nail to poke the hole, and a pencil to enlarge it.


The next few photos show how I "cleaned up" the hollow part of the book:


At this point, I realized that the hole in the cover, the hollow part of the book, and the clock movement did not line up. Ooops.


Rather than cut out more of the book to scoot the clock movement over to the right by a few centimenters, I just made the hole in the cover bigger.


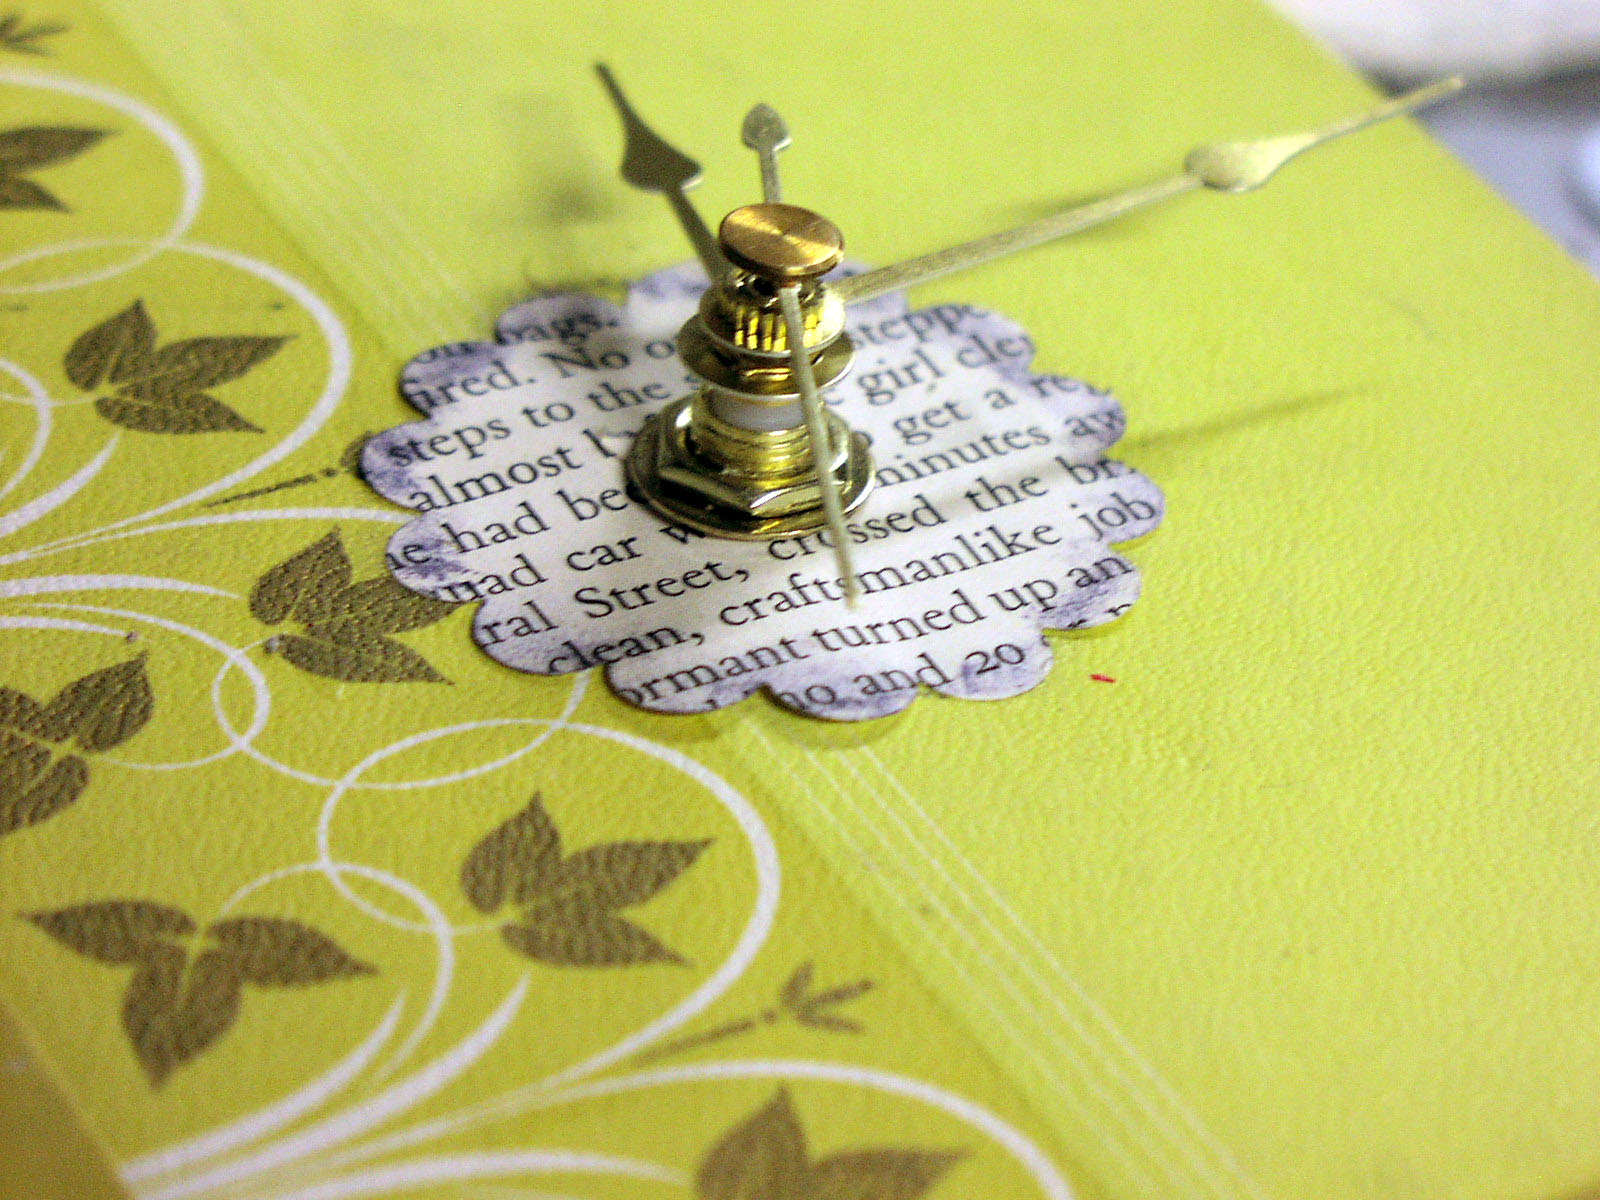
You won't believe how long it took me to figure out how to screw the clock movement together! I was having a totally "duh" day... In case any of you are having such a day, here is a photo to show you how it is done. :)


Because I had to adjust the size of my hole, it was too big and did not look very handsome. I decided to cover it up-- I just used a paper punch to punch out a page from the book.


Ta-dah! A finished Book Clock!


As you can see here, I added some brown paint to the clock hands. It helps them stand out more from a distance.

I might be something of an anomaly as far as sixteen year old girls go-- I can actually tell time on an analog clock without any problem.
However, if you want to mark off the numbers on the clock, feel free to!
You can use those flat thumbtacks (if you get the white ones, you can even decorate them with Sharpies). You could use number stickers.... miniature paper mustaches.... whatever you want!


P.S. Were you inspired to make something using the tutorial? Please leave a comment, I'd love to see it! 

  • bgbgb